
One of my hobbies that I’m really into is drones, flying wings, and other RC-controlled flying machines. A big part of this for me is that I build the aircrafts myself from separate components. I got into this hobby in 2014, and since then, Ive built dozens of different drones and planes.
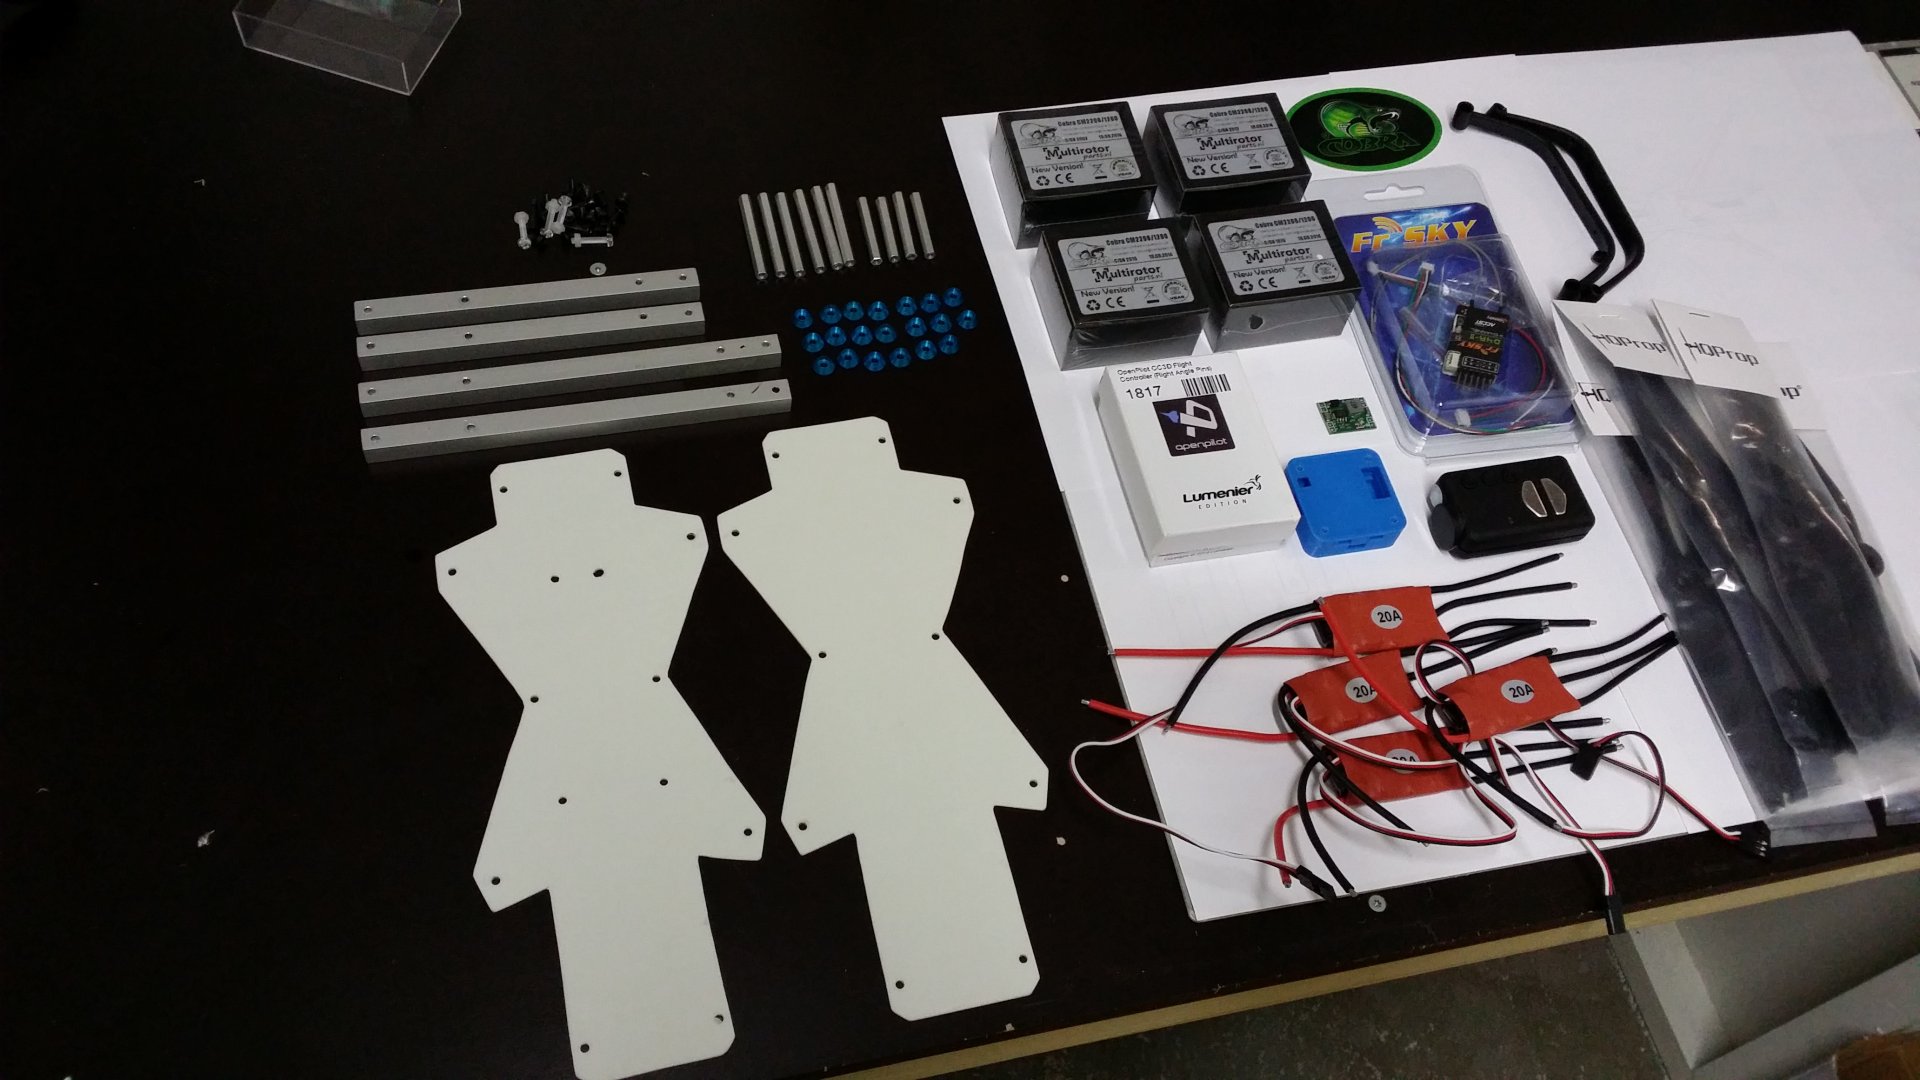
Building an aircraft includes putting together different components, programming the flight controller and speed controllers, and finally tuning the flight controller software to match the setup for the smoothest and most responsive flight characteristics as possible.
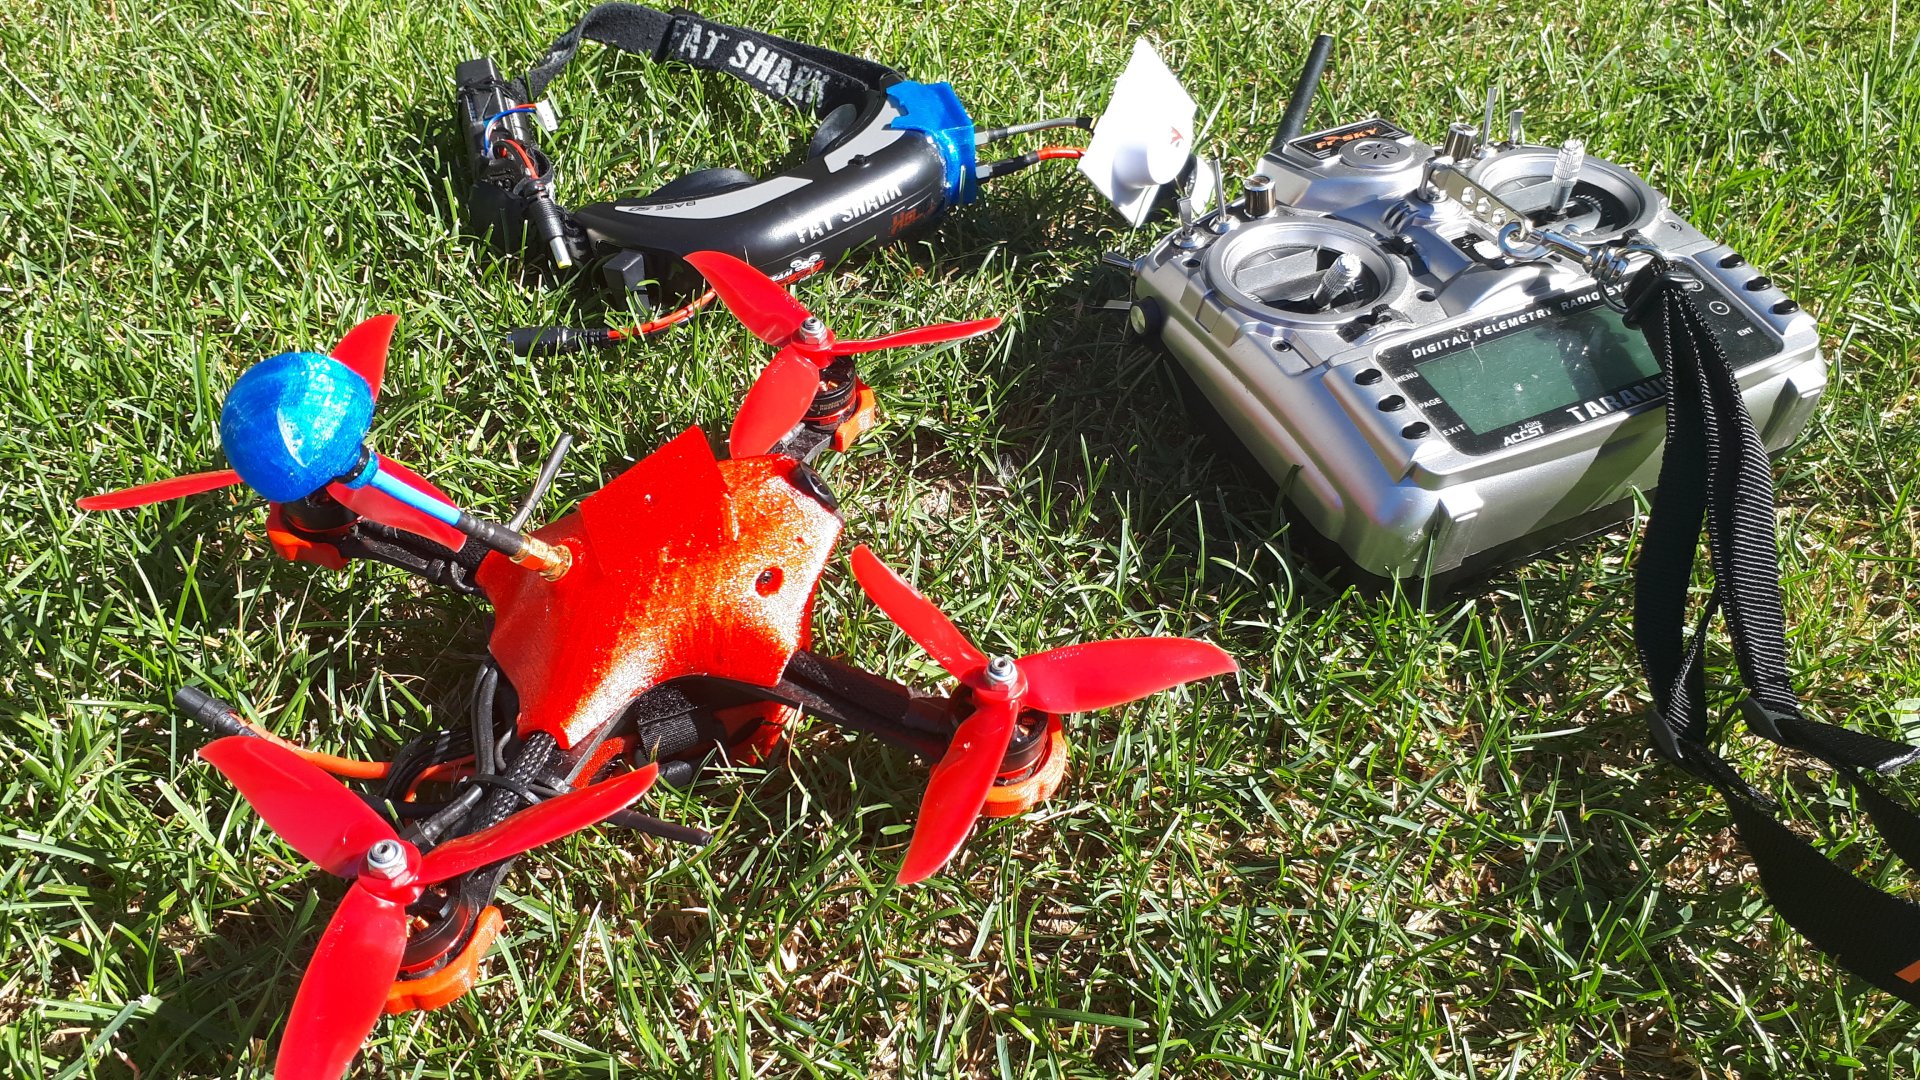
Im especially into FPV drones and planes, and even more into FPV racing. FPV (First Person View) means that a live video feed from the aircraft is sent to the pilot’s goggles in real time, making it feel like you're actually inside and flying the aircraft yourself.
Here are some current and former aircrafts that I have built.

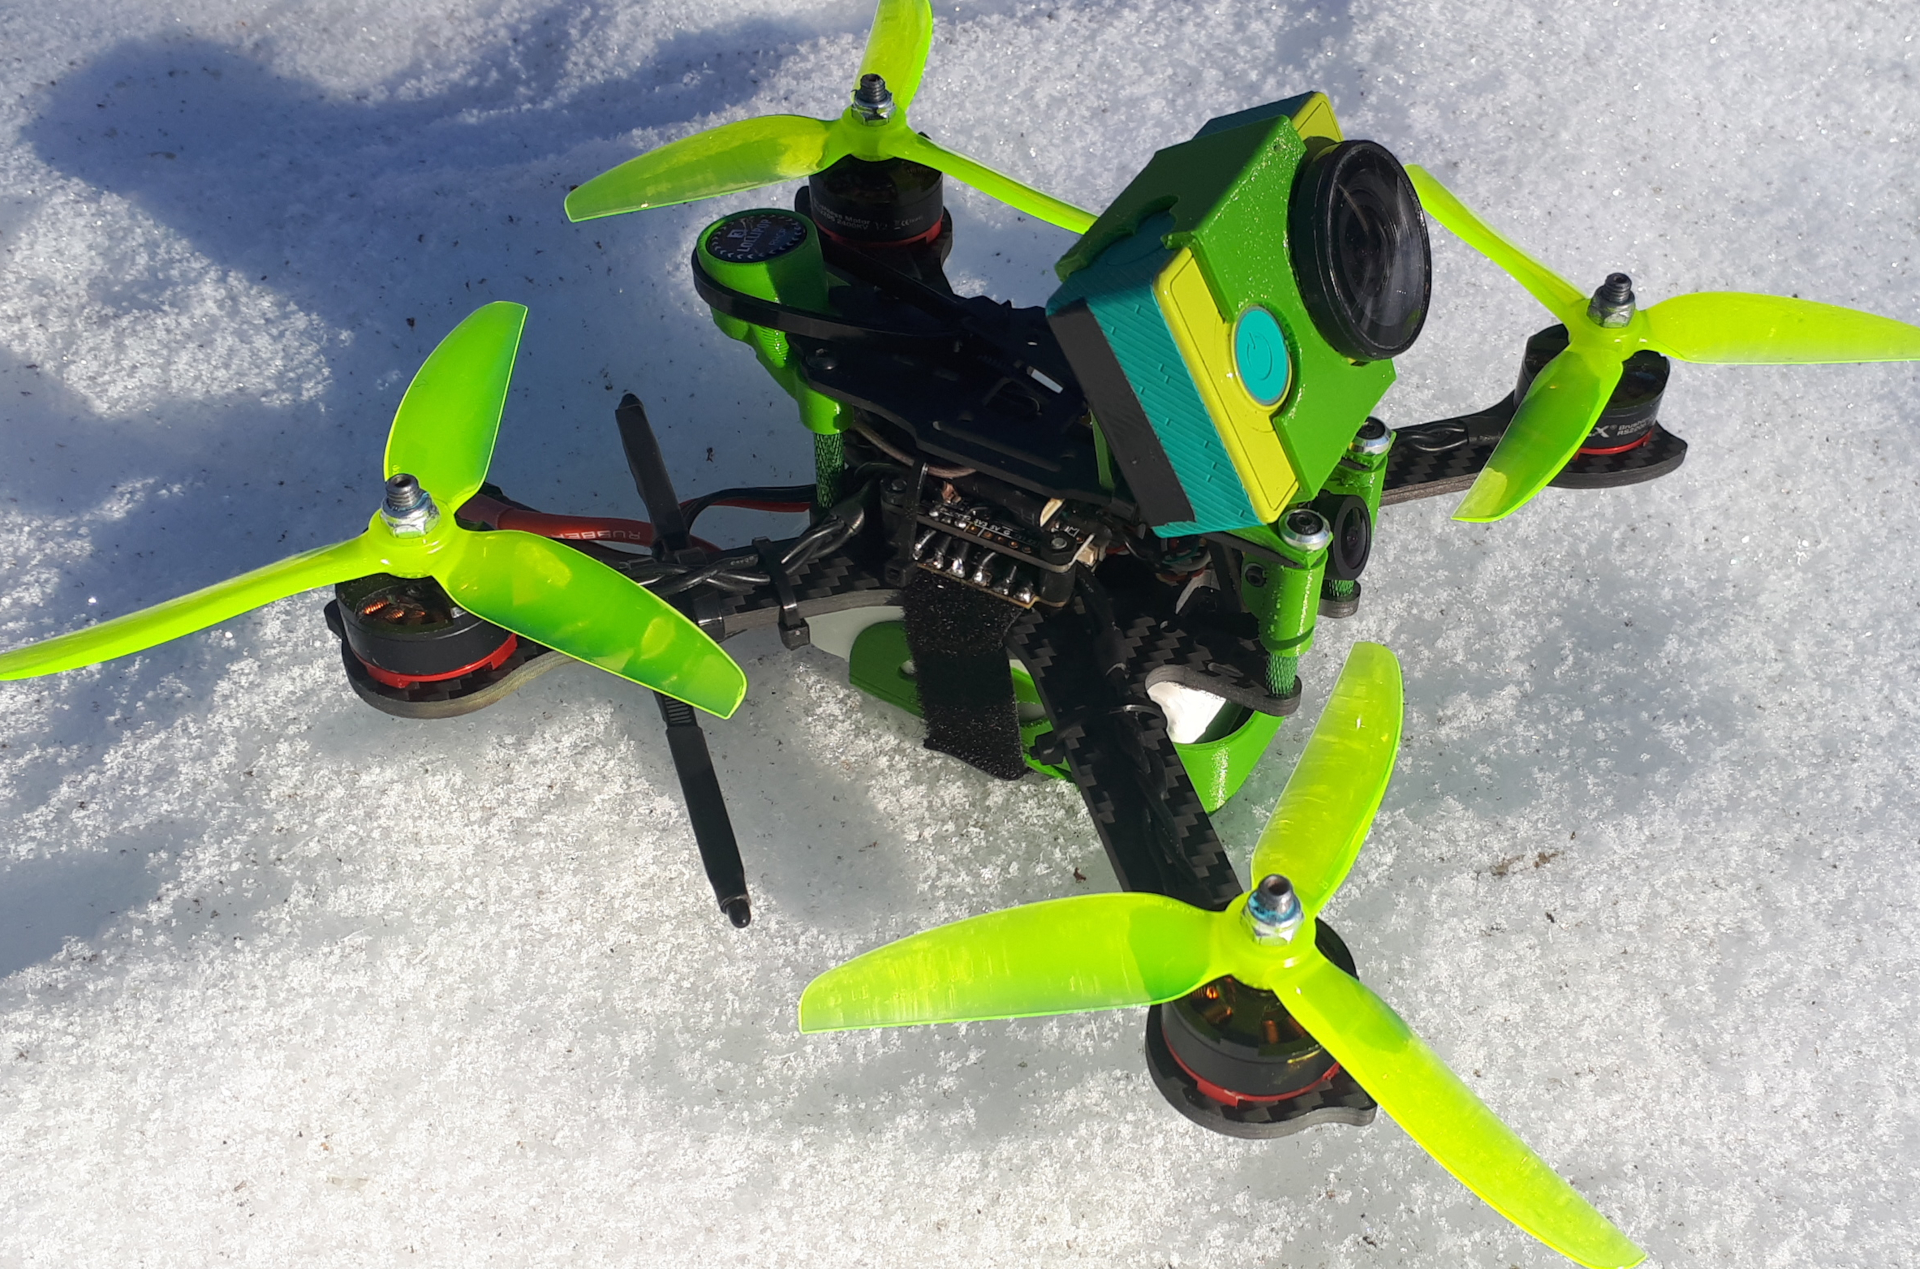
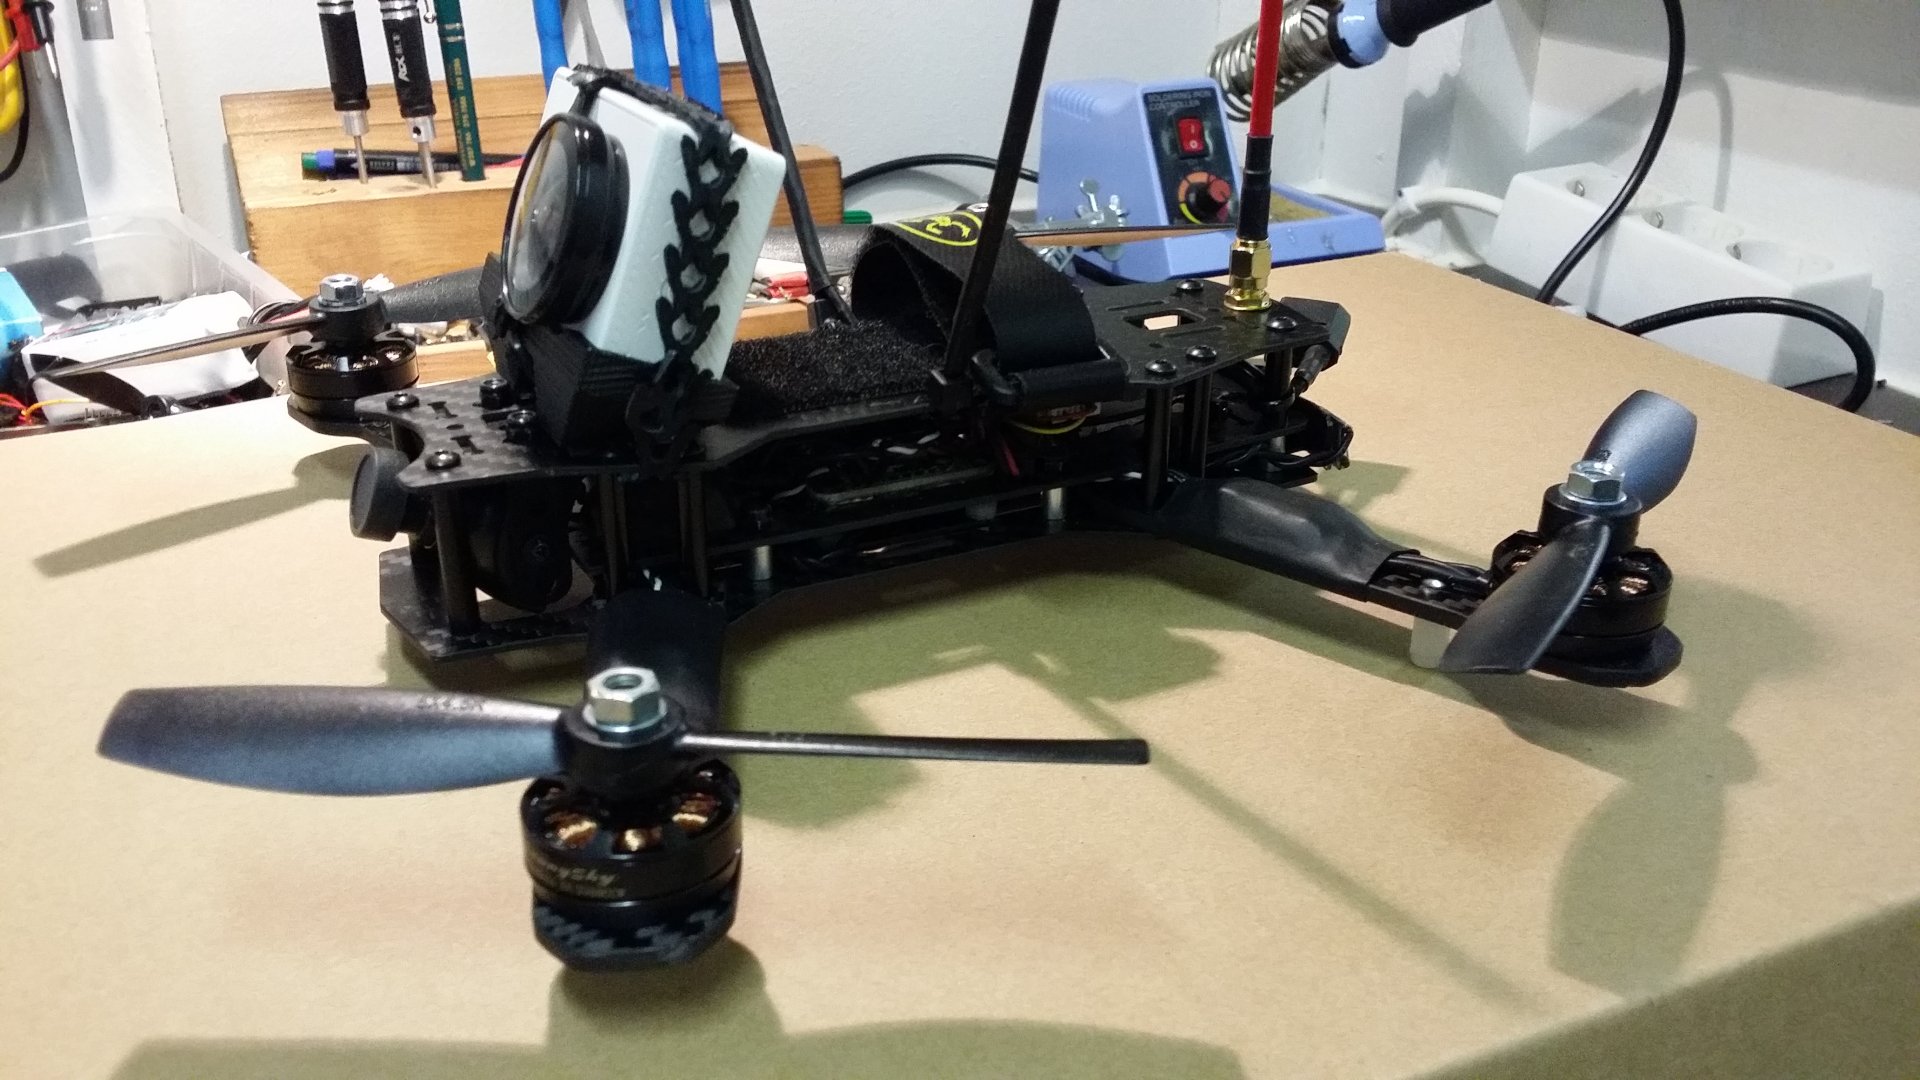
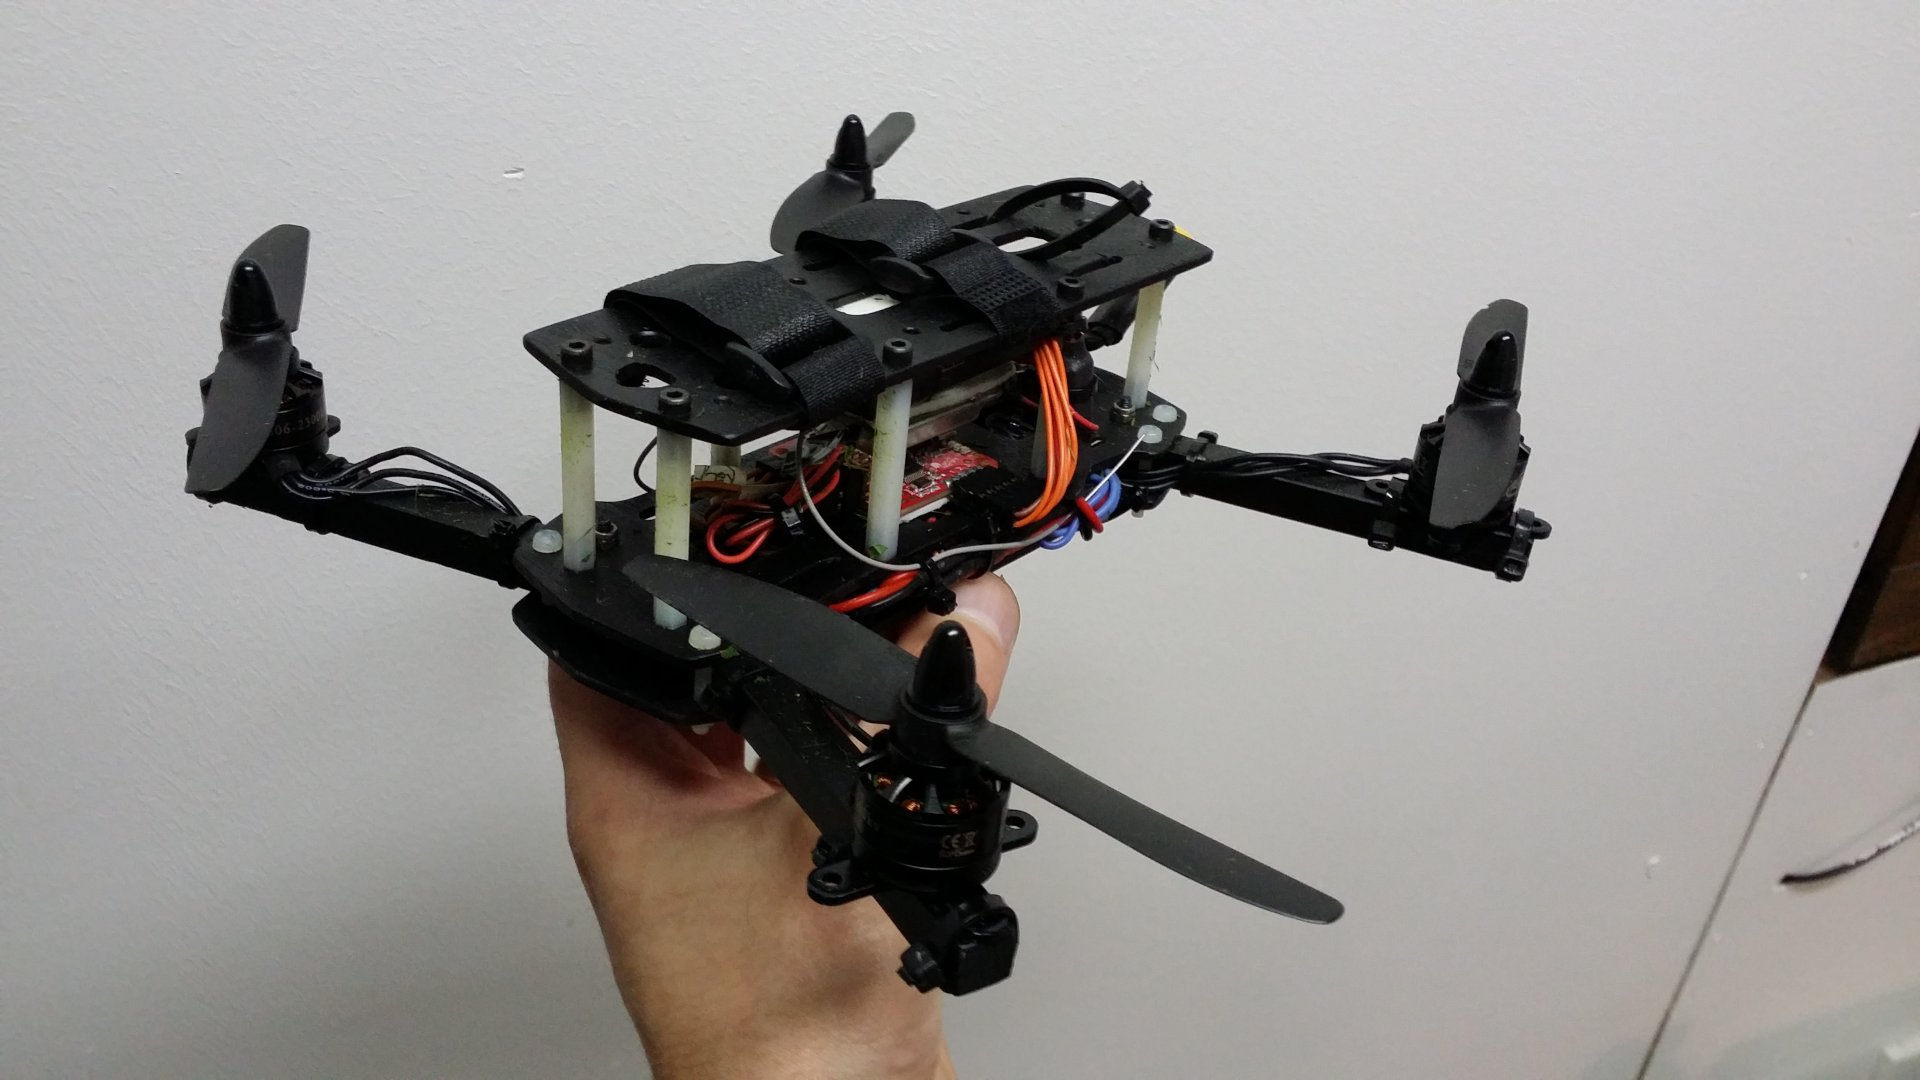
Usage: Proximity and high speed flying and also freestyle. Can carry HD-camera for filming
Size: 5"-inch propellers.
RC-Link: ELRS 900mhz / Frsky R9M
Video-link: 5.8ghz / IRC Tramp-vtx, Caddx Ratel 2-camera, Foxeer-Lollipop antenna.
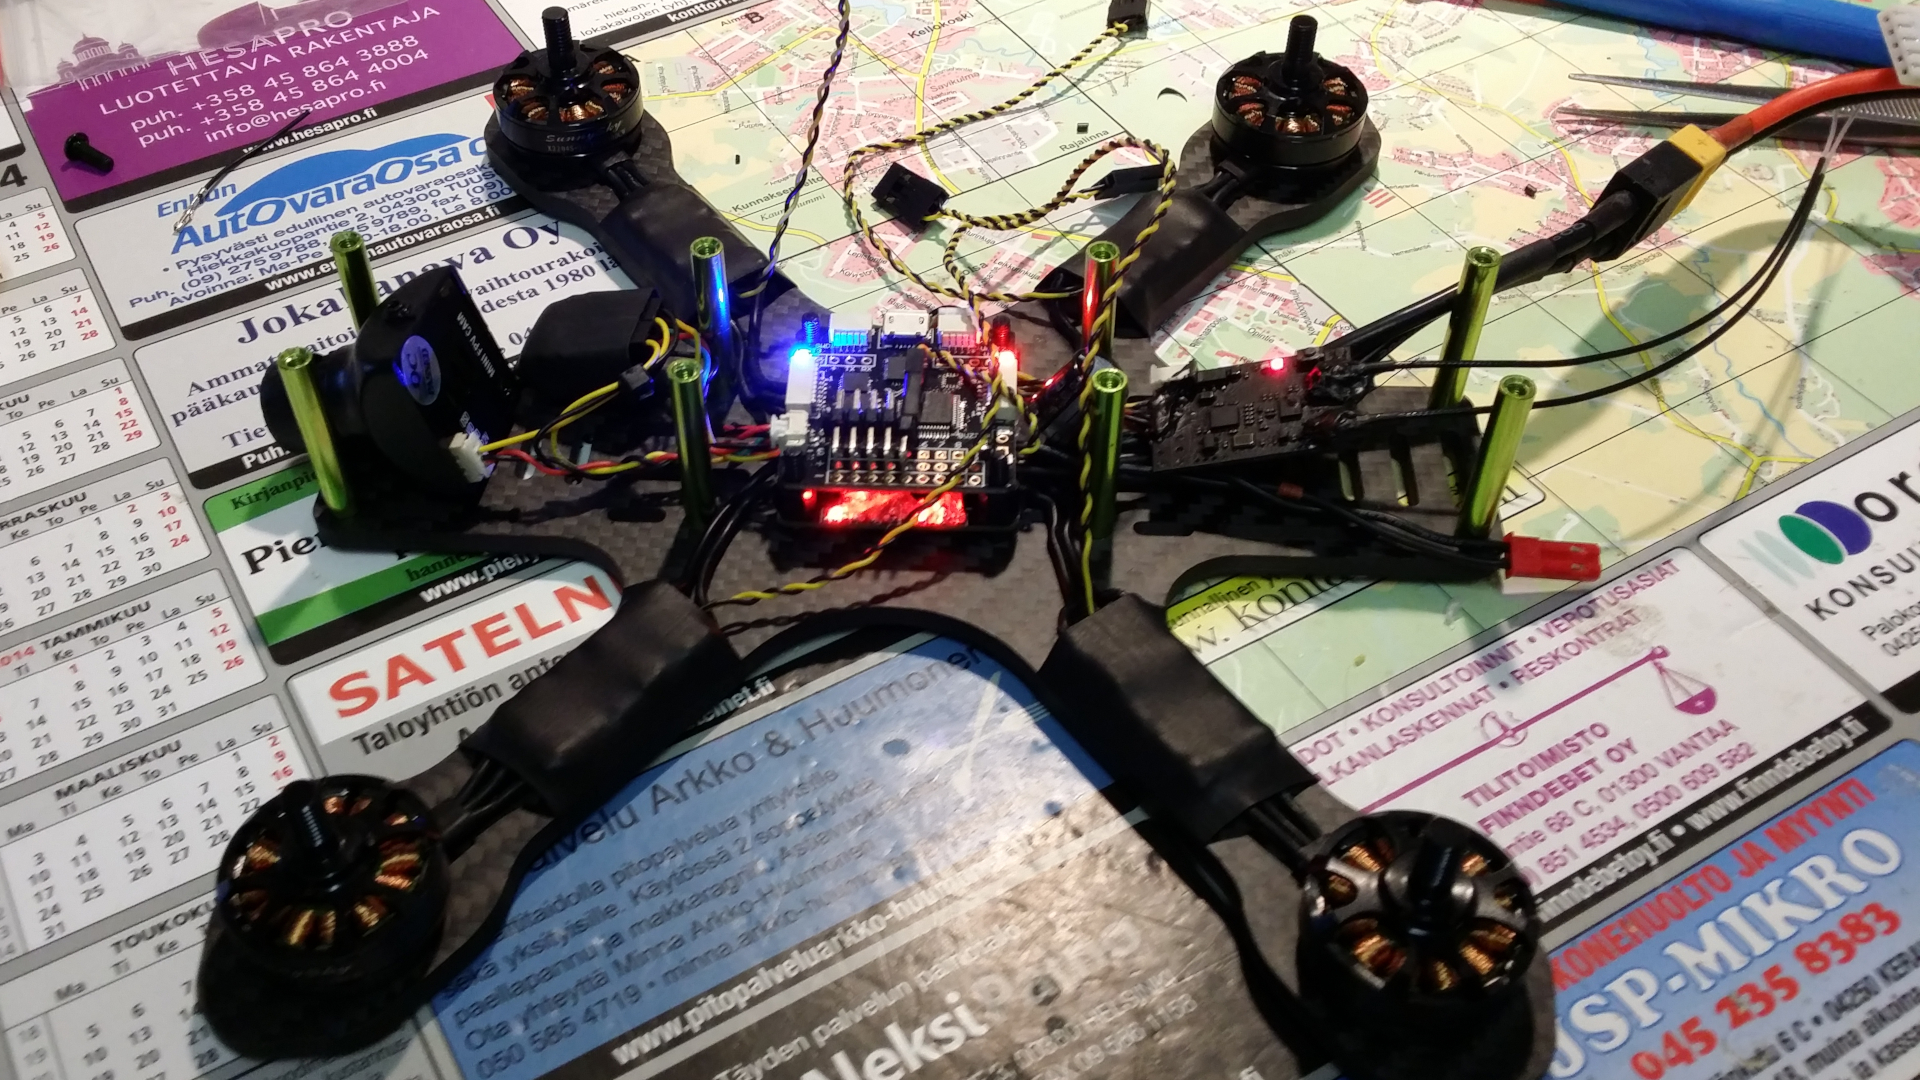
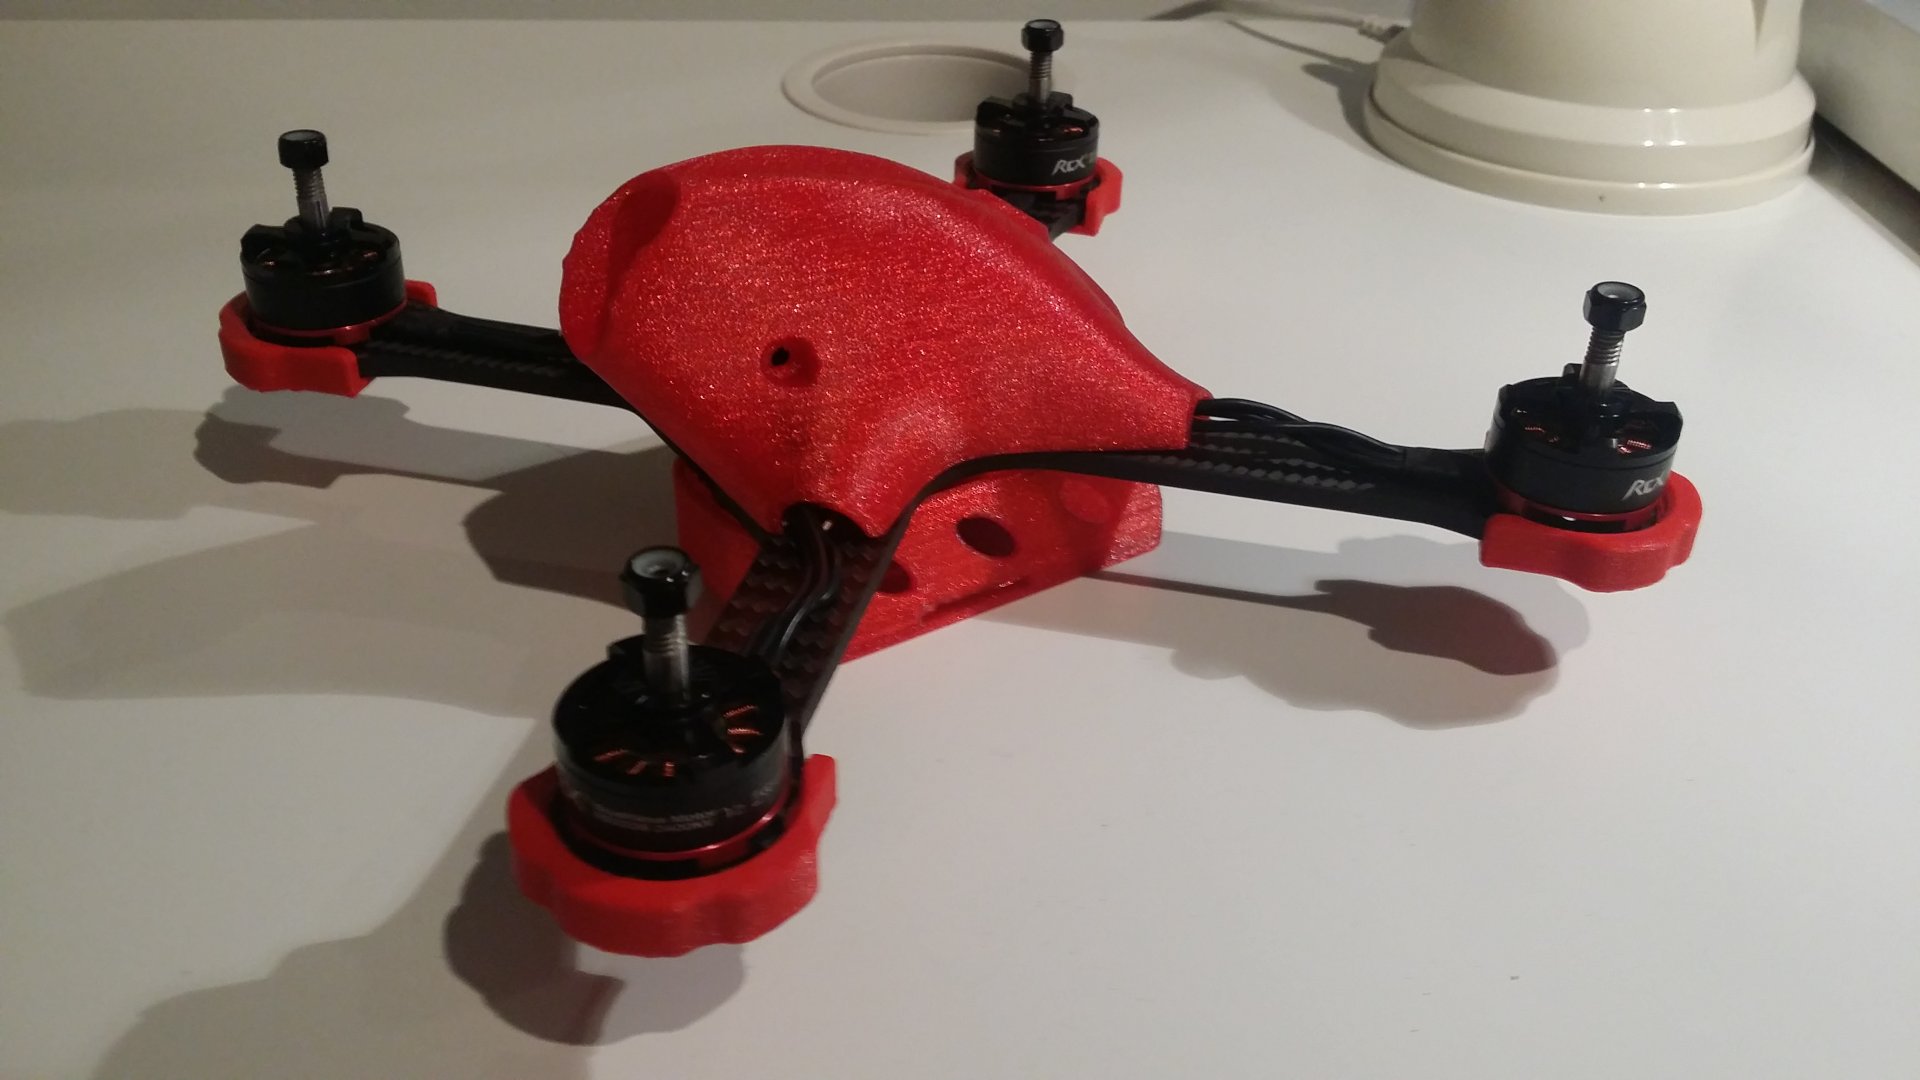
Parts: iFlight carbon-frame, RCX SE2205-motors, Matek F405 flight controller, Betaflight-firmware, Spedix ES30 speed controller and 4S batteries.
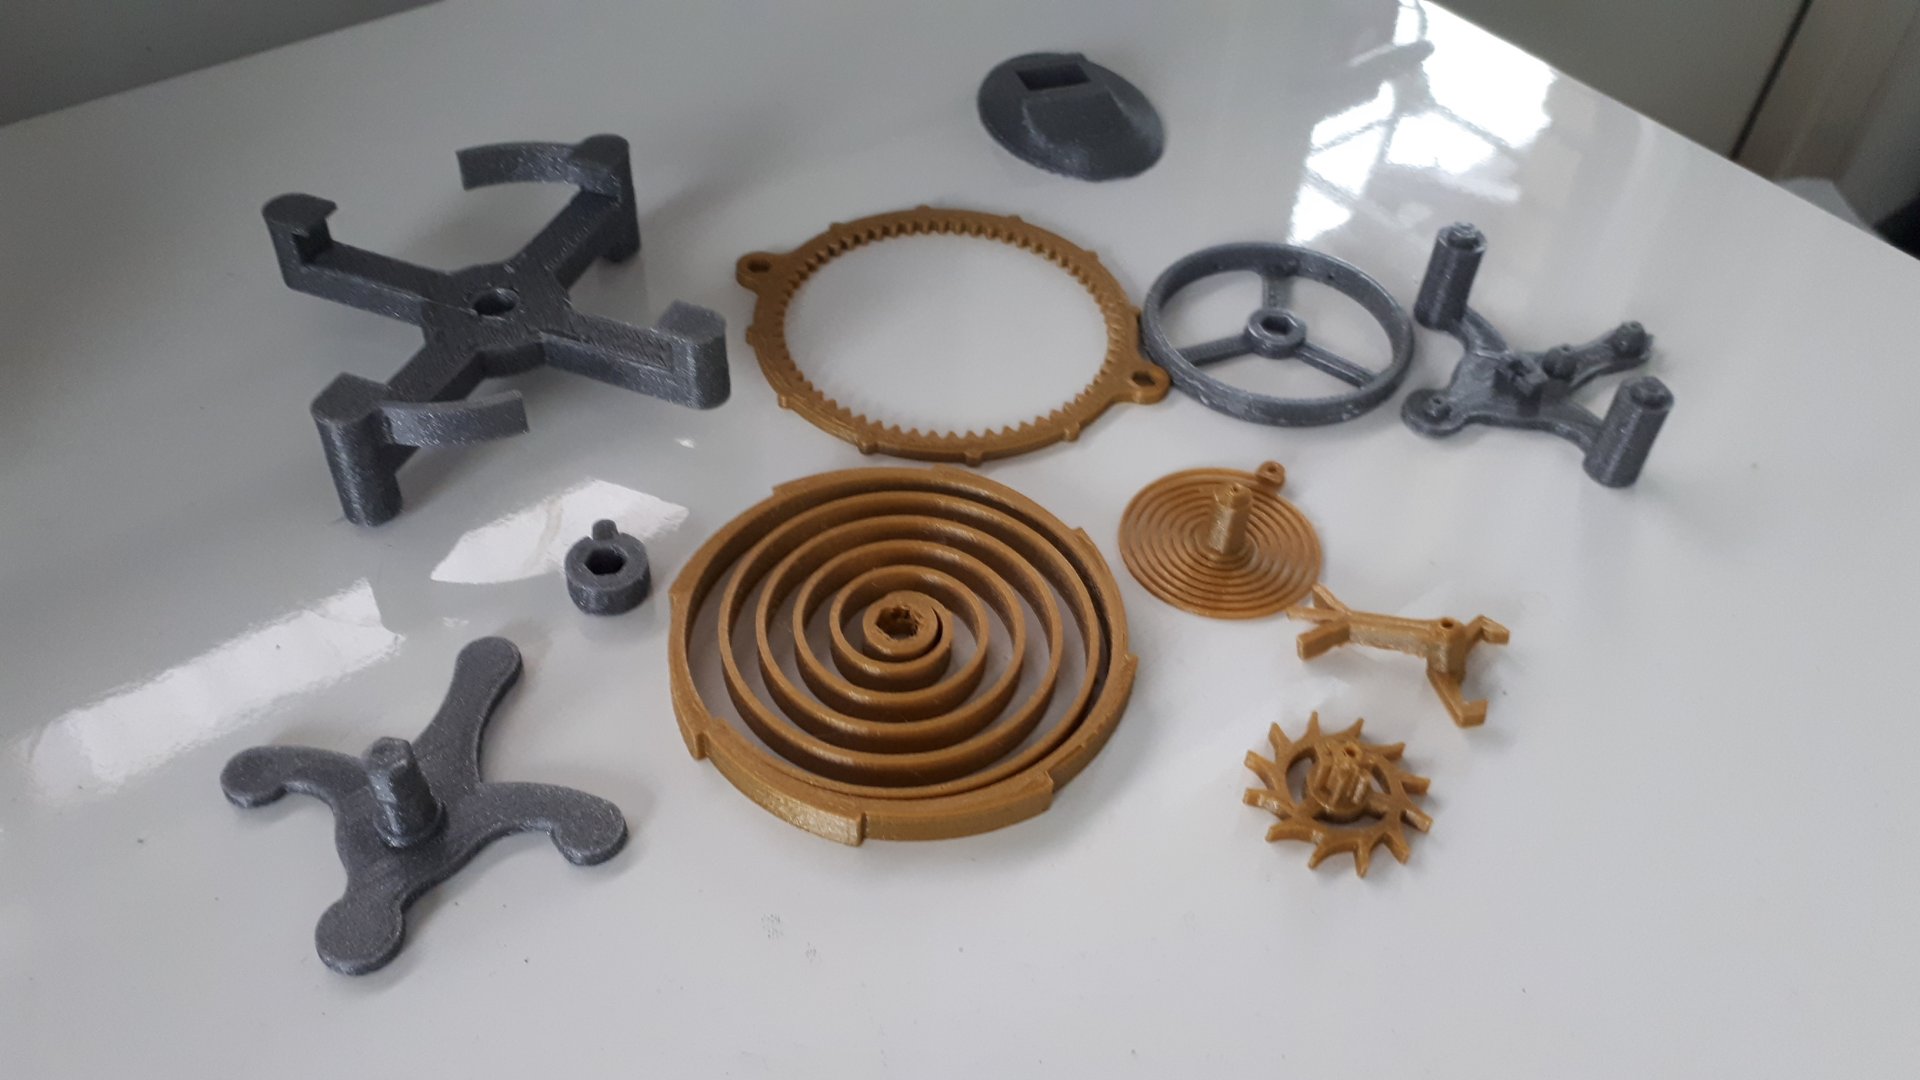
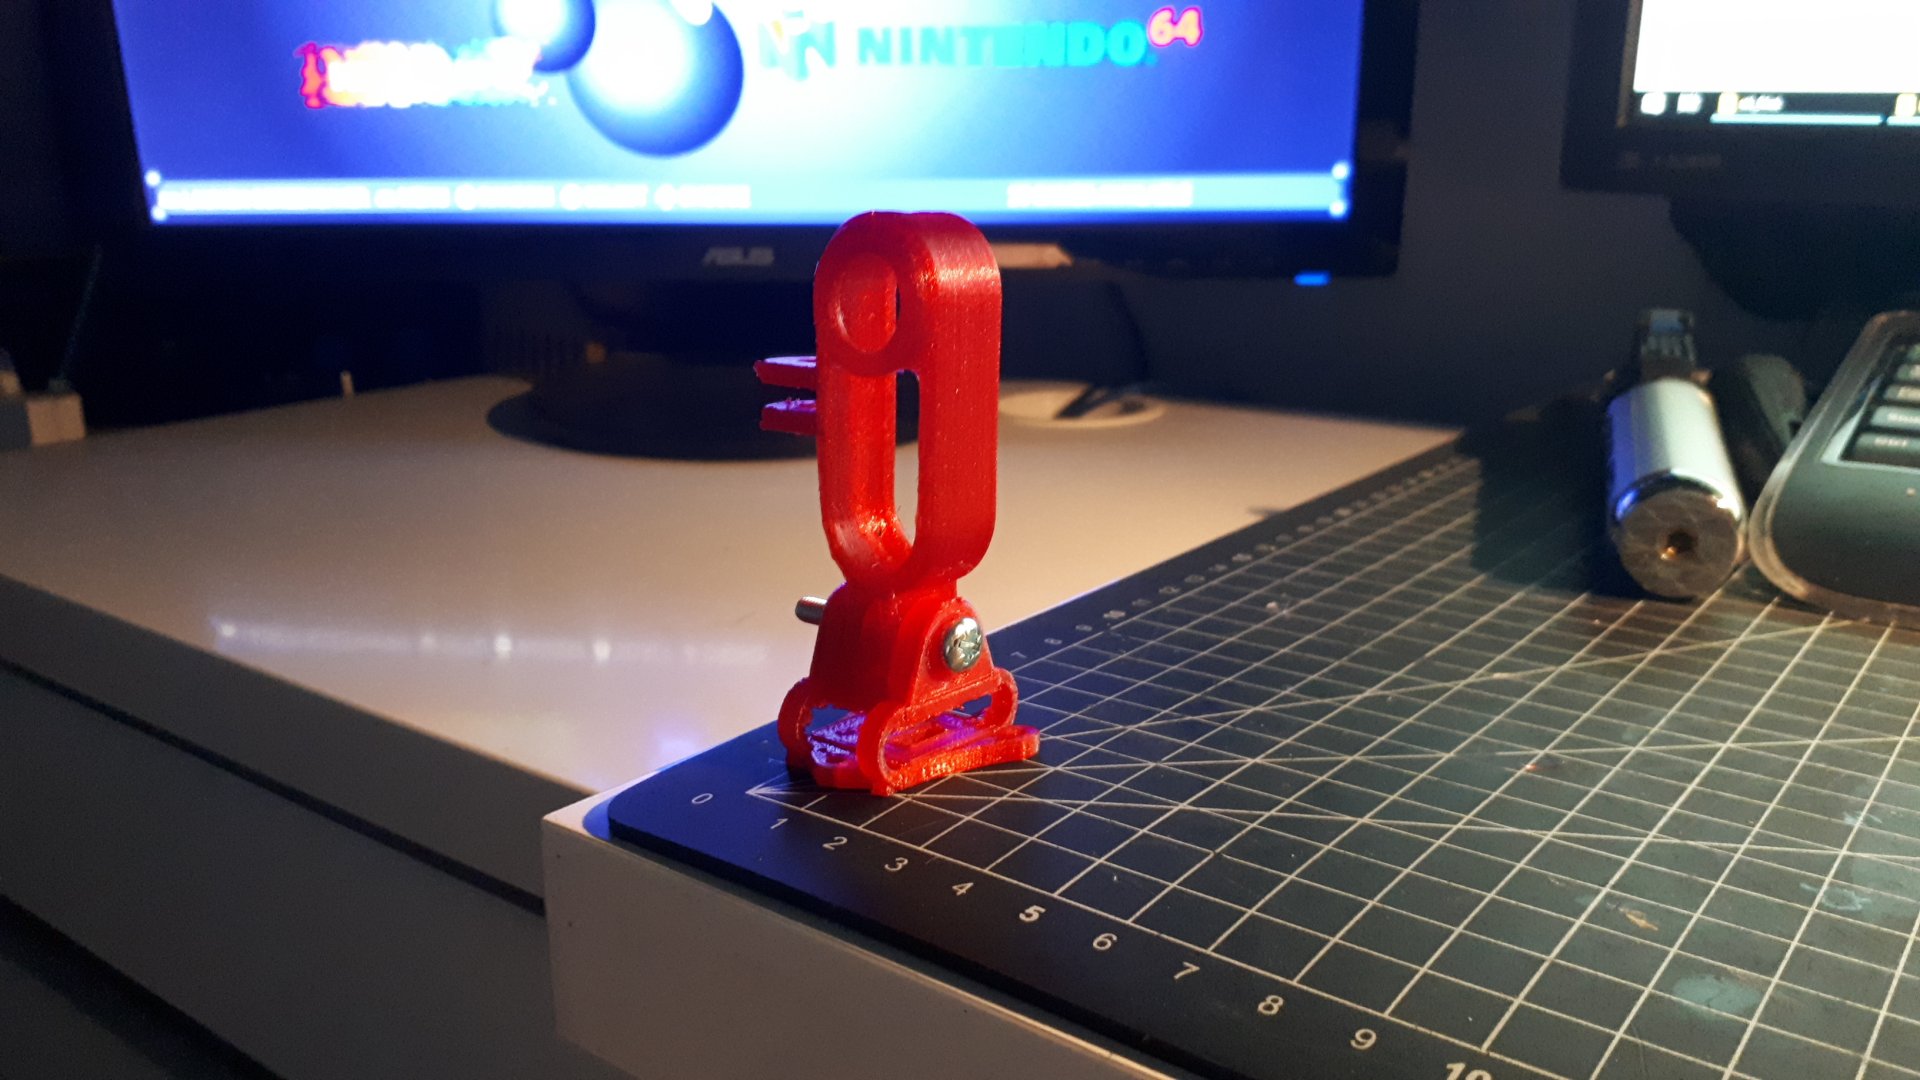
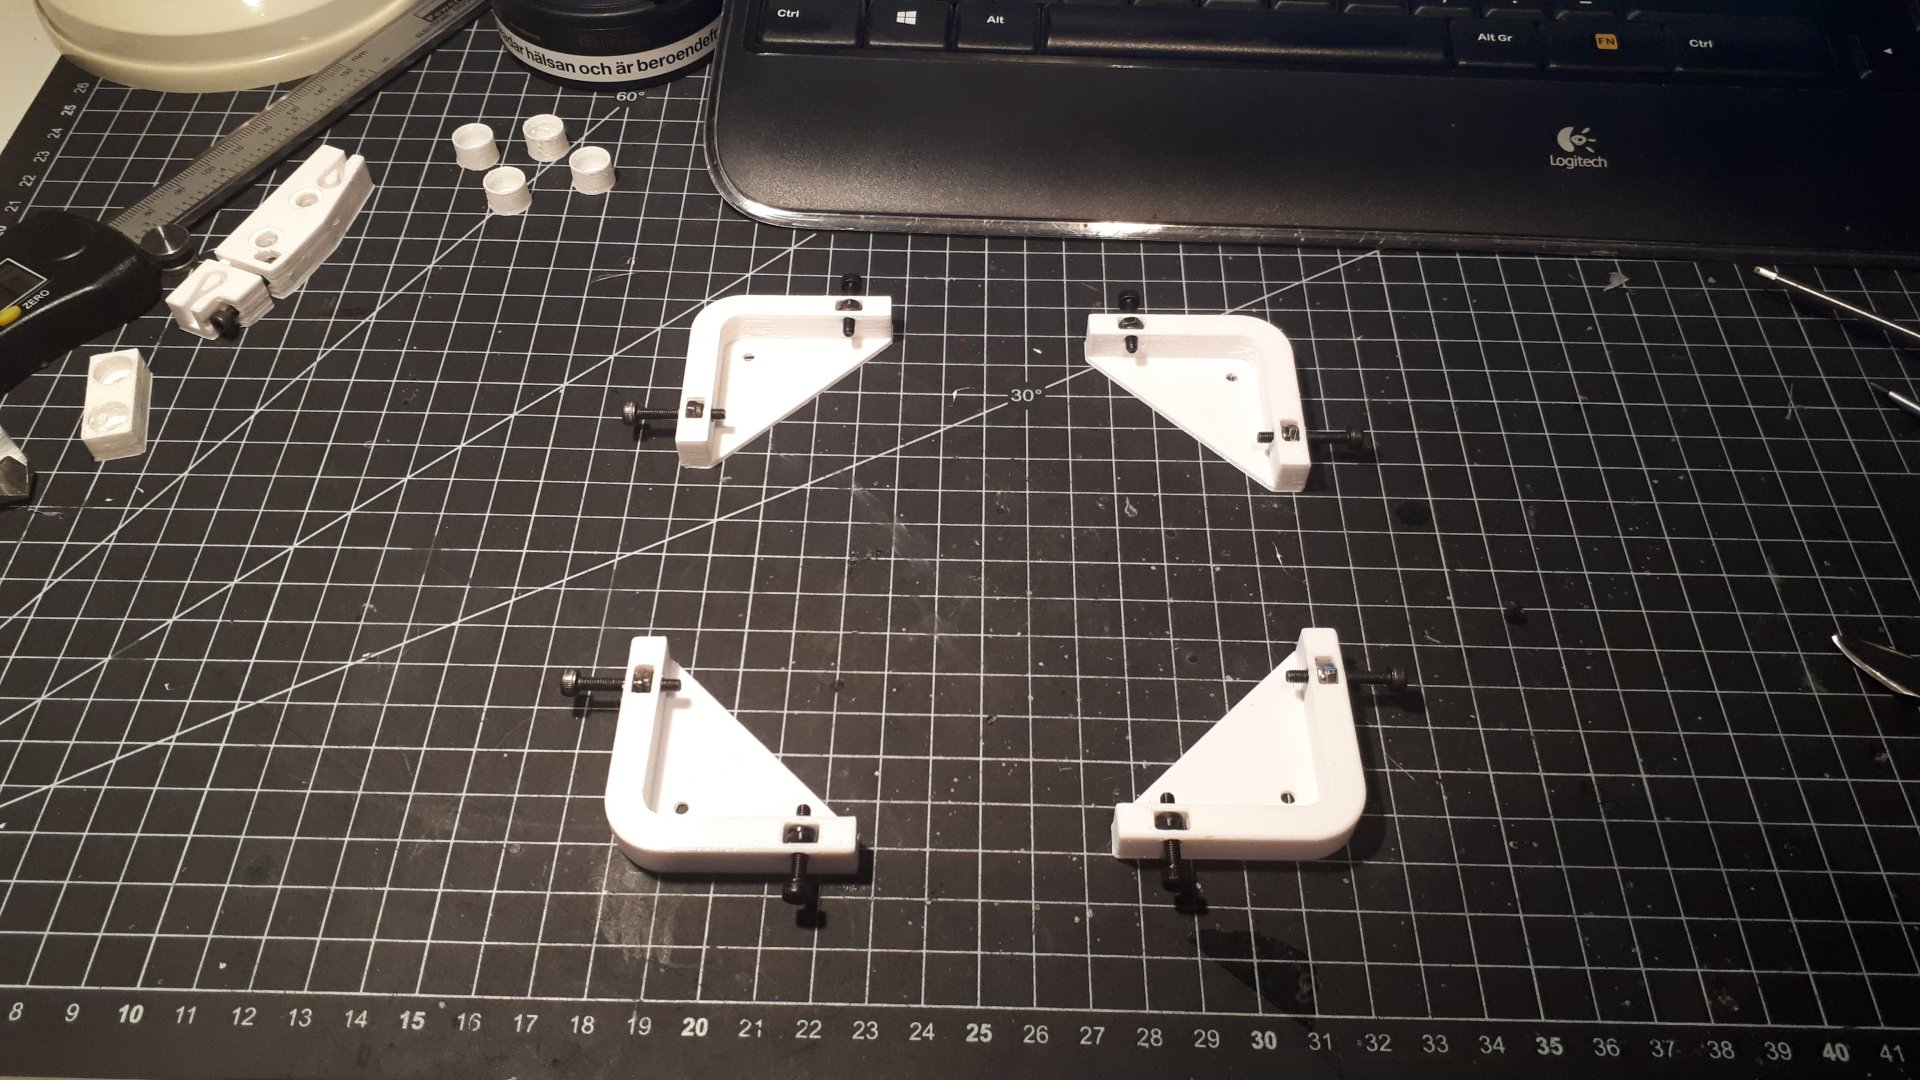
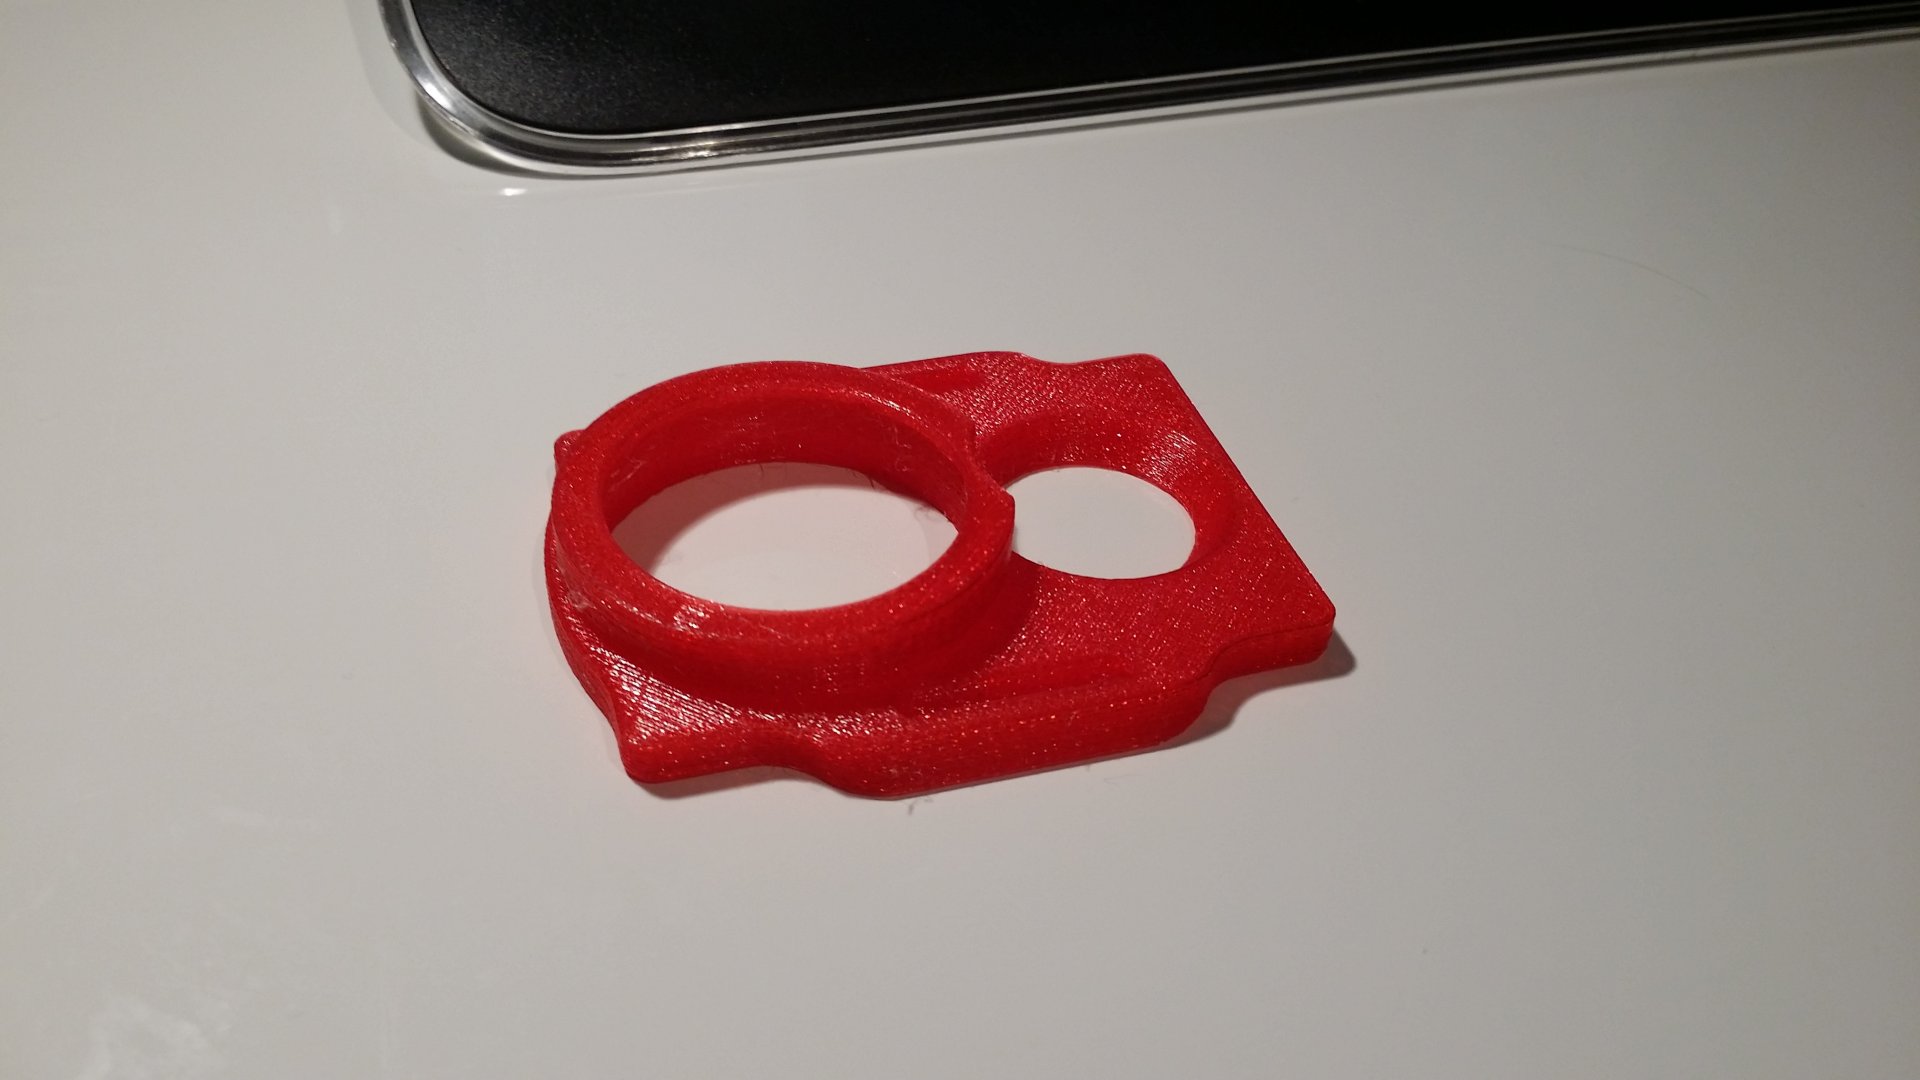
Extras: Adjustable RGB LED:s in the back. Many 3D printed parts, mostly TPU. E.g. battery protector, fpv-camera mount, antenna mount, led-mount and HD-camera mount.

Usage: Proximity and high speed flying and also freestyle. Can carry HD-camera for filming
Size: 5"-inch propellers.
RC-Link: ELRS 900mhz / Frsky R9M
Video-link: 5.8ghz / IRC Tramp-vtx, Caddx Ratel 2-camera, Foxeer-Lollipop antenna.
Parts: iFlight carbon-frame, RCX SE2205-motors, Matek F405 flight controller, Betaflight-firmware, Spedix ES30 speed controller and 4S batteries.
Extras: Adjustable RGB LED:s in the back. Many 3D printed parts, mostly TPU. E.g. battery protector, fpv-camera mount, antenna mount, led-mount and HD-camera mount.
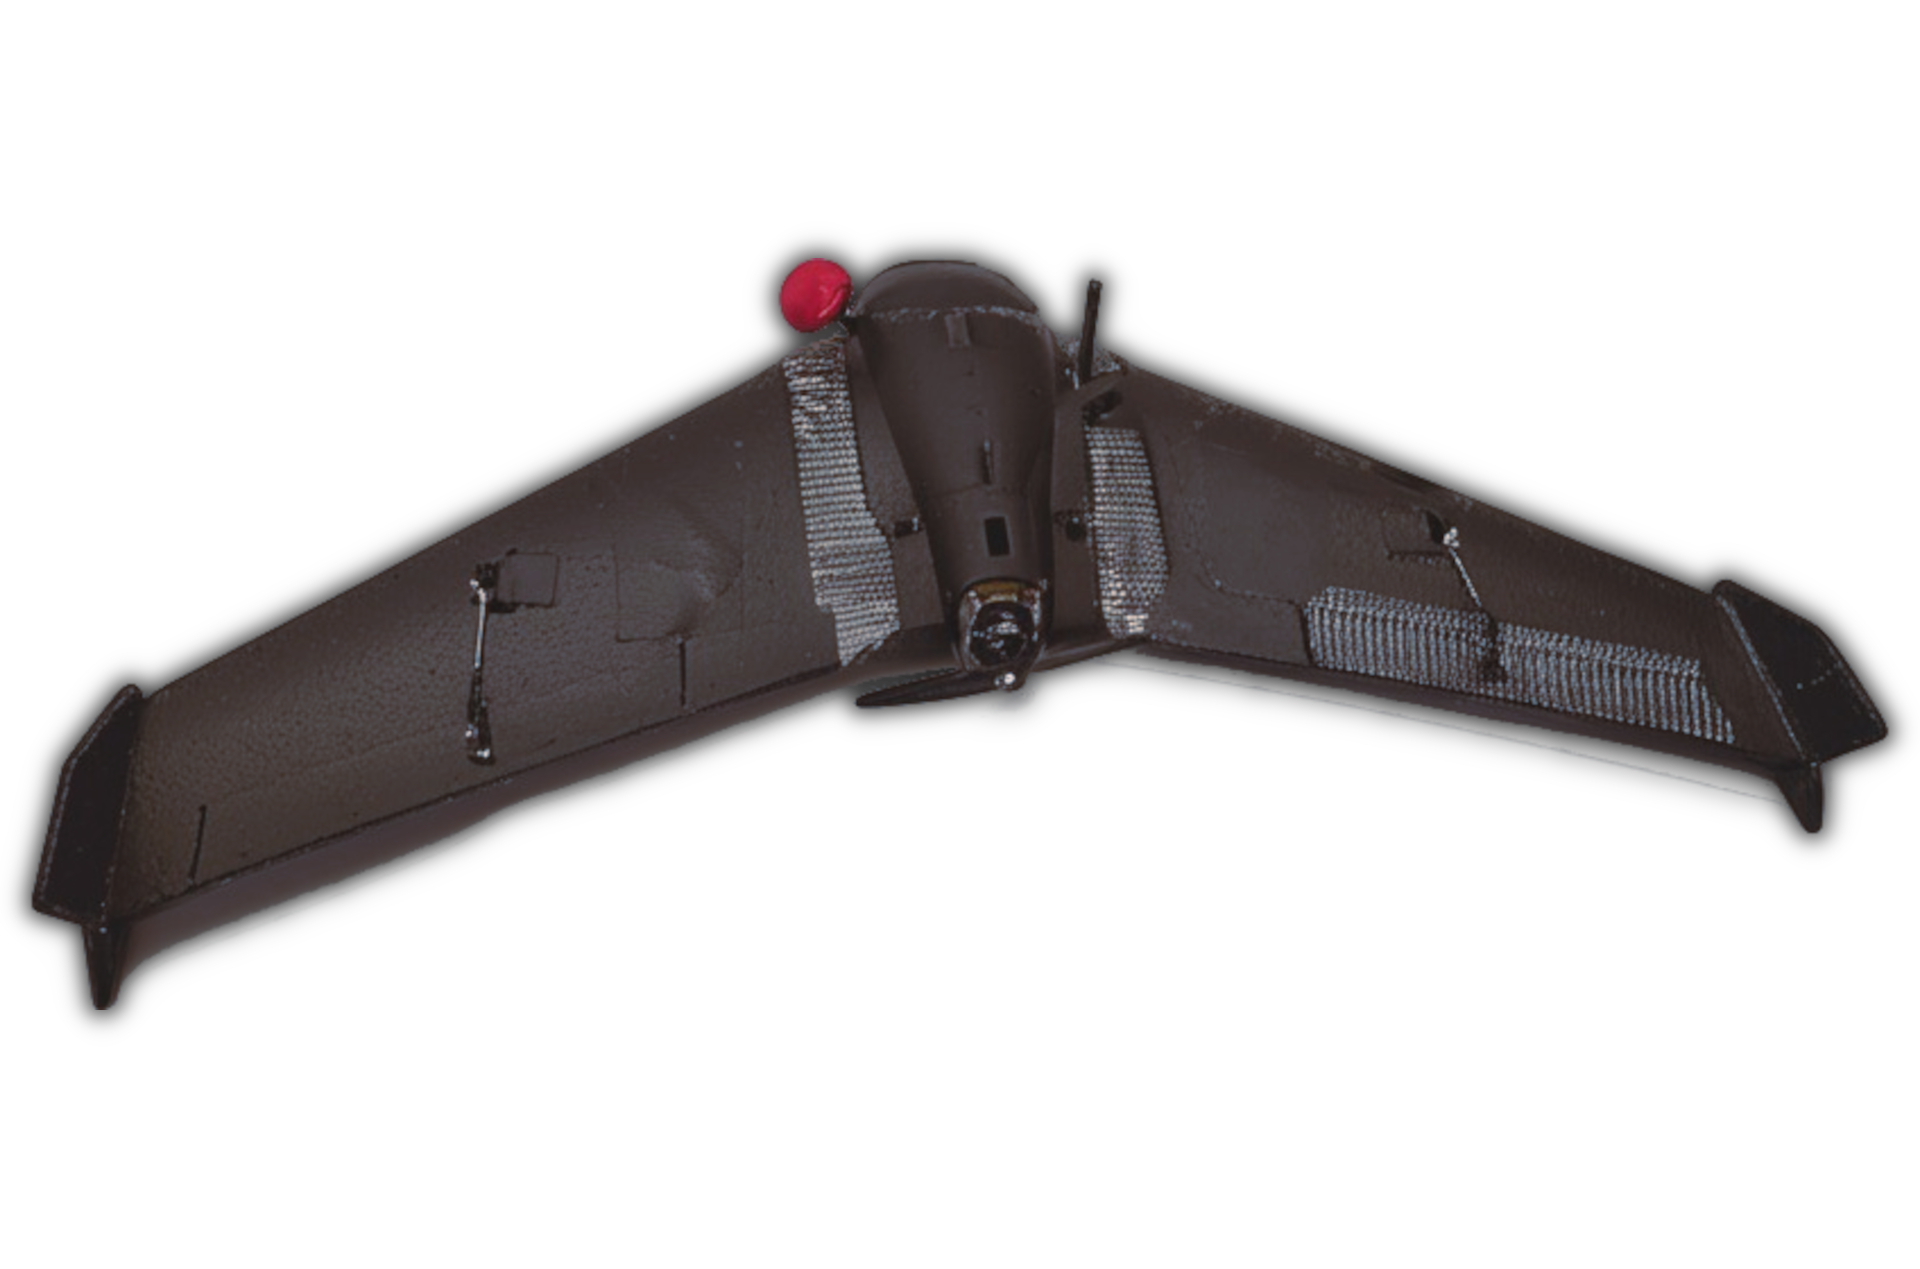
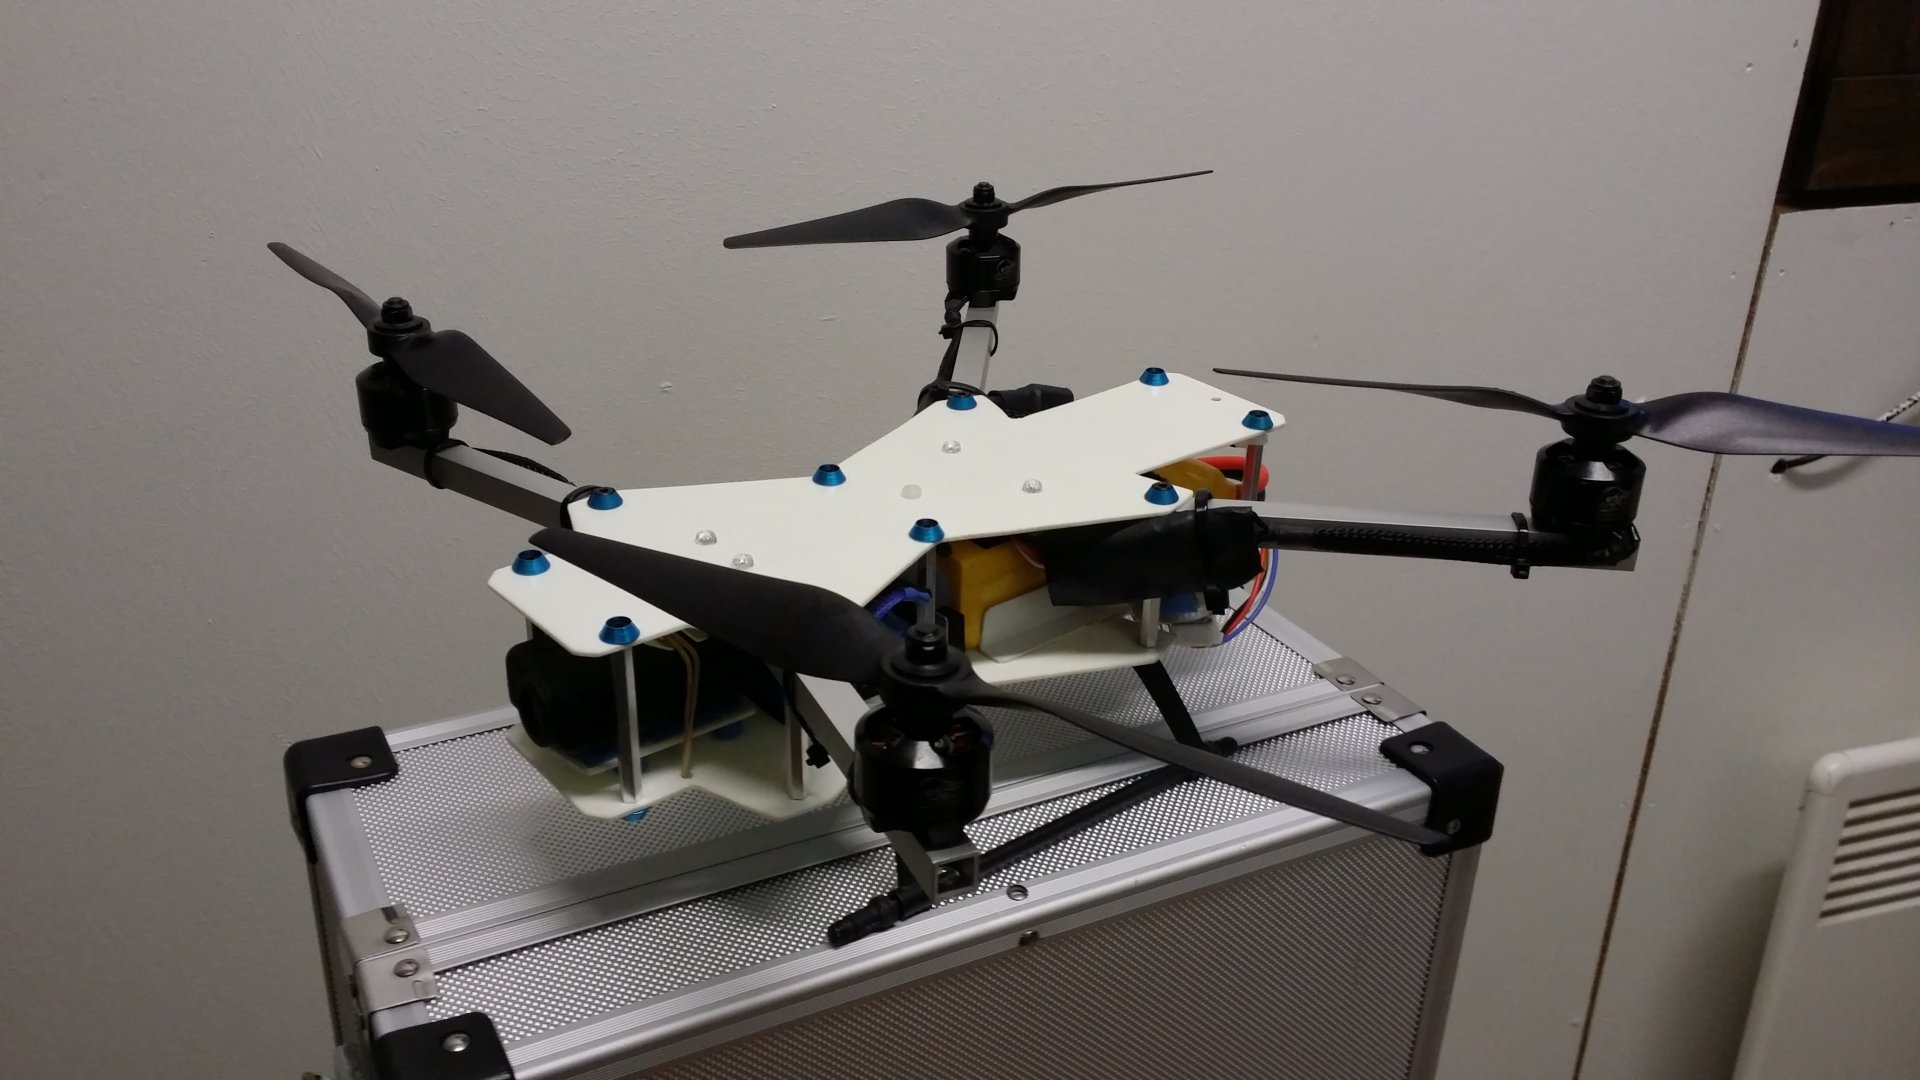
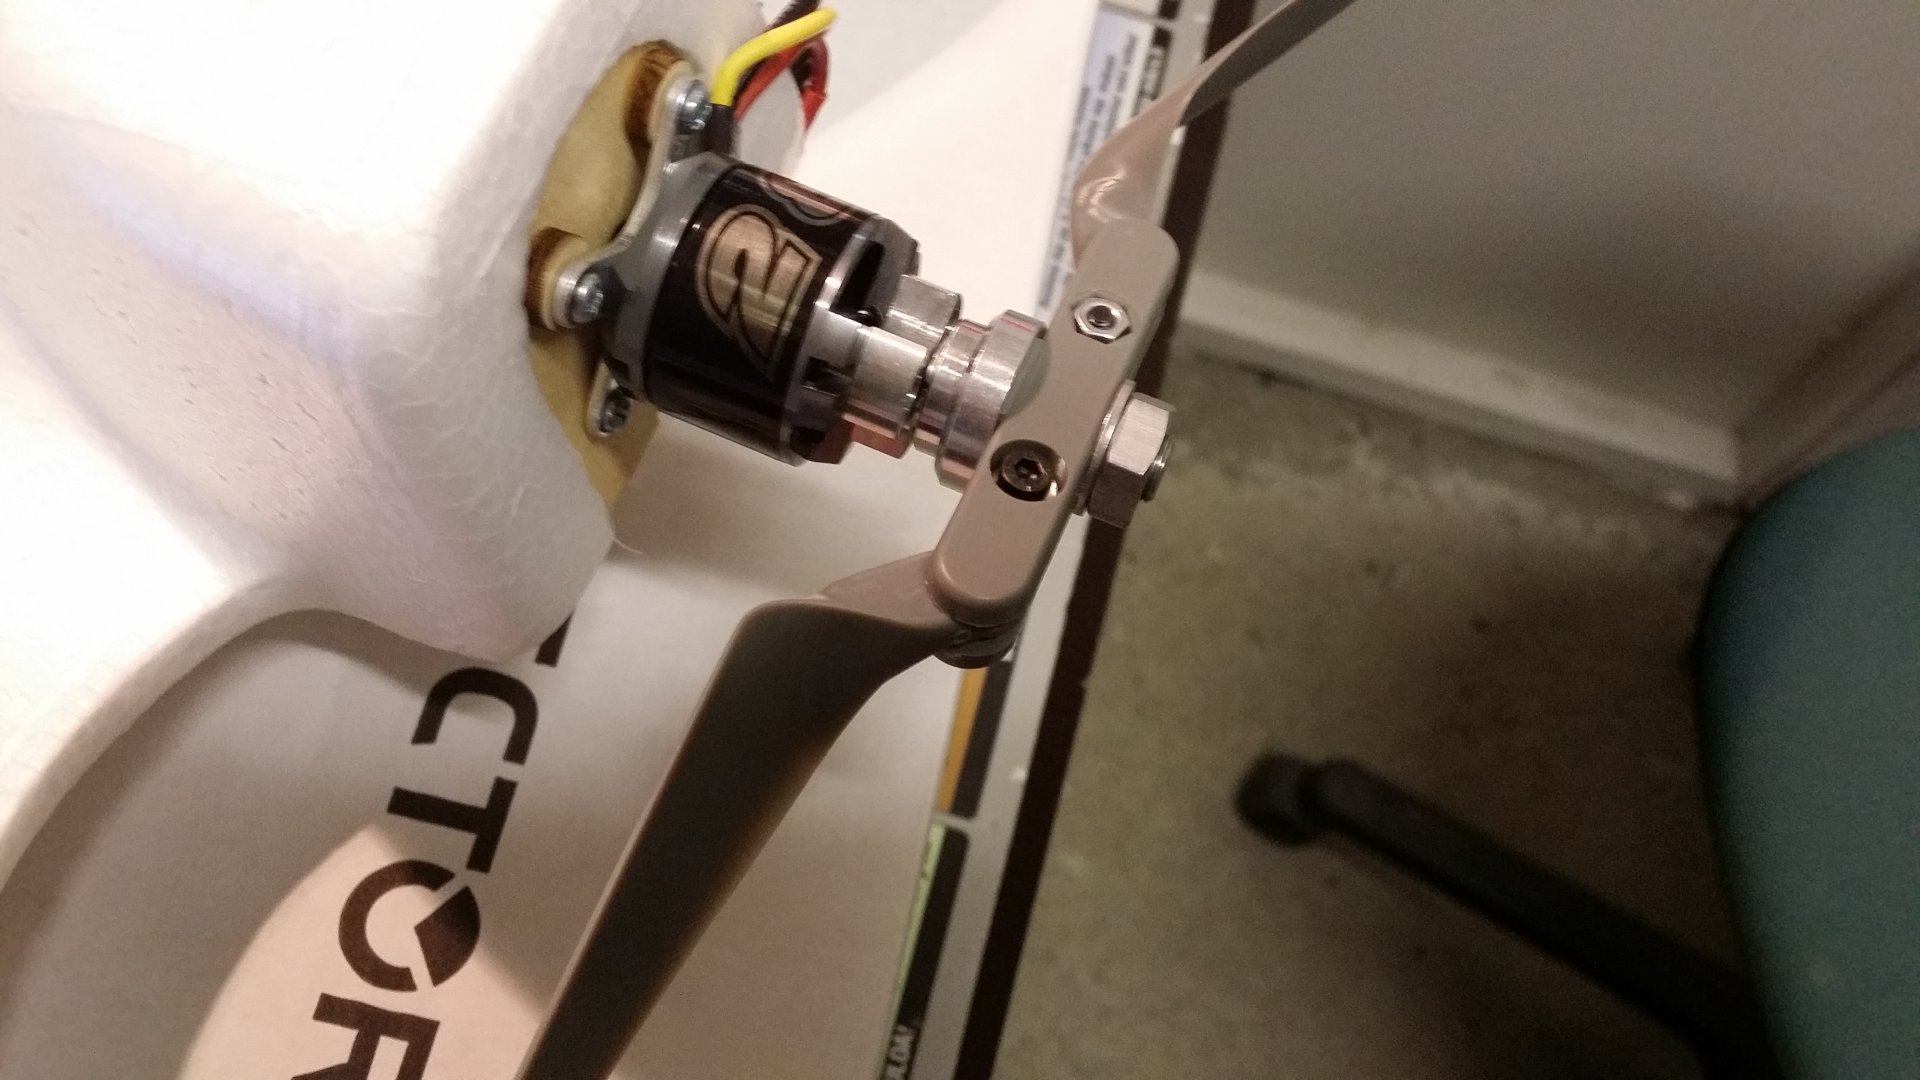
Usage: Proximity and high speed flying.
Size: Wingspan 600mm
RC-Link: Frsky 2.4ghz
Video-link: 5.8ghz / ET-vtx, HS1177-camera, IRC-antenna
Parts: Sunnysky 2204 2200kv motor, 5'-inch propeller, naked / no flight-controller but telemetry for voltage and RSSI-signal. Flies with 4S batteries.
Notes & Extras: Pretty bulky with fiber glass tape for strengthness, but this is intended for flying high speed at low height, so there is big change for crashes and ground contacts.
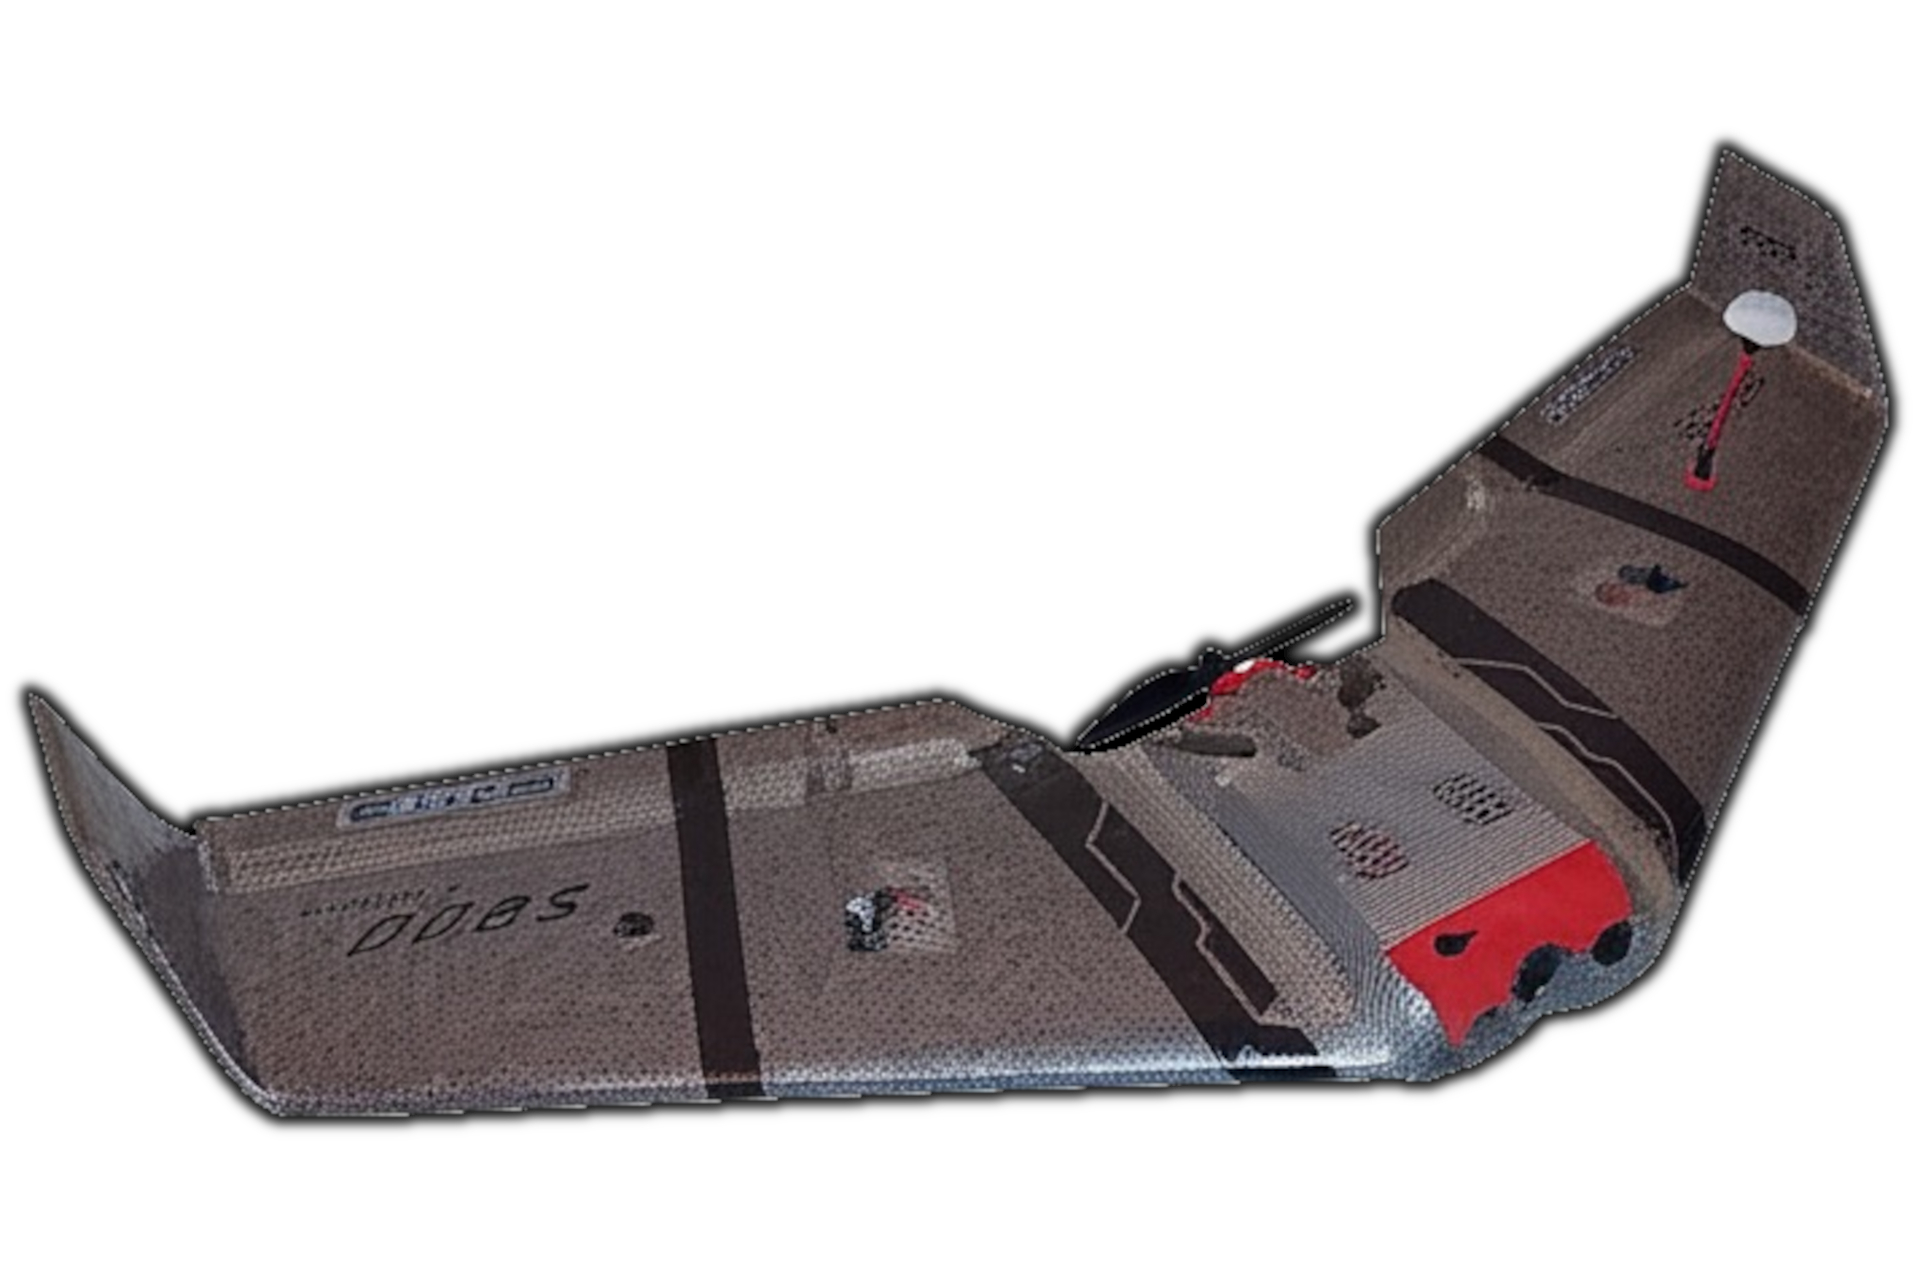
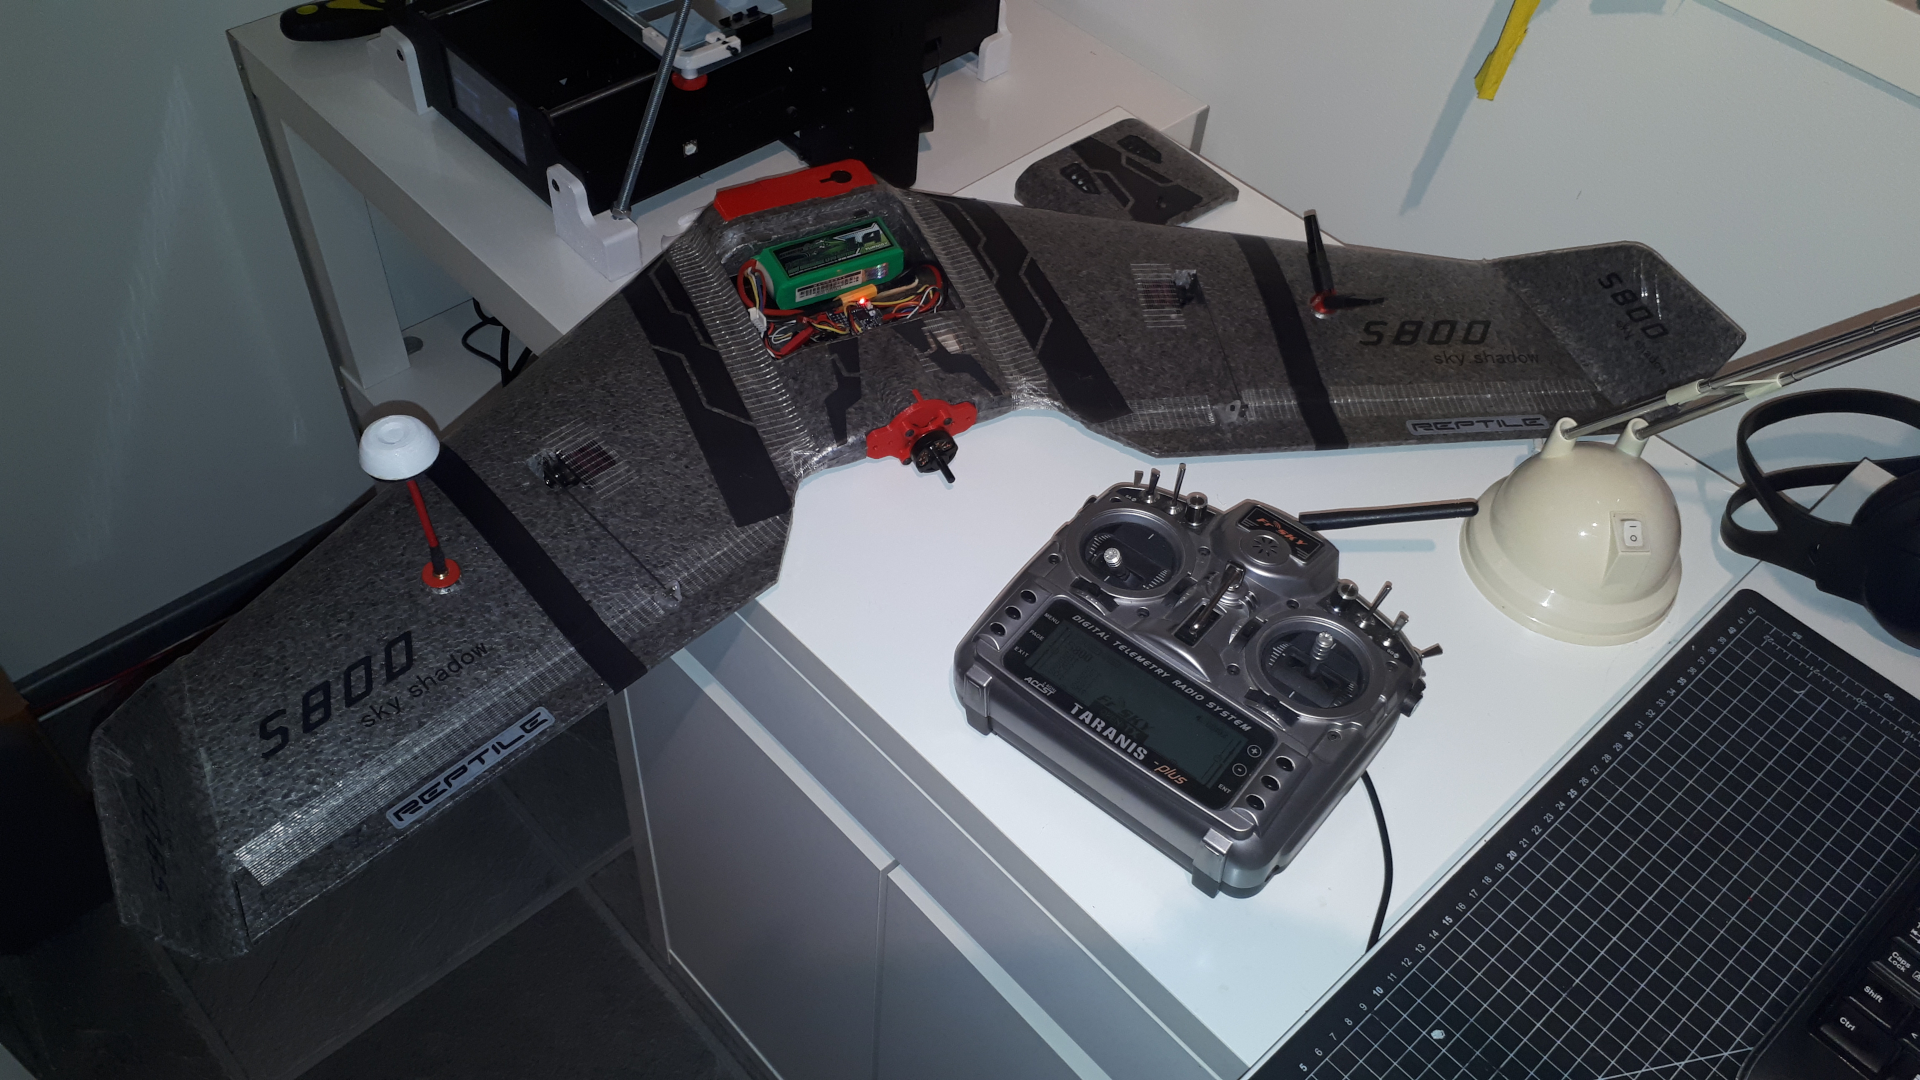
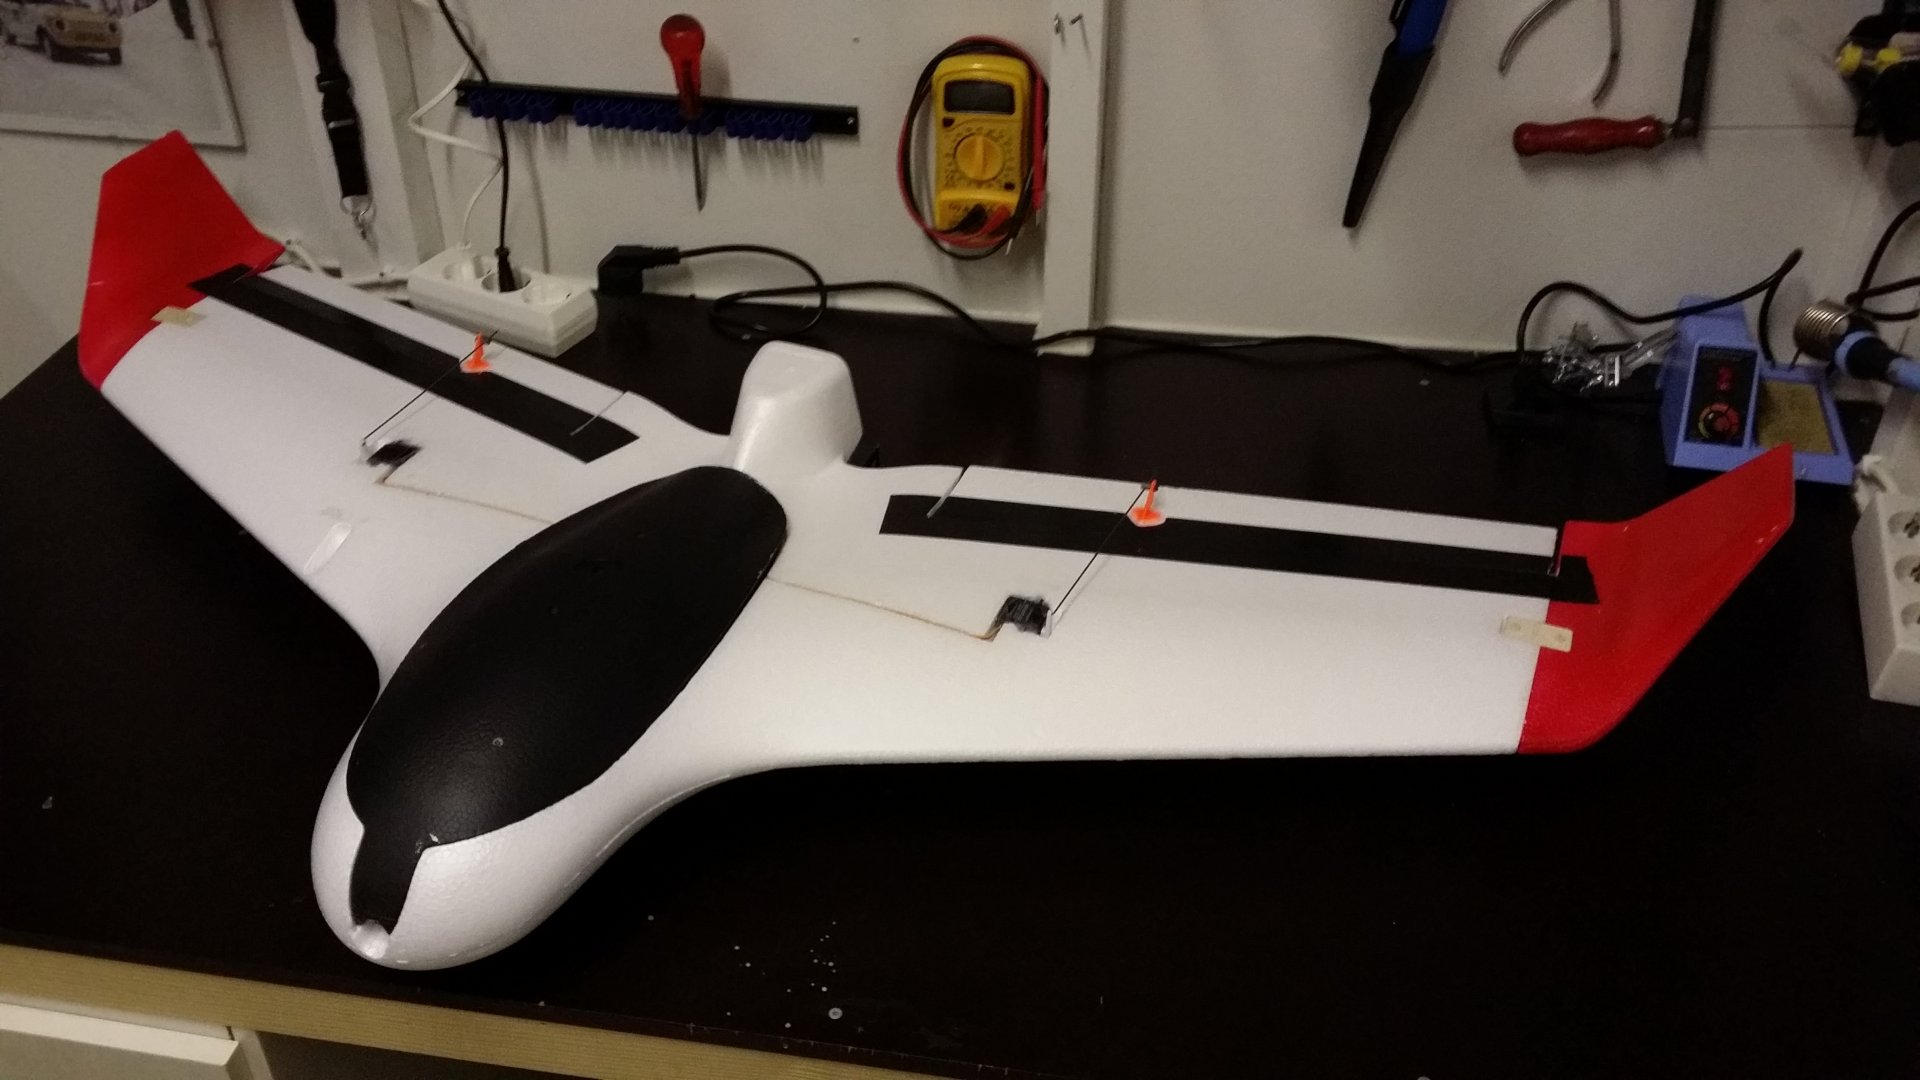
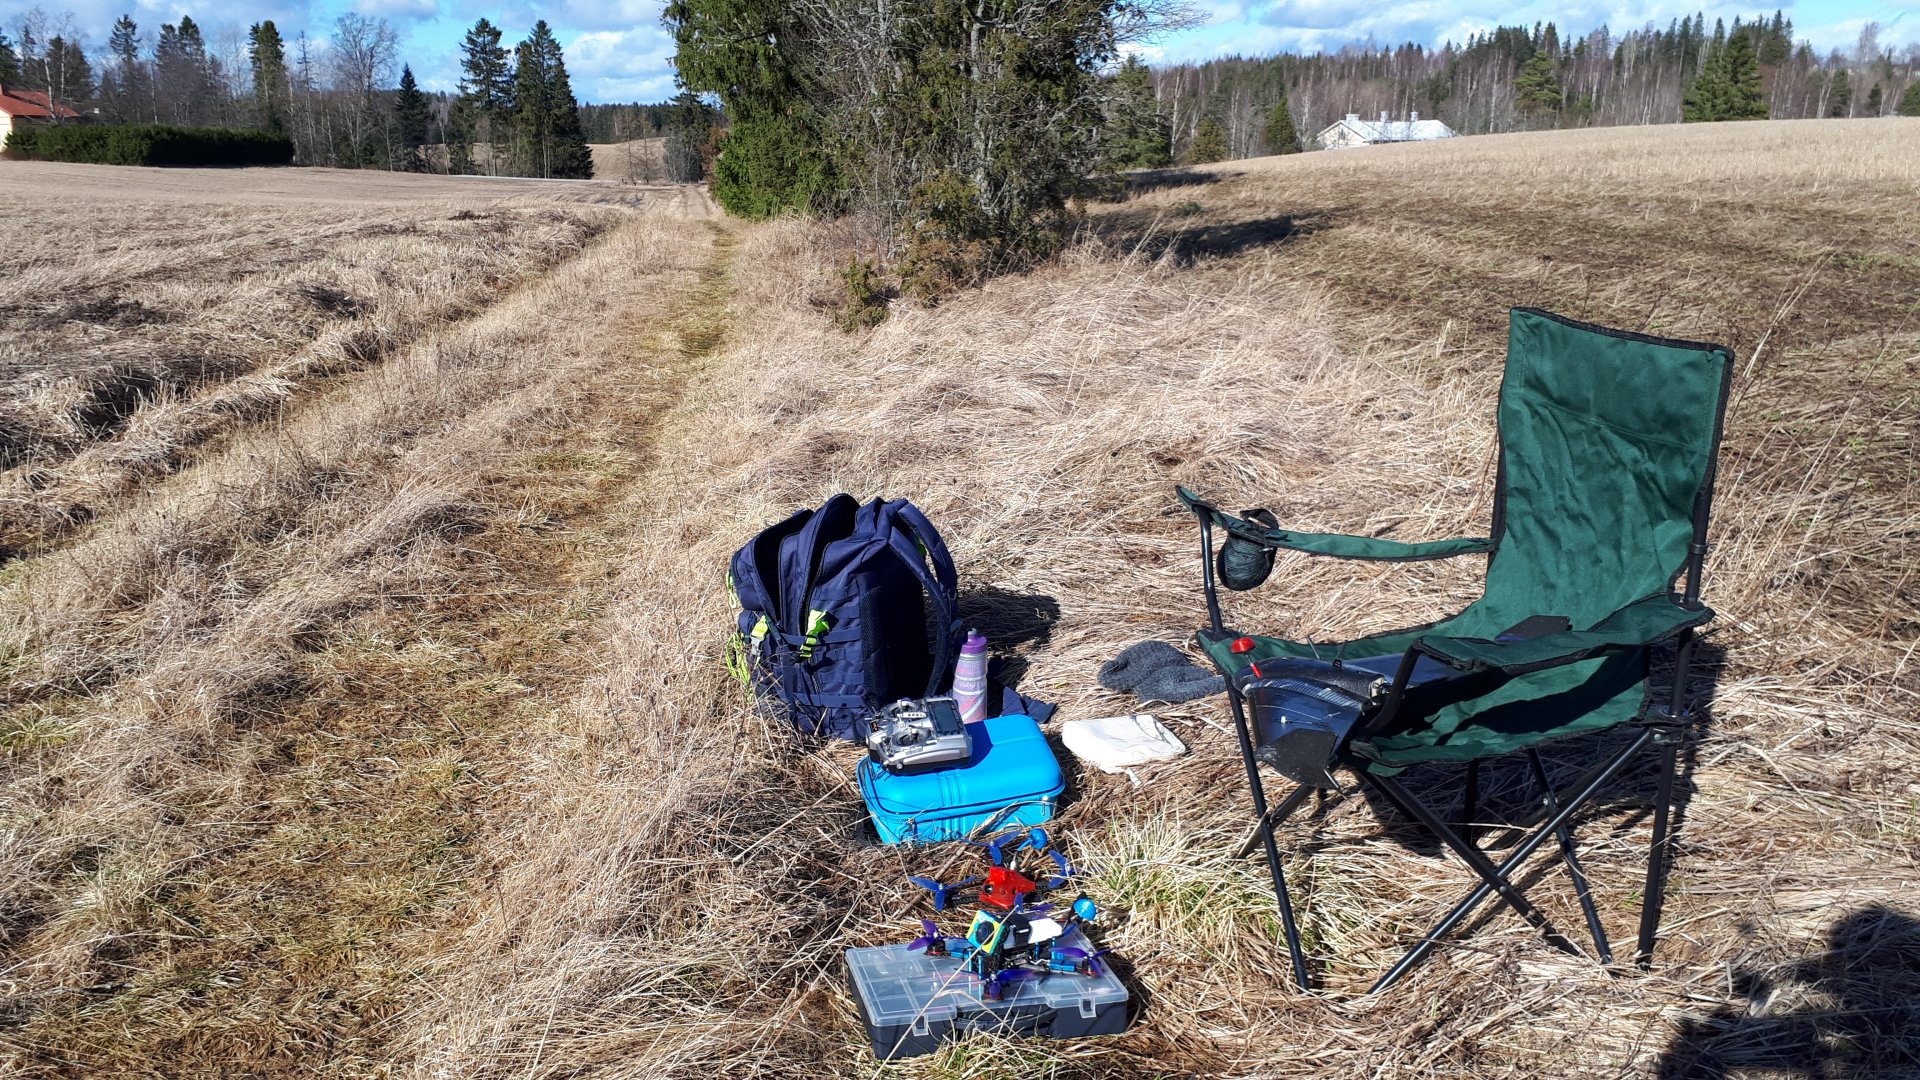
Usage: Autonomous and long-range flights. Equipped with GPS.
Size: Wingspan 820mm
RC-Link: ELRS 900mhz / BetaFPV Nano900
Video-link: 5.8ghz / IRC Tramp-vtx, Caddx Ratel 2-camera, IRC-Spironet antenna.
Parts: Made from EPP, 9g servos, RCX-2205 2200kv motor with 6'-inch prop, Matek F411 flight controller, Racerstar 30A ESC and 4S batteries.
Extras: With iNav-firmware, fairly well tuned. Tested with position hold-mode and also autolaunch and return to home-mode is tested.


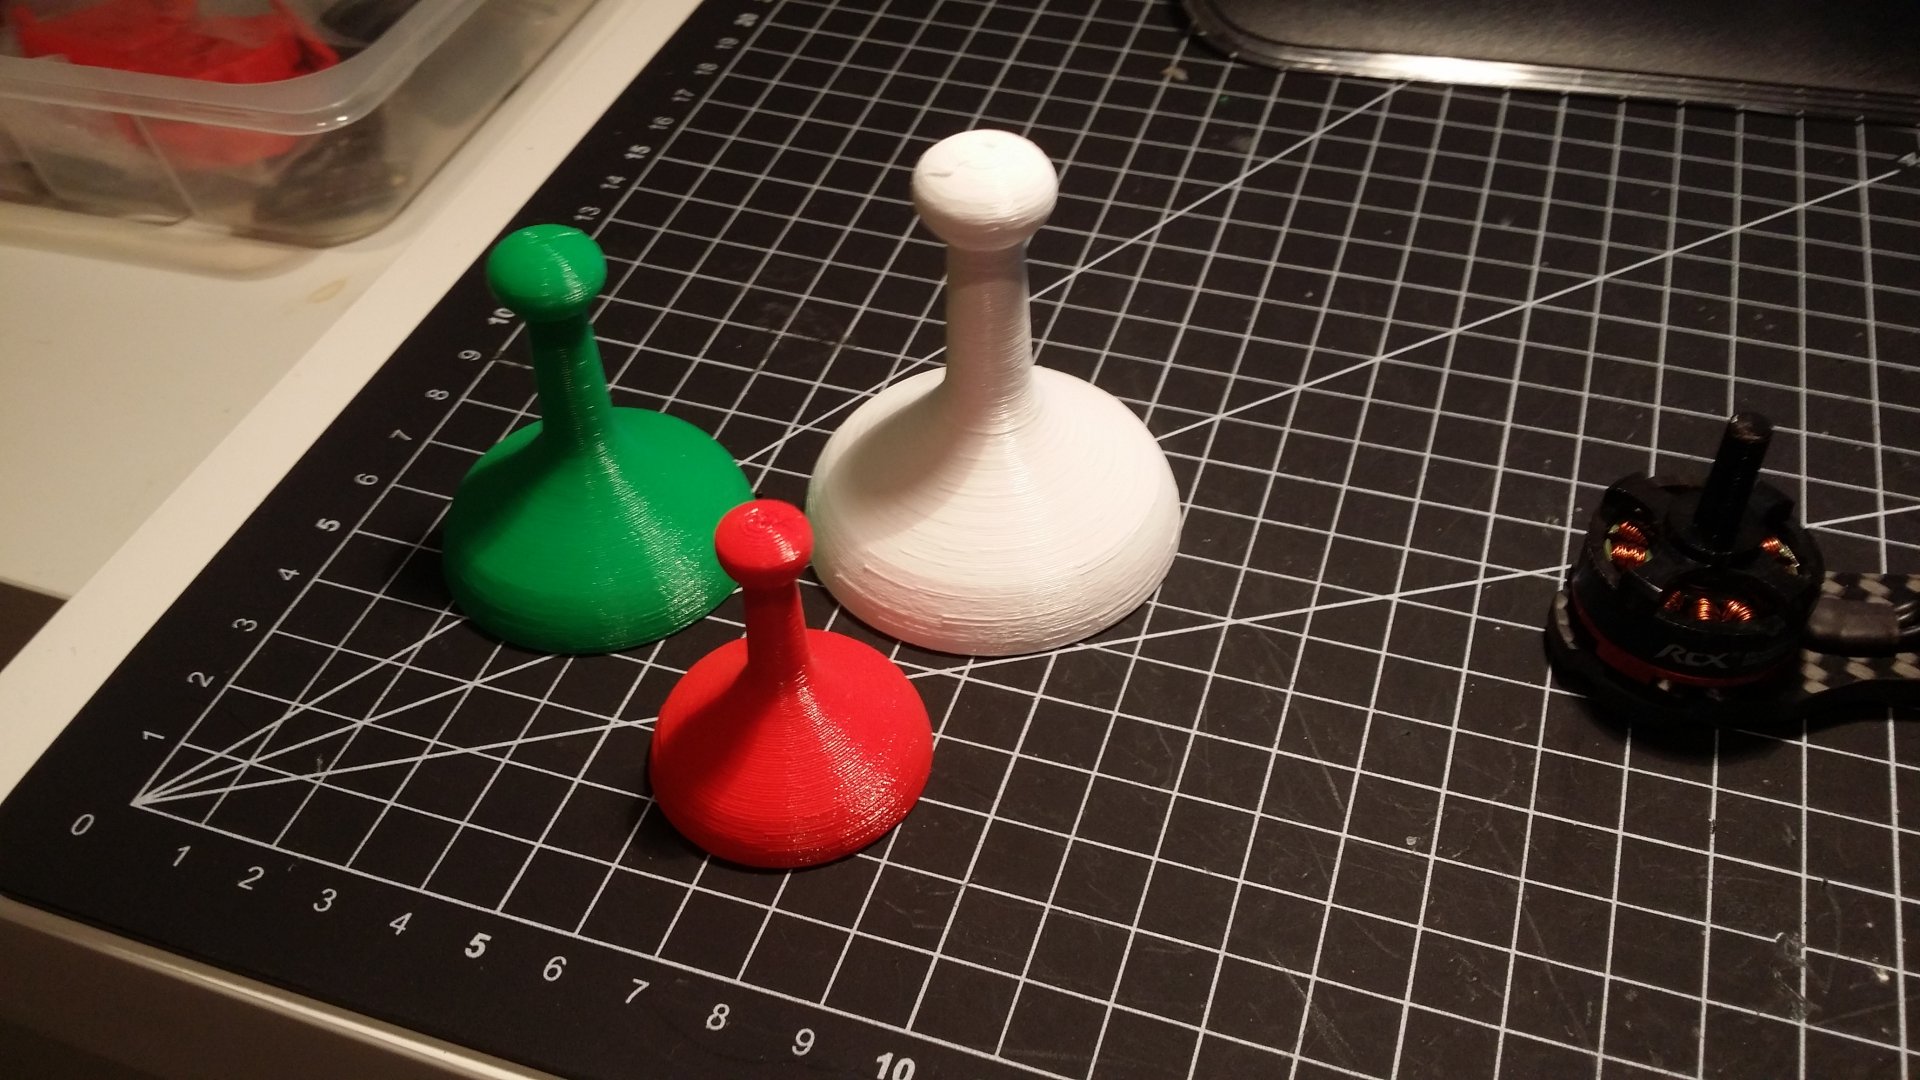
I'm used to tinkering with electronics and controlled devices, so it's natural that I also became interested in 3D printing and printers as well. Printers are already an addictive hobby in themselves, and in addition, printers are correspondingly useful in other hobbies.
With a 3D printer, its possible to make spare parts or accessories for various devices or purposes, or even print improvement parts for the 3D printer itself.
Here are some current and former aircrafts that I have built.
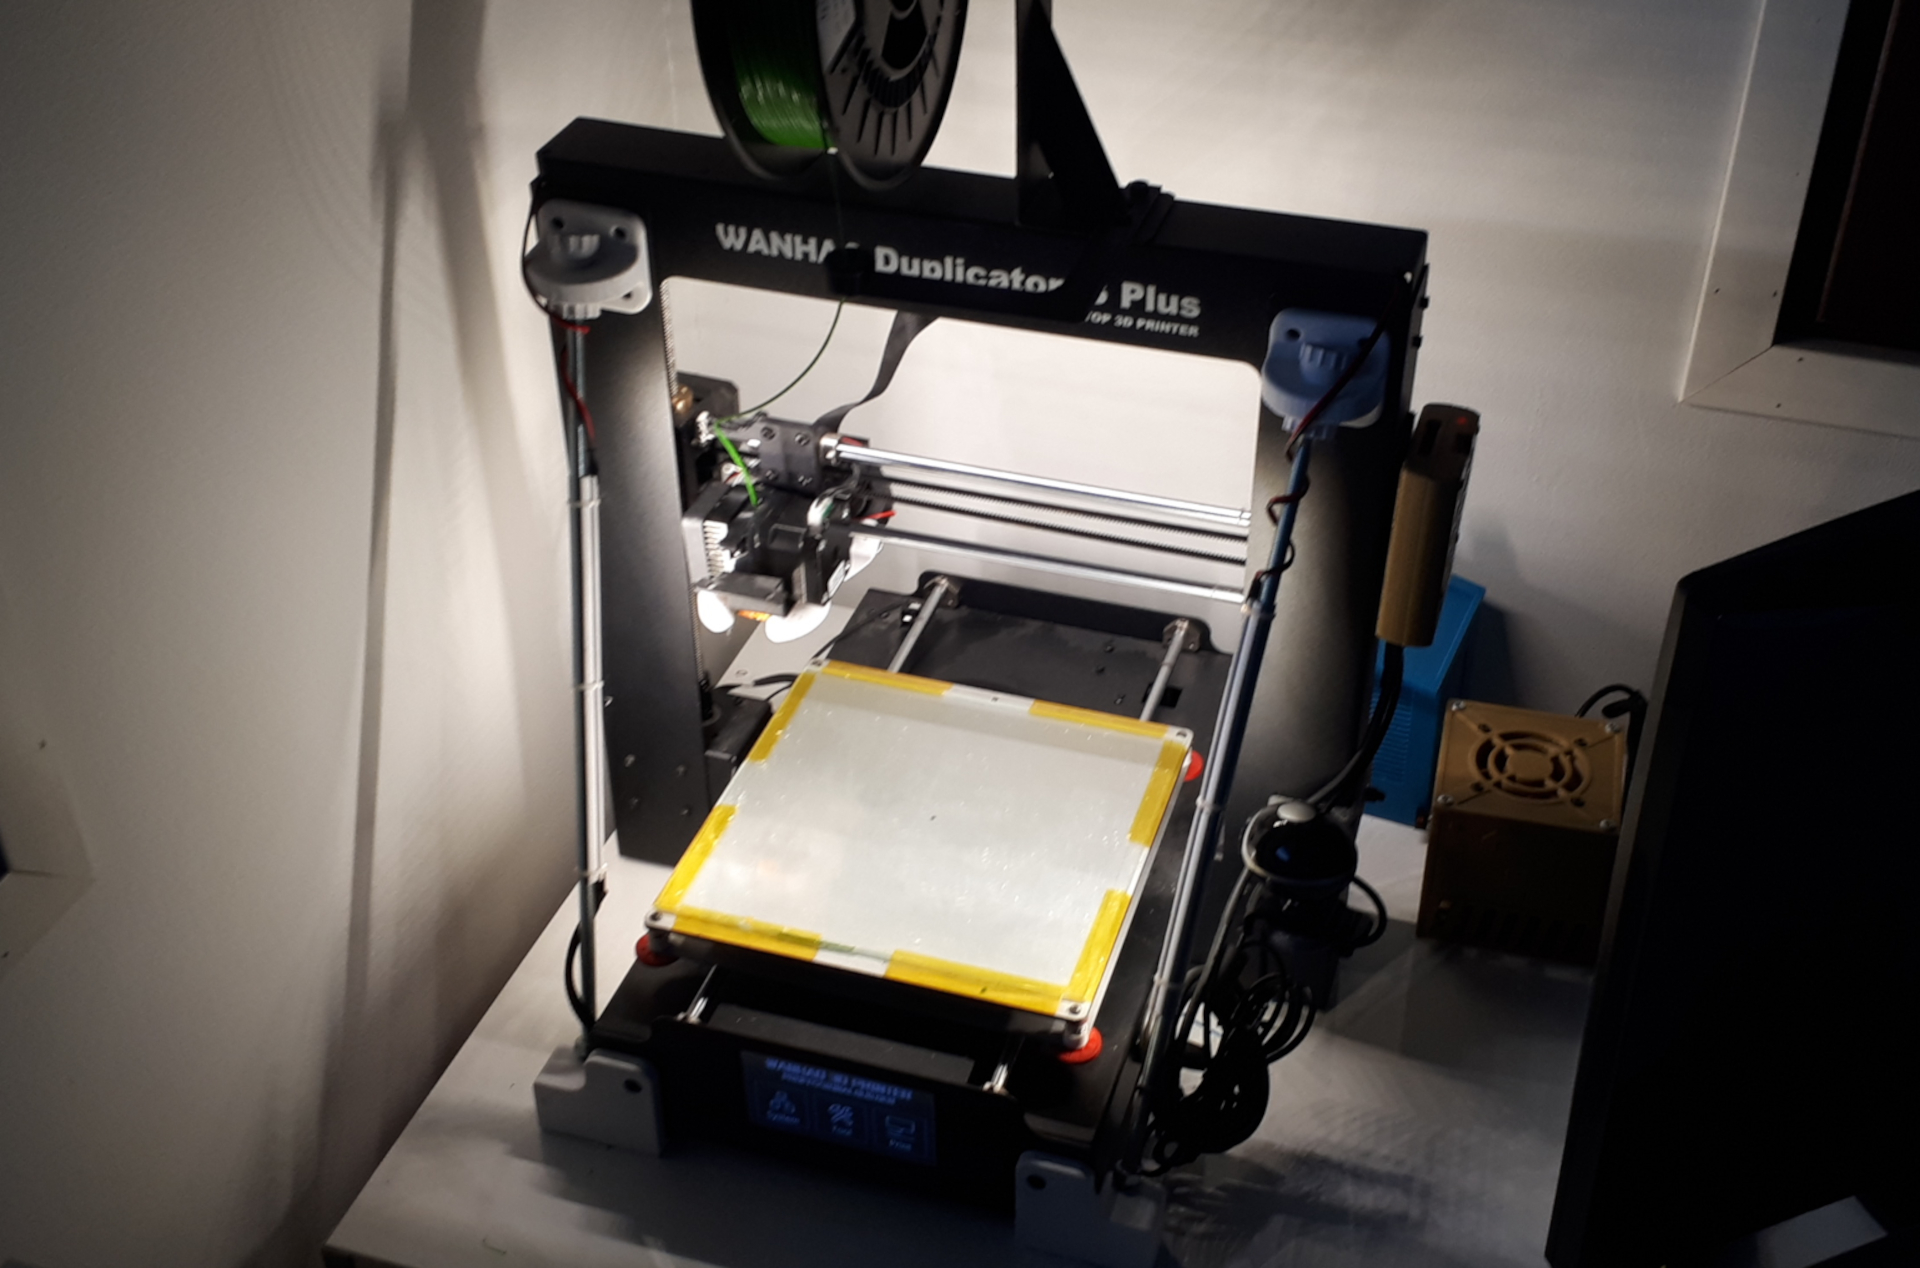
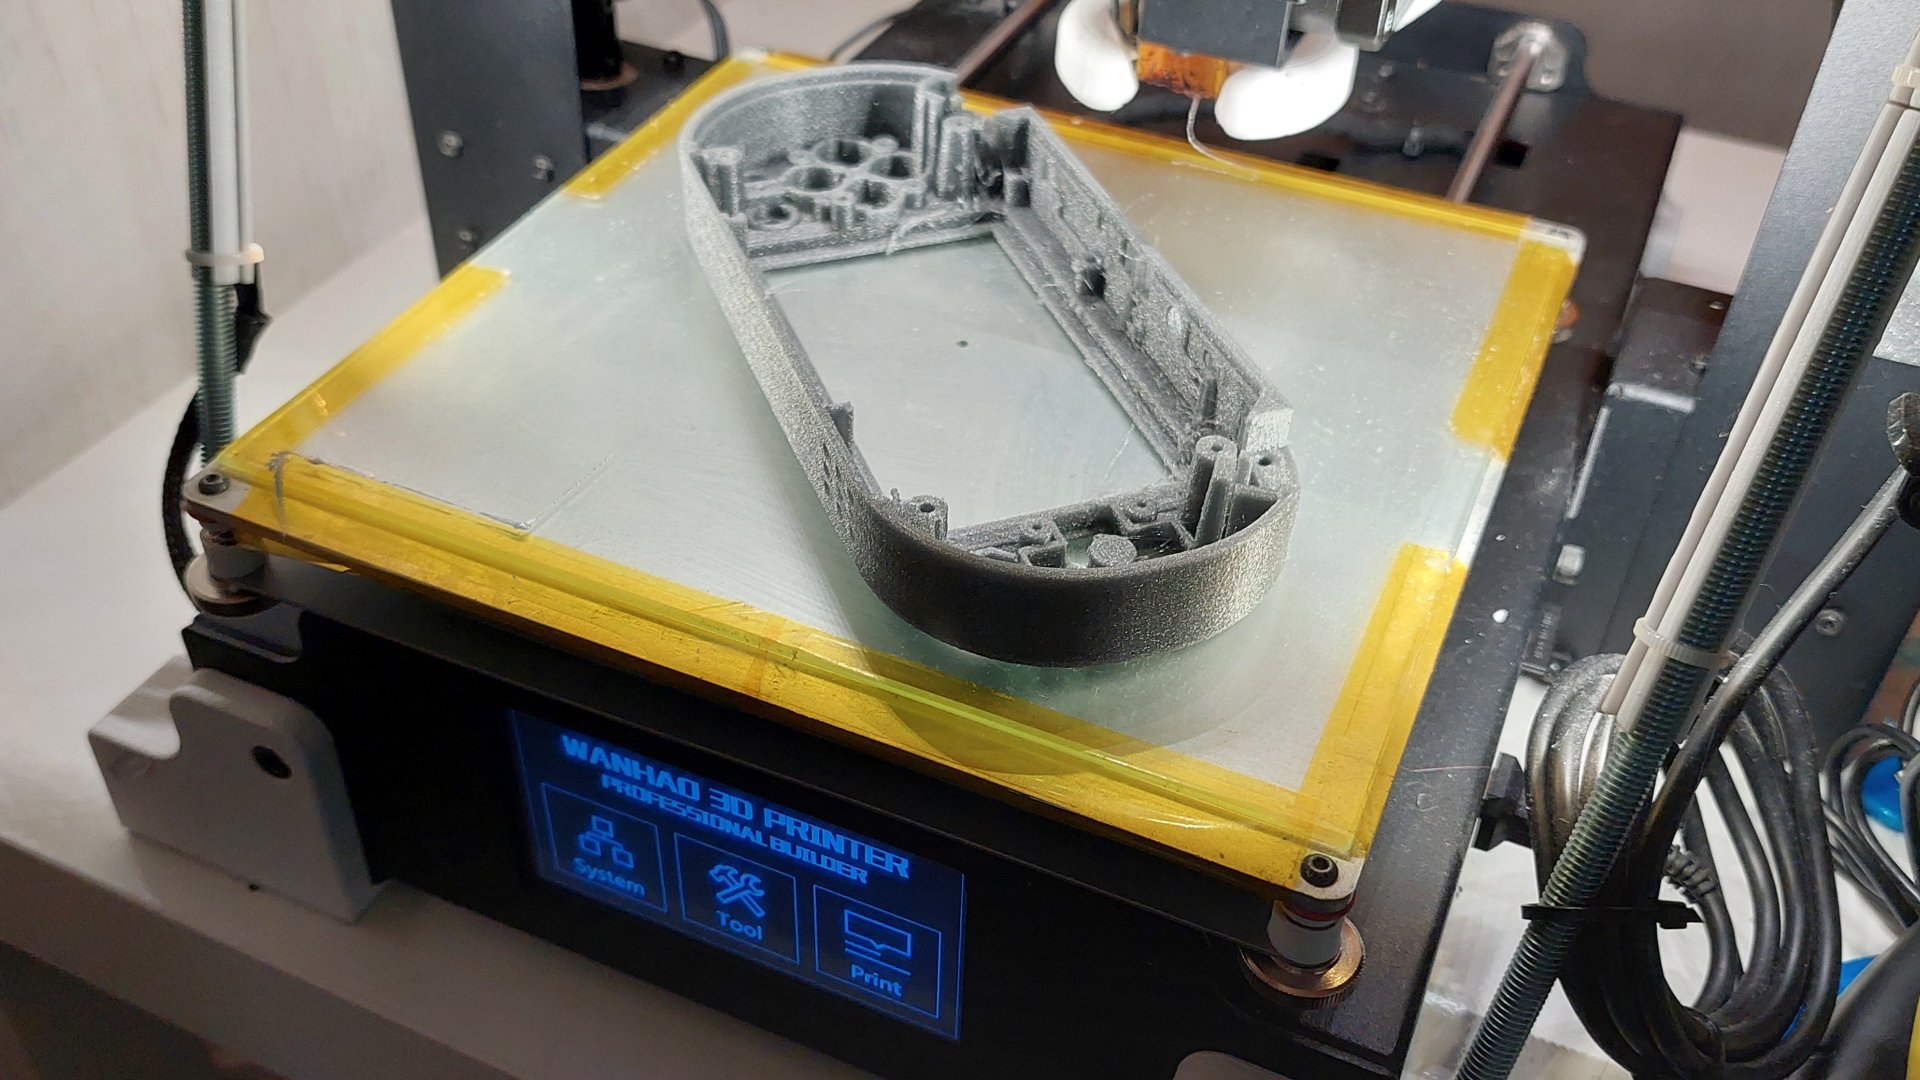
Model: Wanhao Duplicator i3 Plus (Prusa clone)
Firmware: Marlin
Build Volume: 200 x 200 x 180 mm
Printing Material: PLA, TPU, PETG, ABS
Upgrades: Braces for Z-axis for improved rigidy, LED Strips, Reinforced Y-axis roller, Adjustable belt tensioners, DiiCooler mount for radial fan, Filament guide with locker, Glass bed, Camera mount
Extras: Printer control is implemented also with Octoprint-software, which is installed on a Raspberry Pi4. A camera has also been installed in the Octoprint software, allowing monitoring of the printing process remote. Cura v. 4.4.0 is used as the slicer software. The printer is regularly calibrated, including the extruder, e-steps, temperature, and PID.


One of my hobbies is building retro gaming consoles. Of course, I enjoy playing on them too, but my biggest passion is actually putting them together and getting them to work.
I got into this hobby when I decided to try installing a retrogame emulator on a Raspberry Pi, which I connected to a screen and a wired controller. After that, I 3D-printed a case for it, added a fan, and made some software tweaks.
Later, I built an arcade cabinet in the style of the ‘80s and ‘90s. My latest project is a handheld console.
Here’s a quick look at my projects:

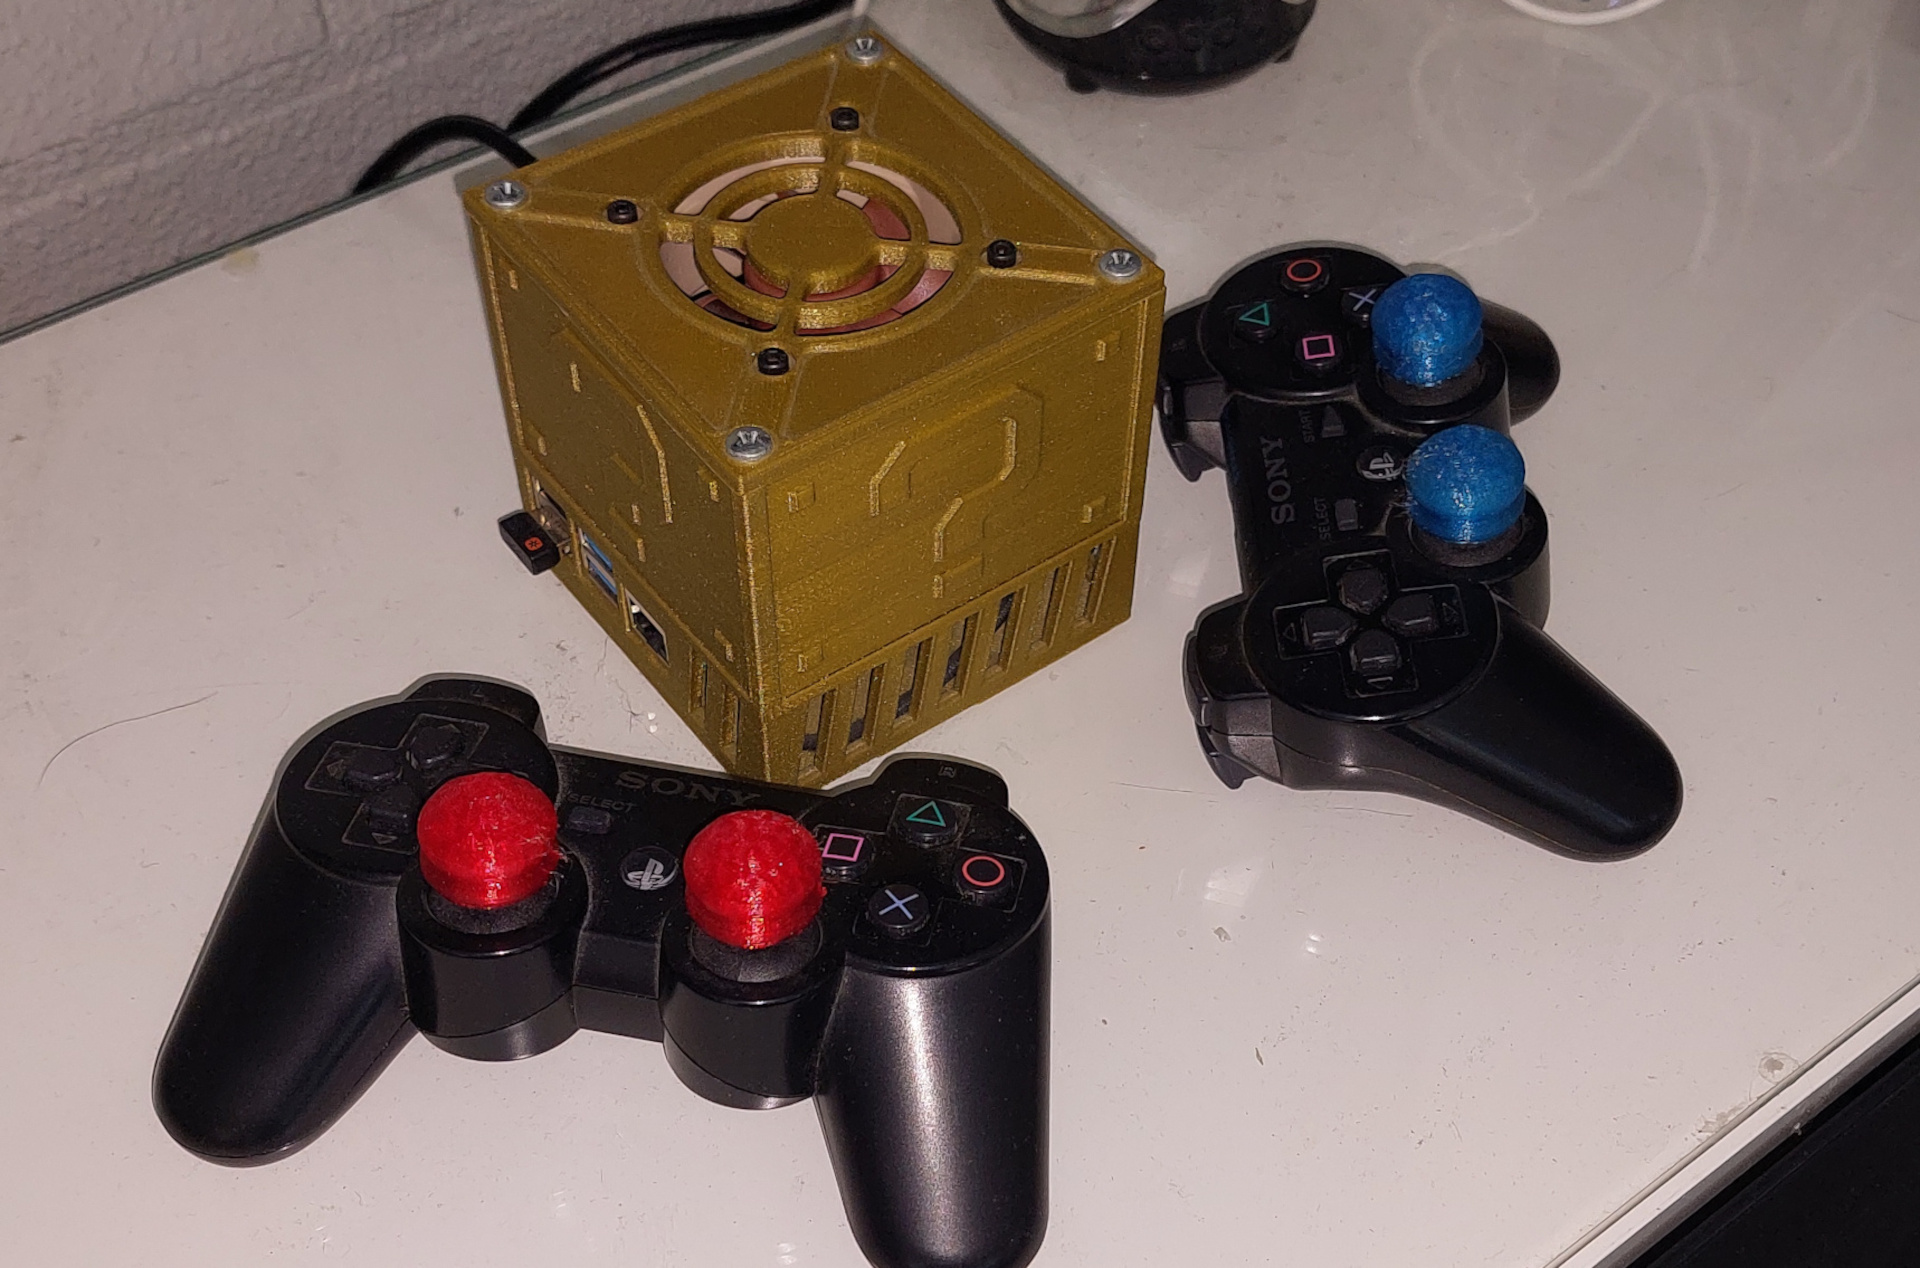
Hardware: Raspberry Pi4 4gb
Firmware: Retropie with Emulation Station frontend
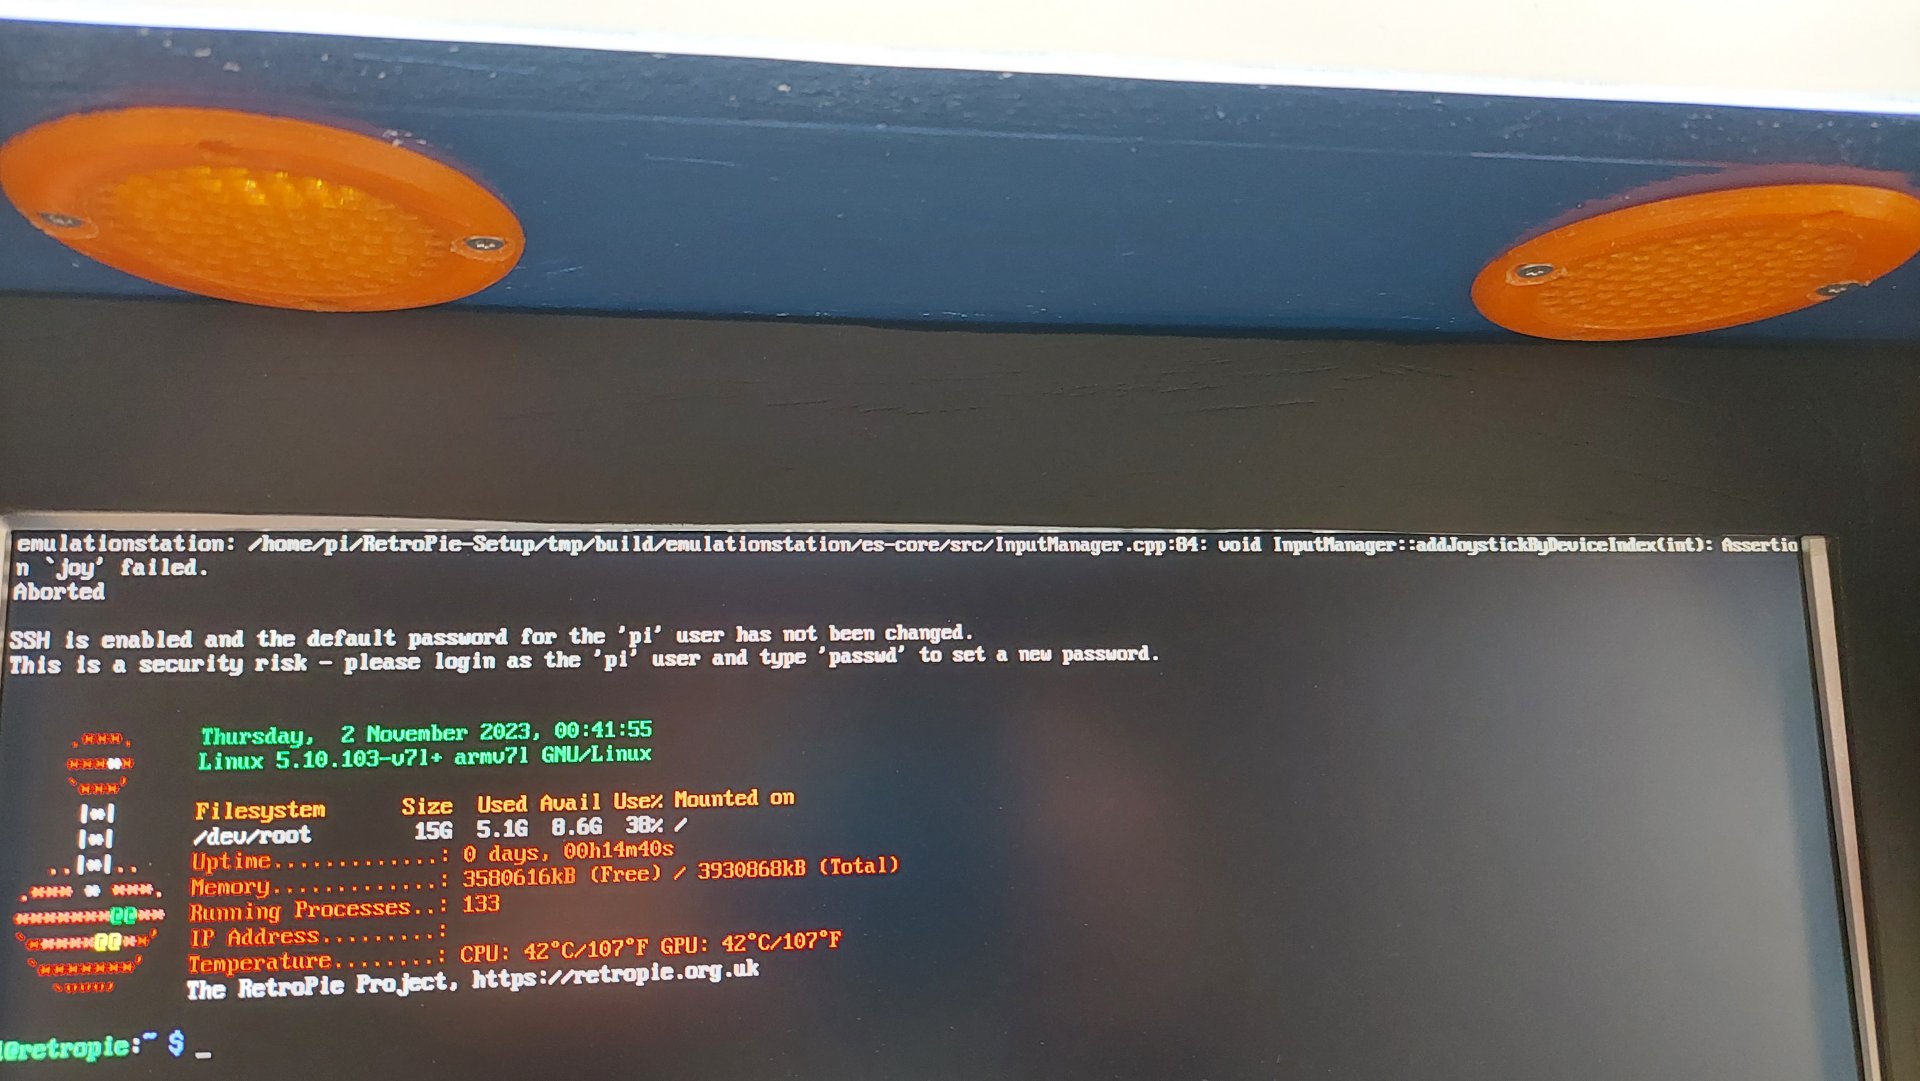
Notes & Extras: Can be connected to any display with an HDMI port. The case is 3D-printed and has a Noctua fan that turns on when the CPU temperature goes over 72°C. Original PS3 controllers are used as gamepads via Bluetooth. A slightly overclocked Raspberry Pi 4 runs the RetroPie emulator, with various optimizations to improve emulator performance—for example, adjusting shaders to match the visual style of different gaming periods.
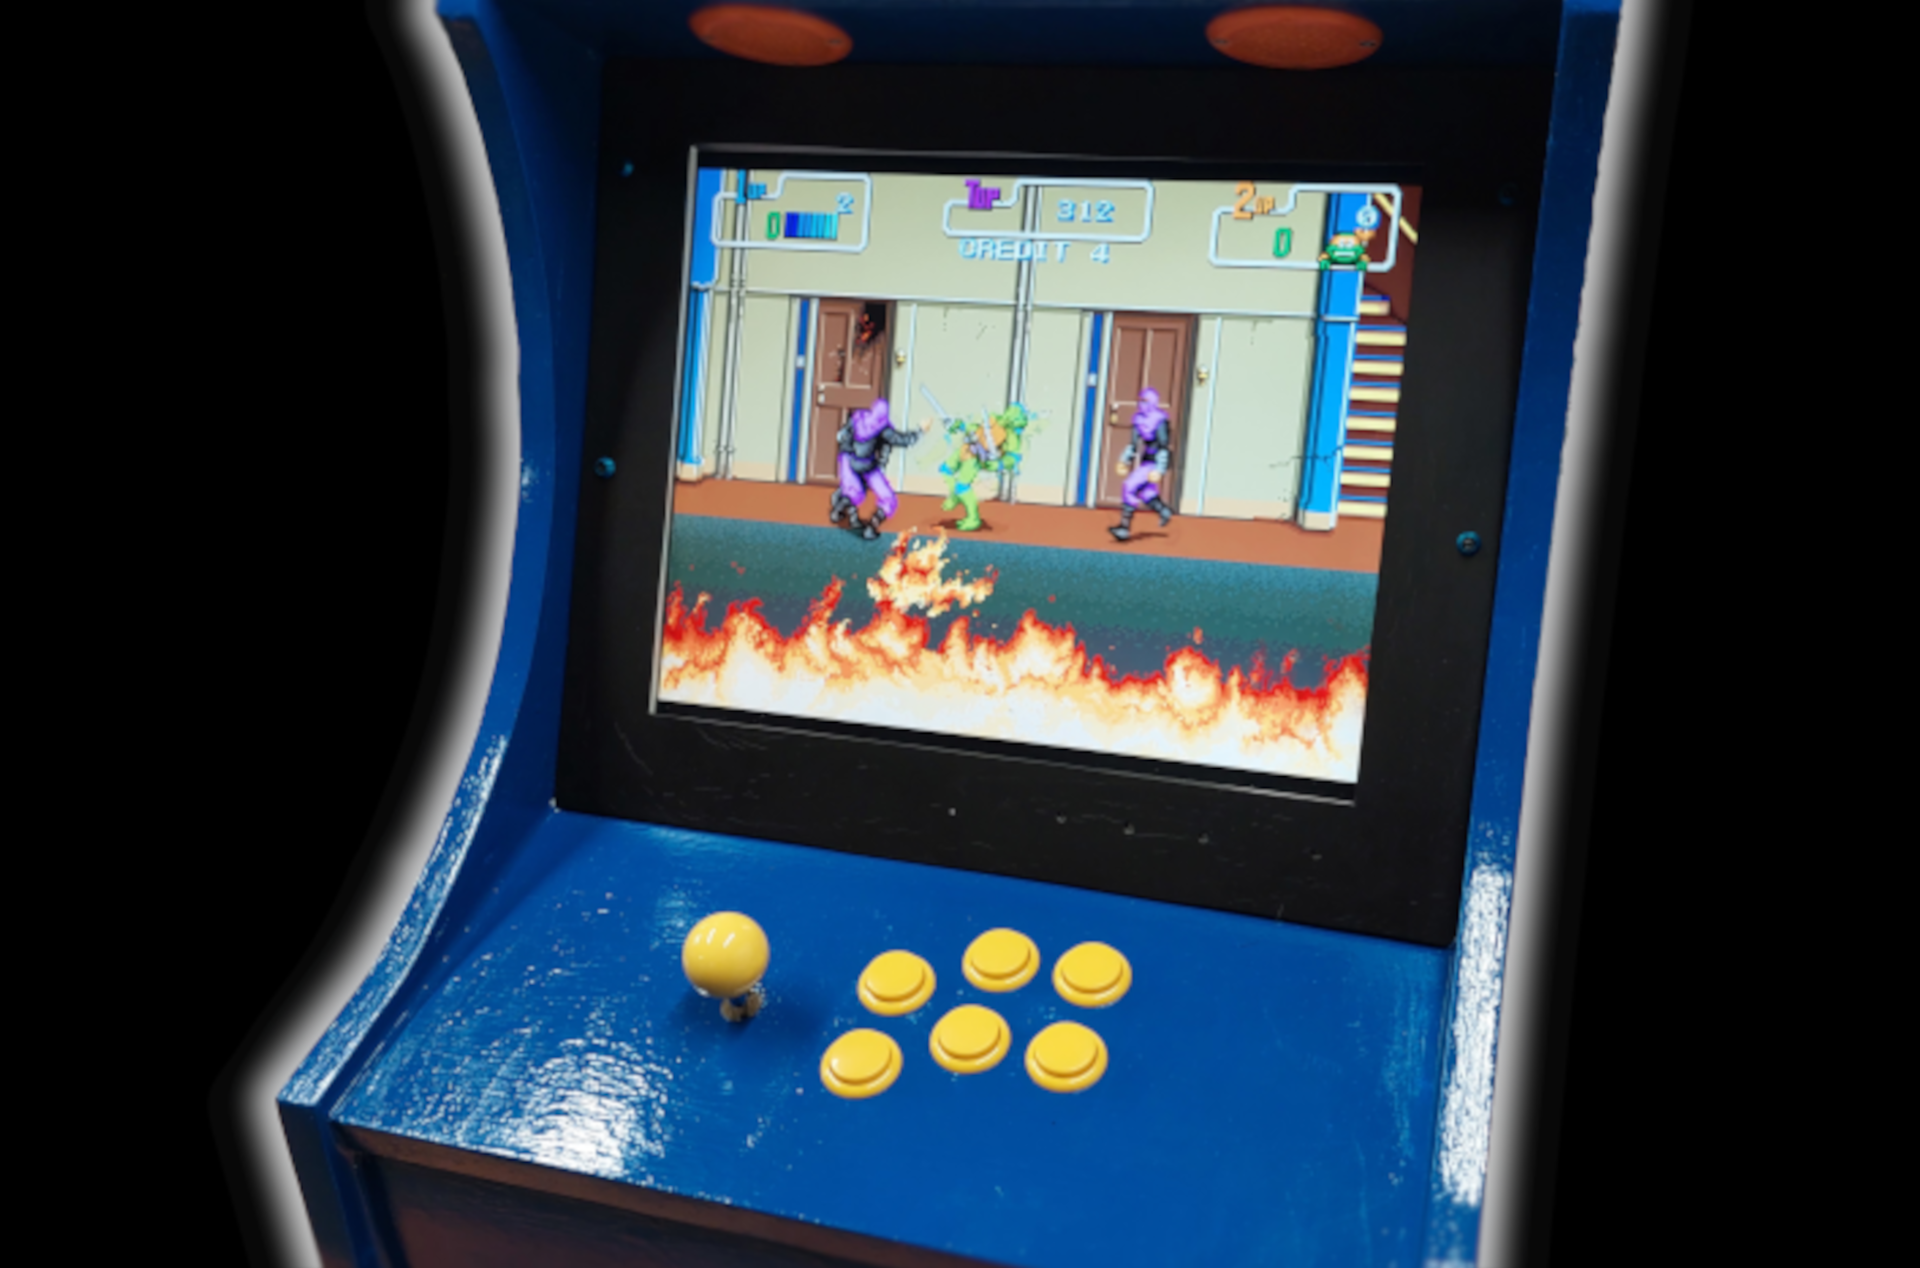
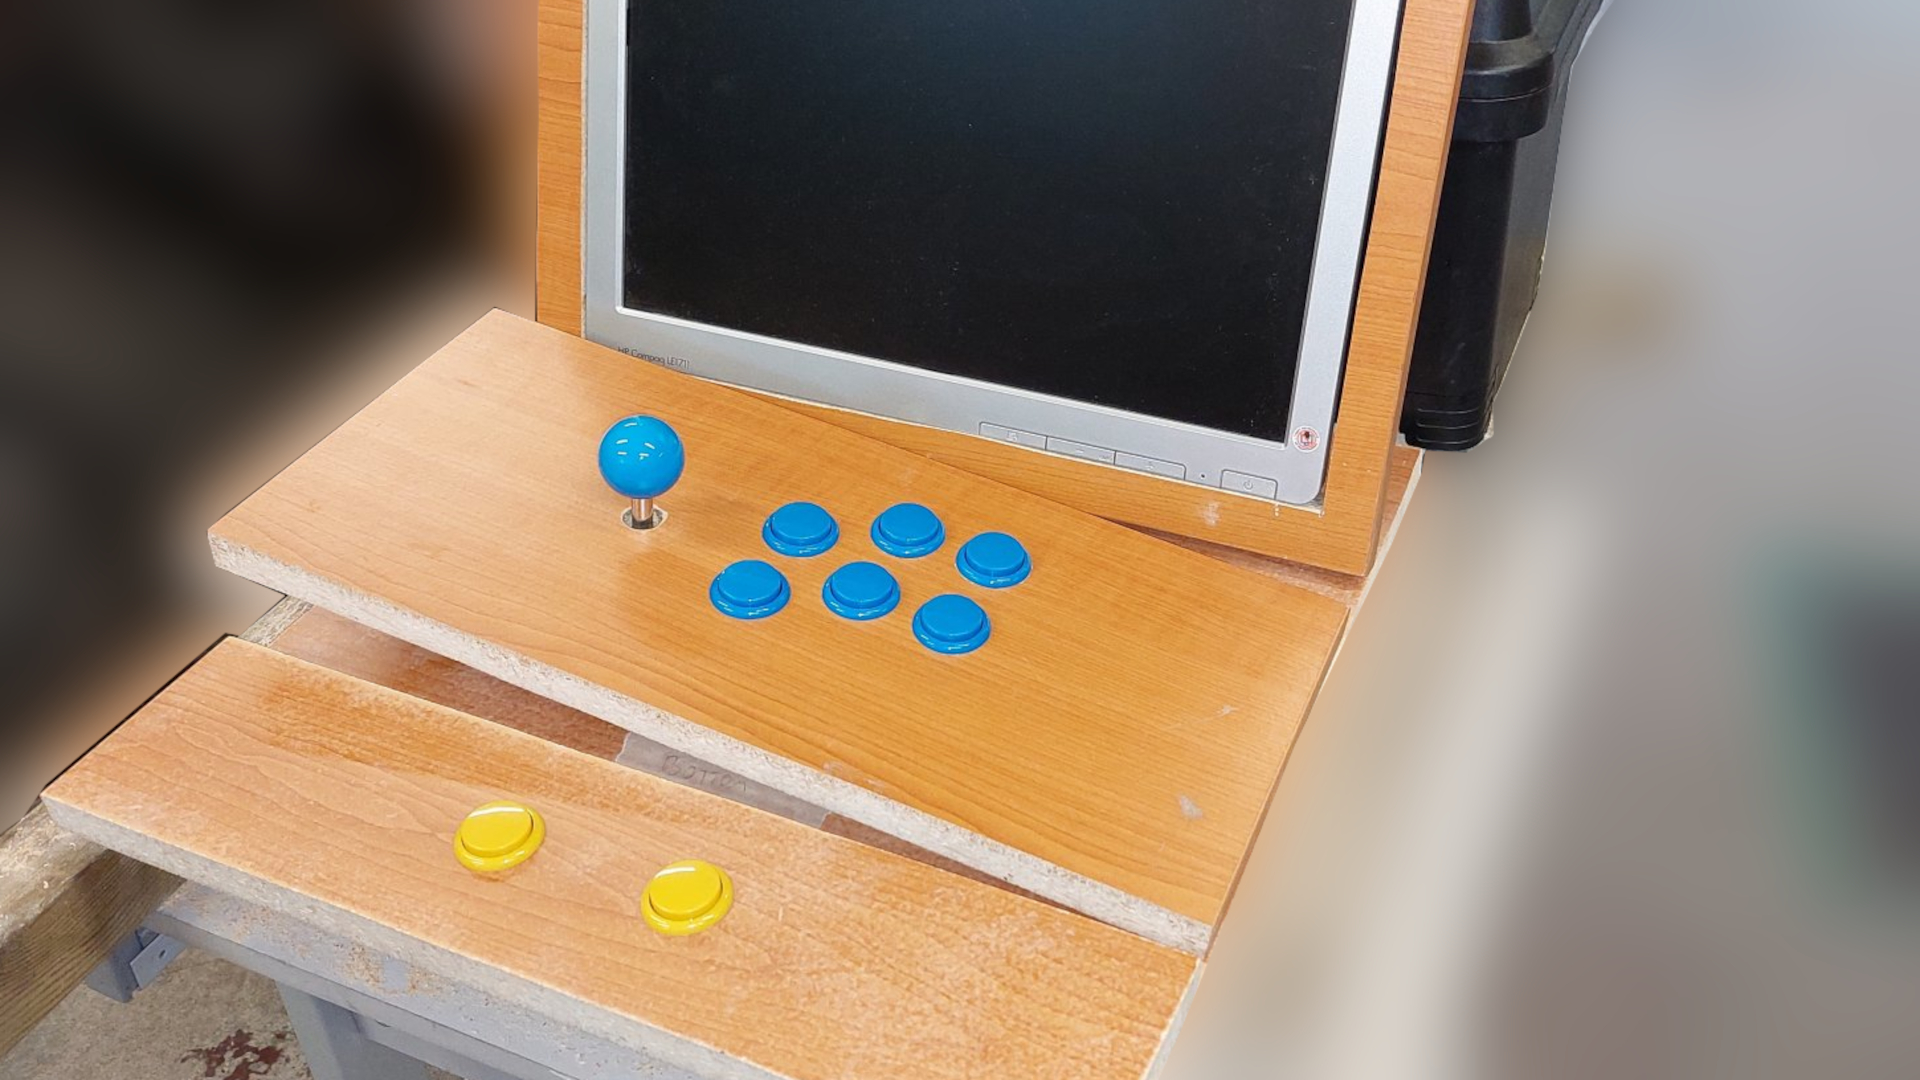
Cabinet: Melamine board & polycarbonate marquee with LED:s
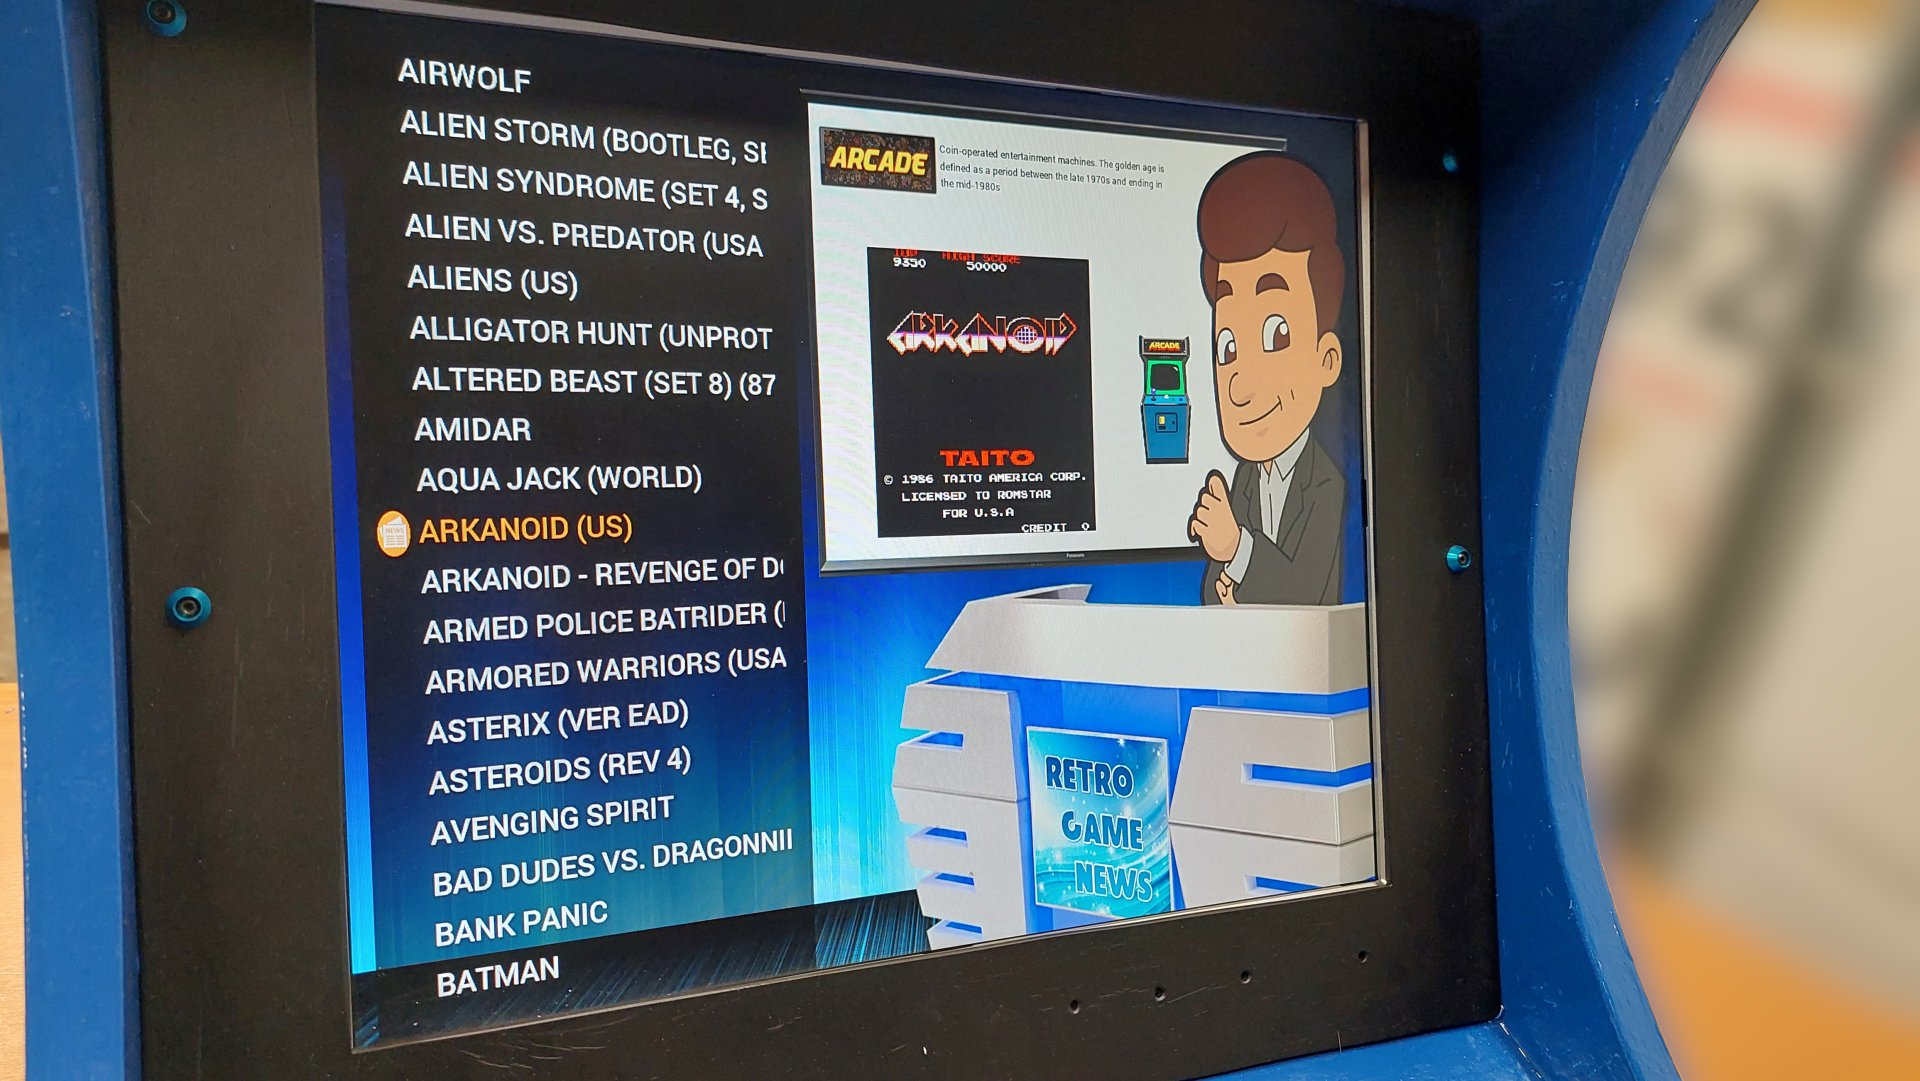
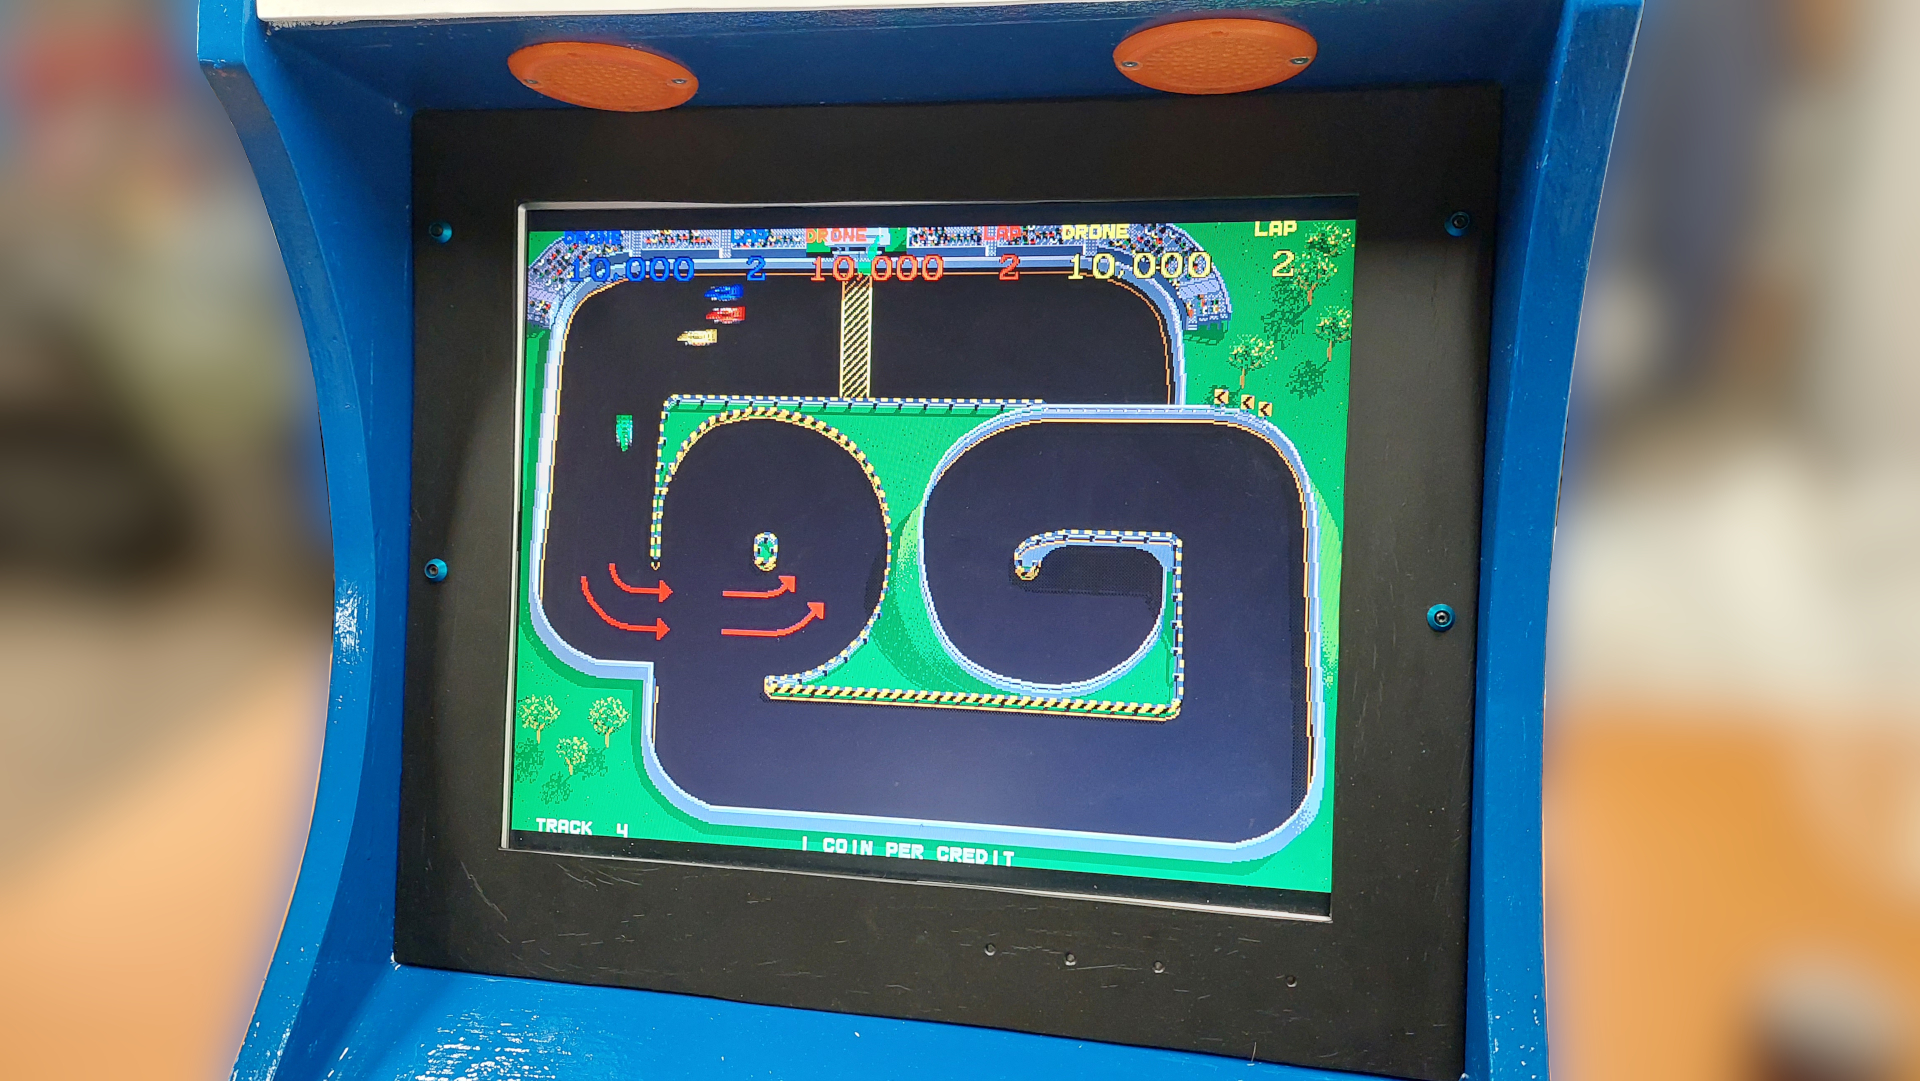
Electrics & Firmware: Retropie installed on Raspberry Pi4 with MAME-emulator, Arcade joystick kit with 6 buttons & speakers
Notes & Extras: The shapes and dimensions of the panels were first modeled on cardboard, then the melamine boards were cut accordingly. The game controller layout was designed based on the original model used in the 1980s. A 15-inch monitor from an old desktop PC was used as the display. An HDMI-to-VGA adapter is used between the Raspberry Pi and the monitor.
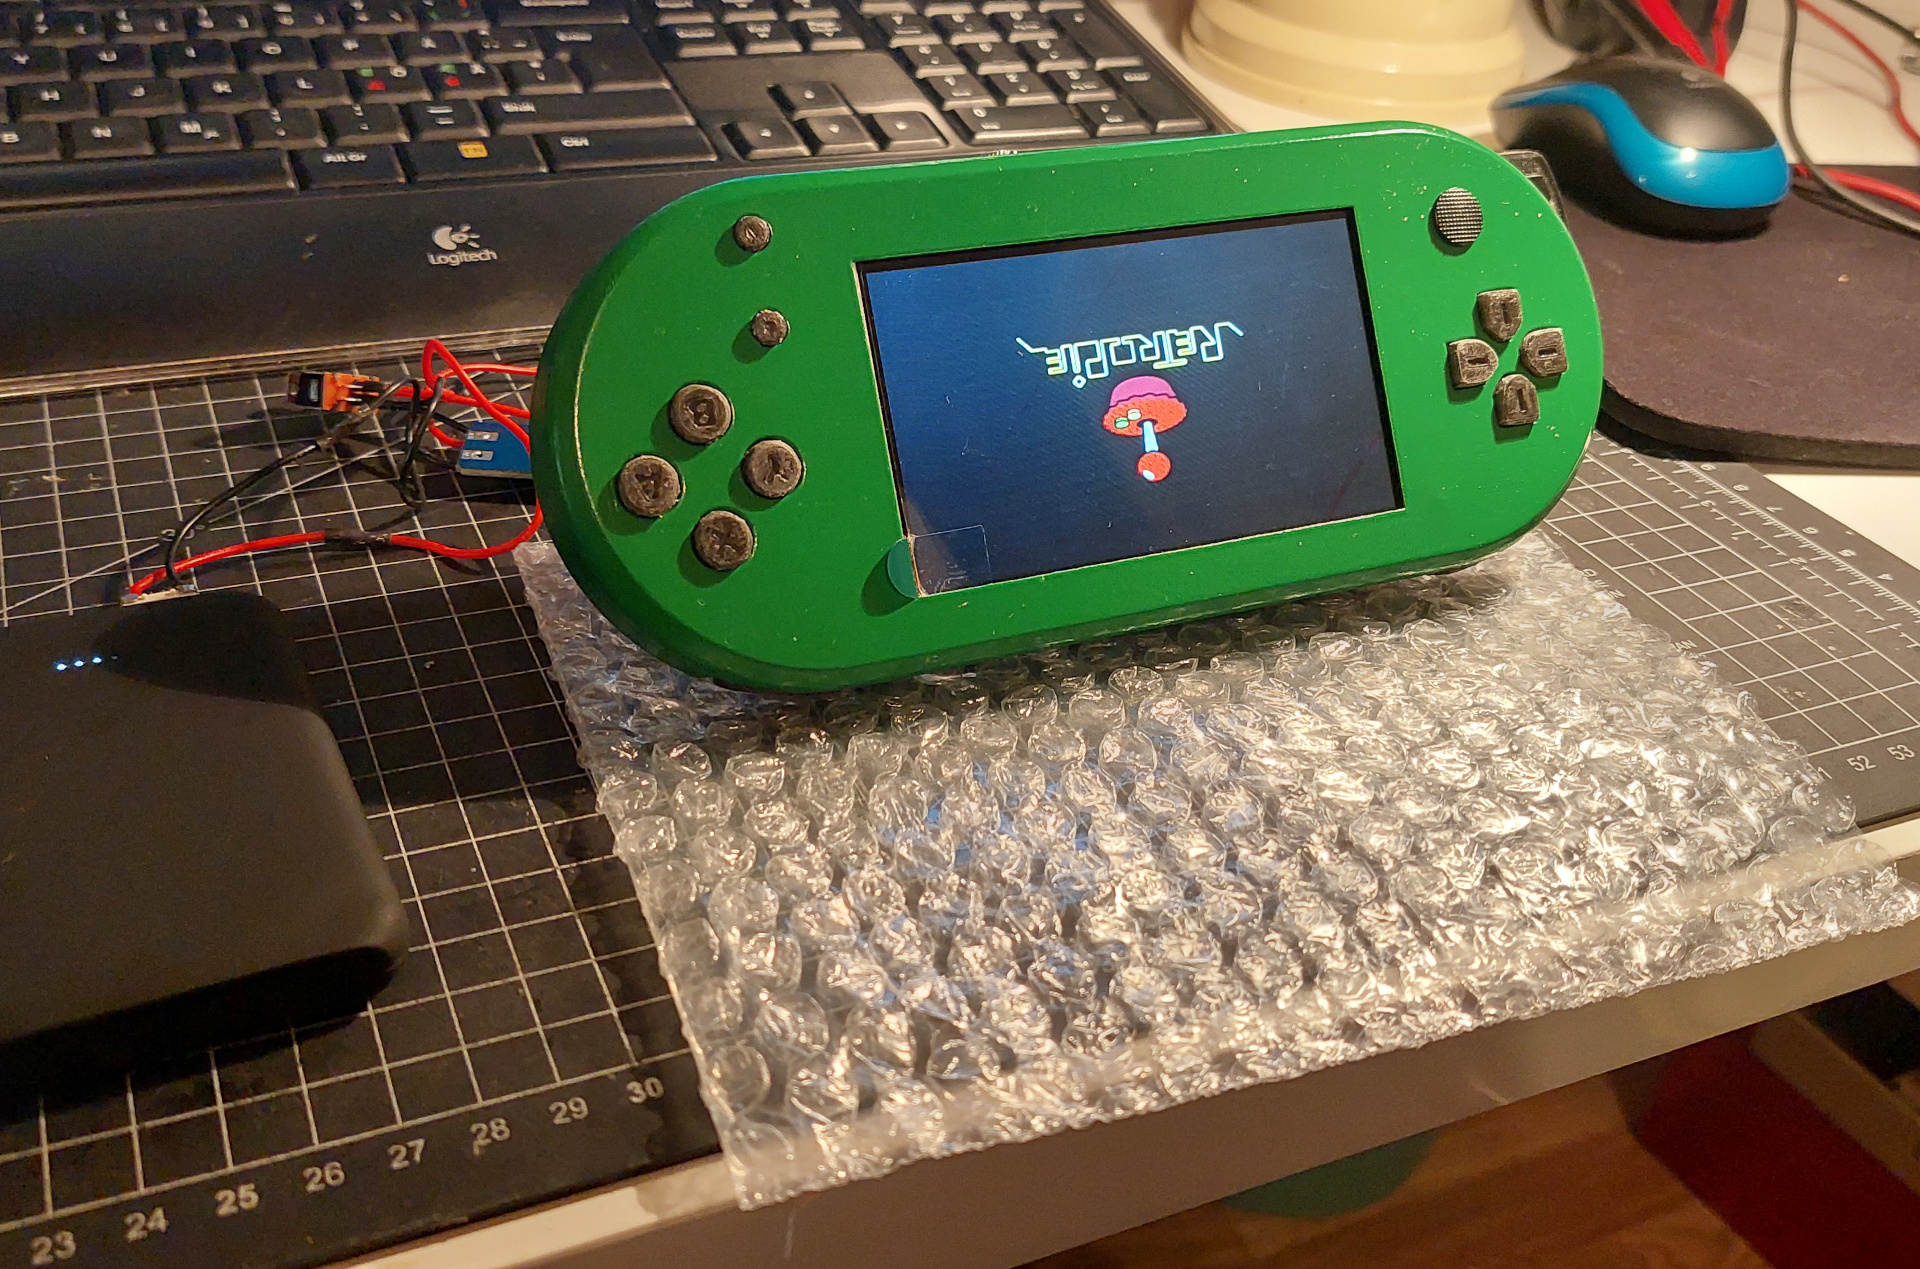
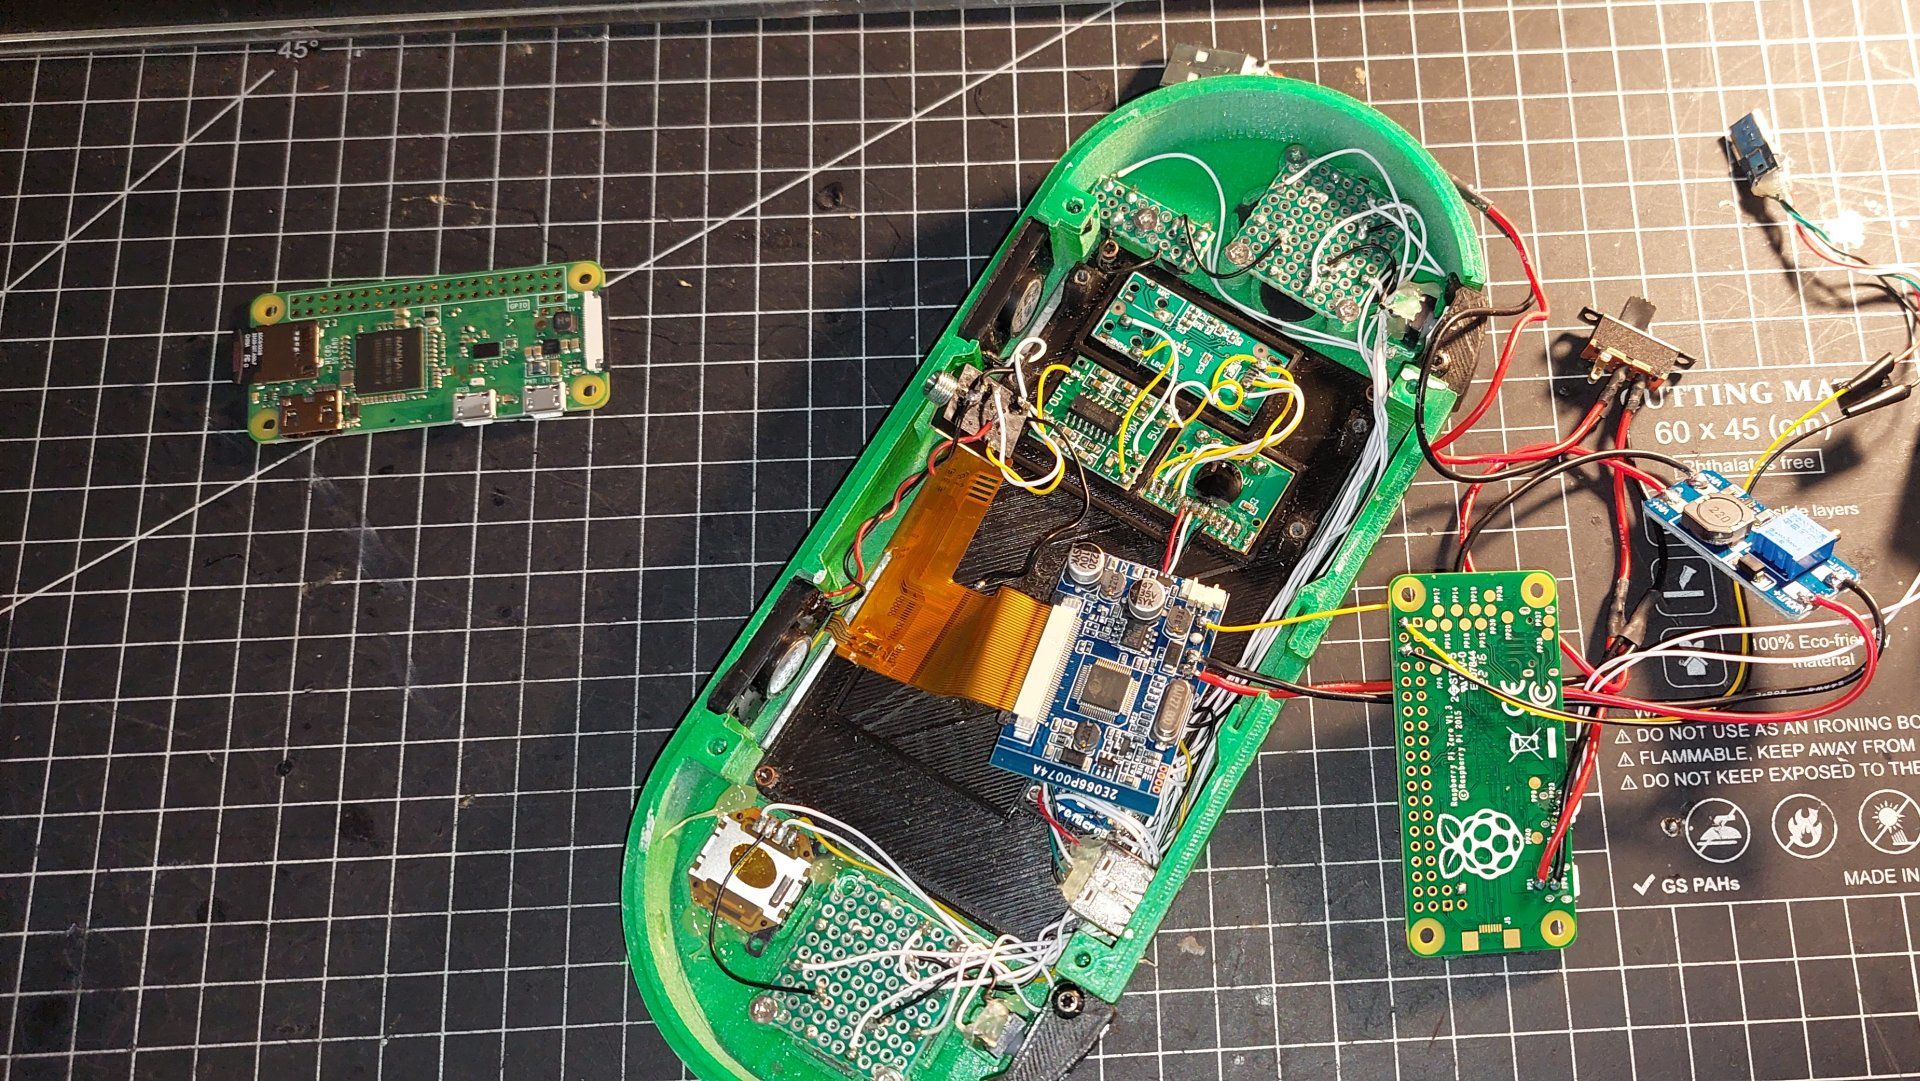
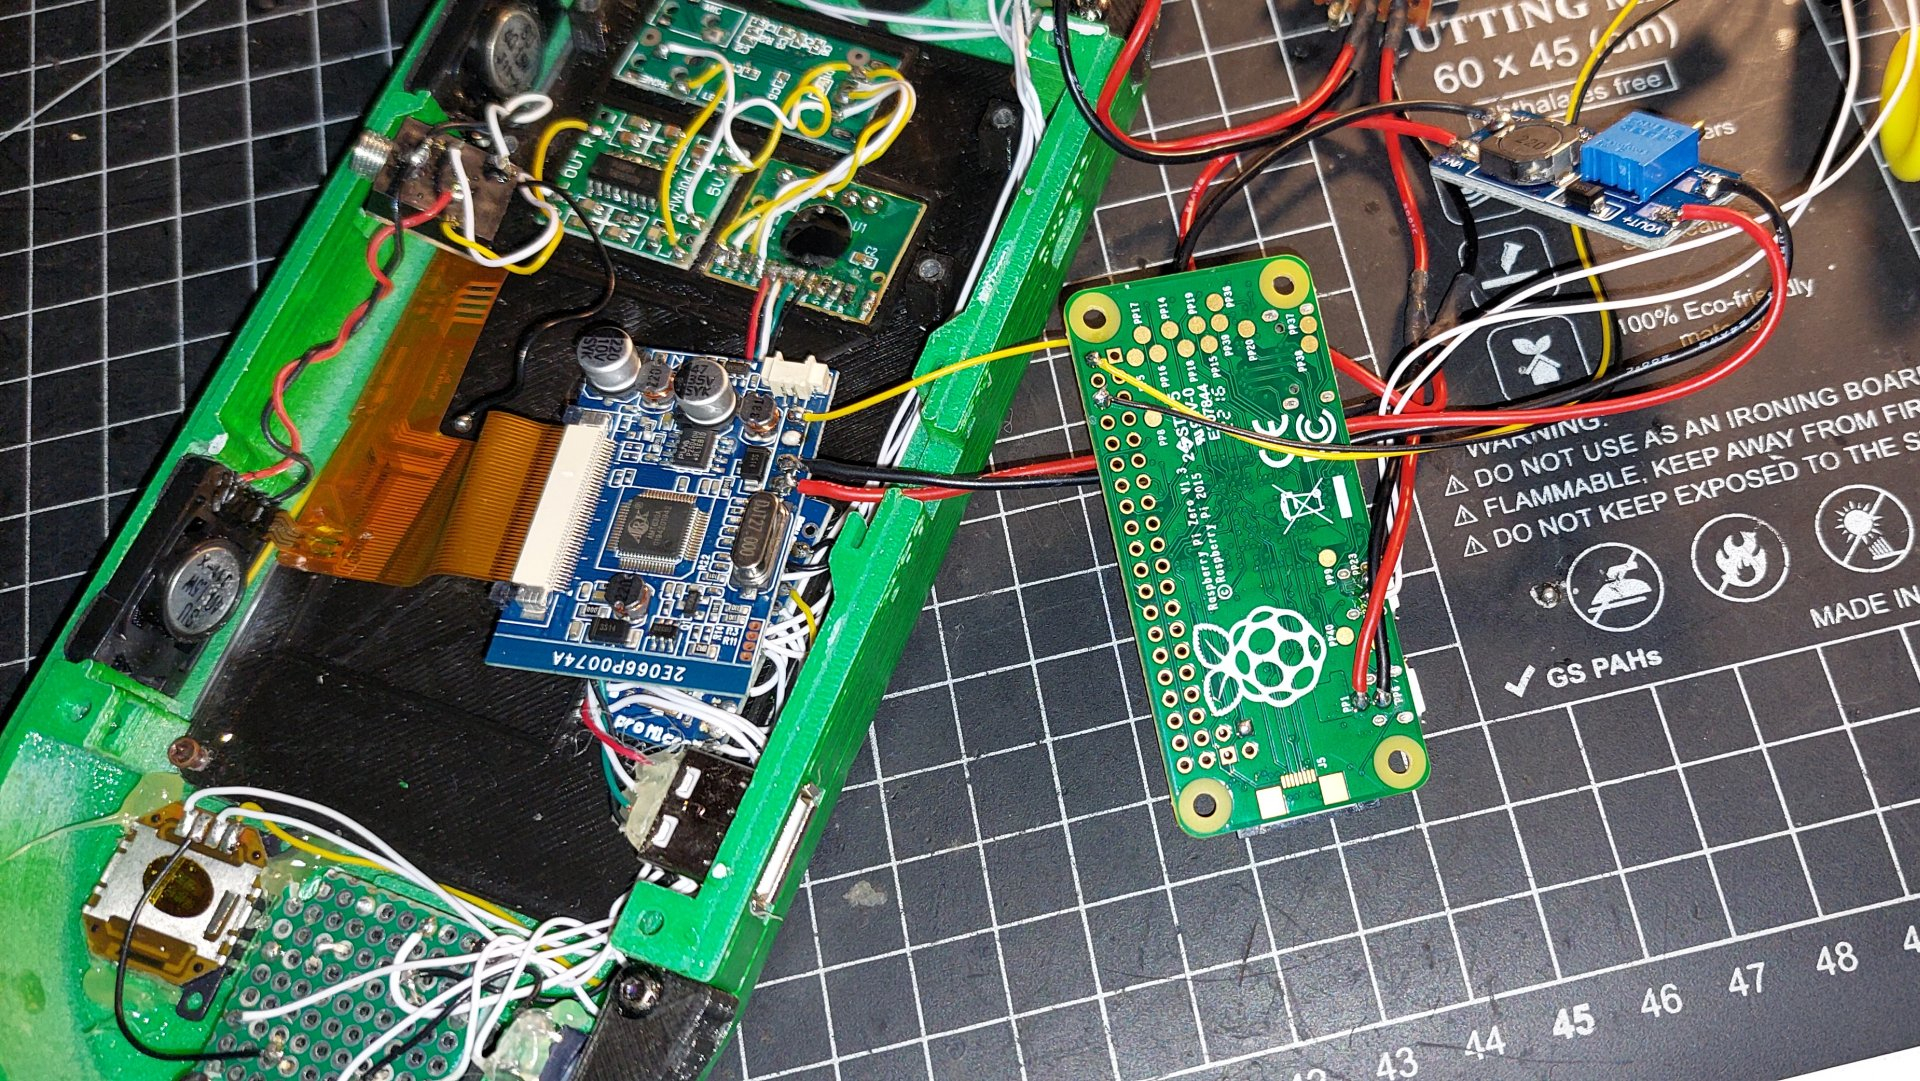
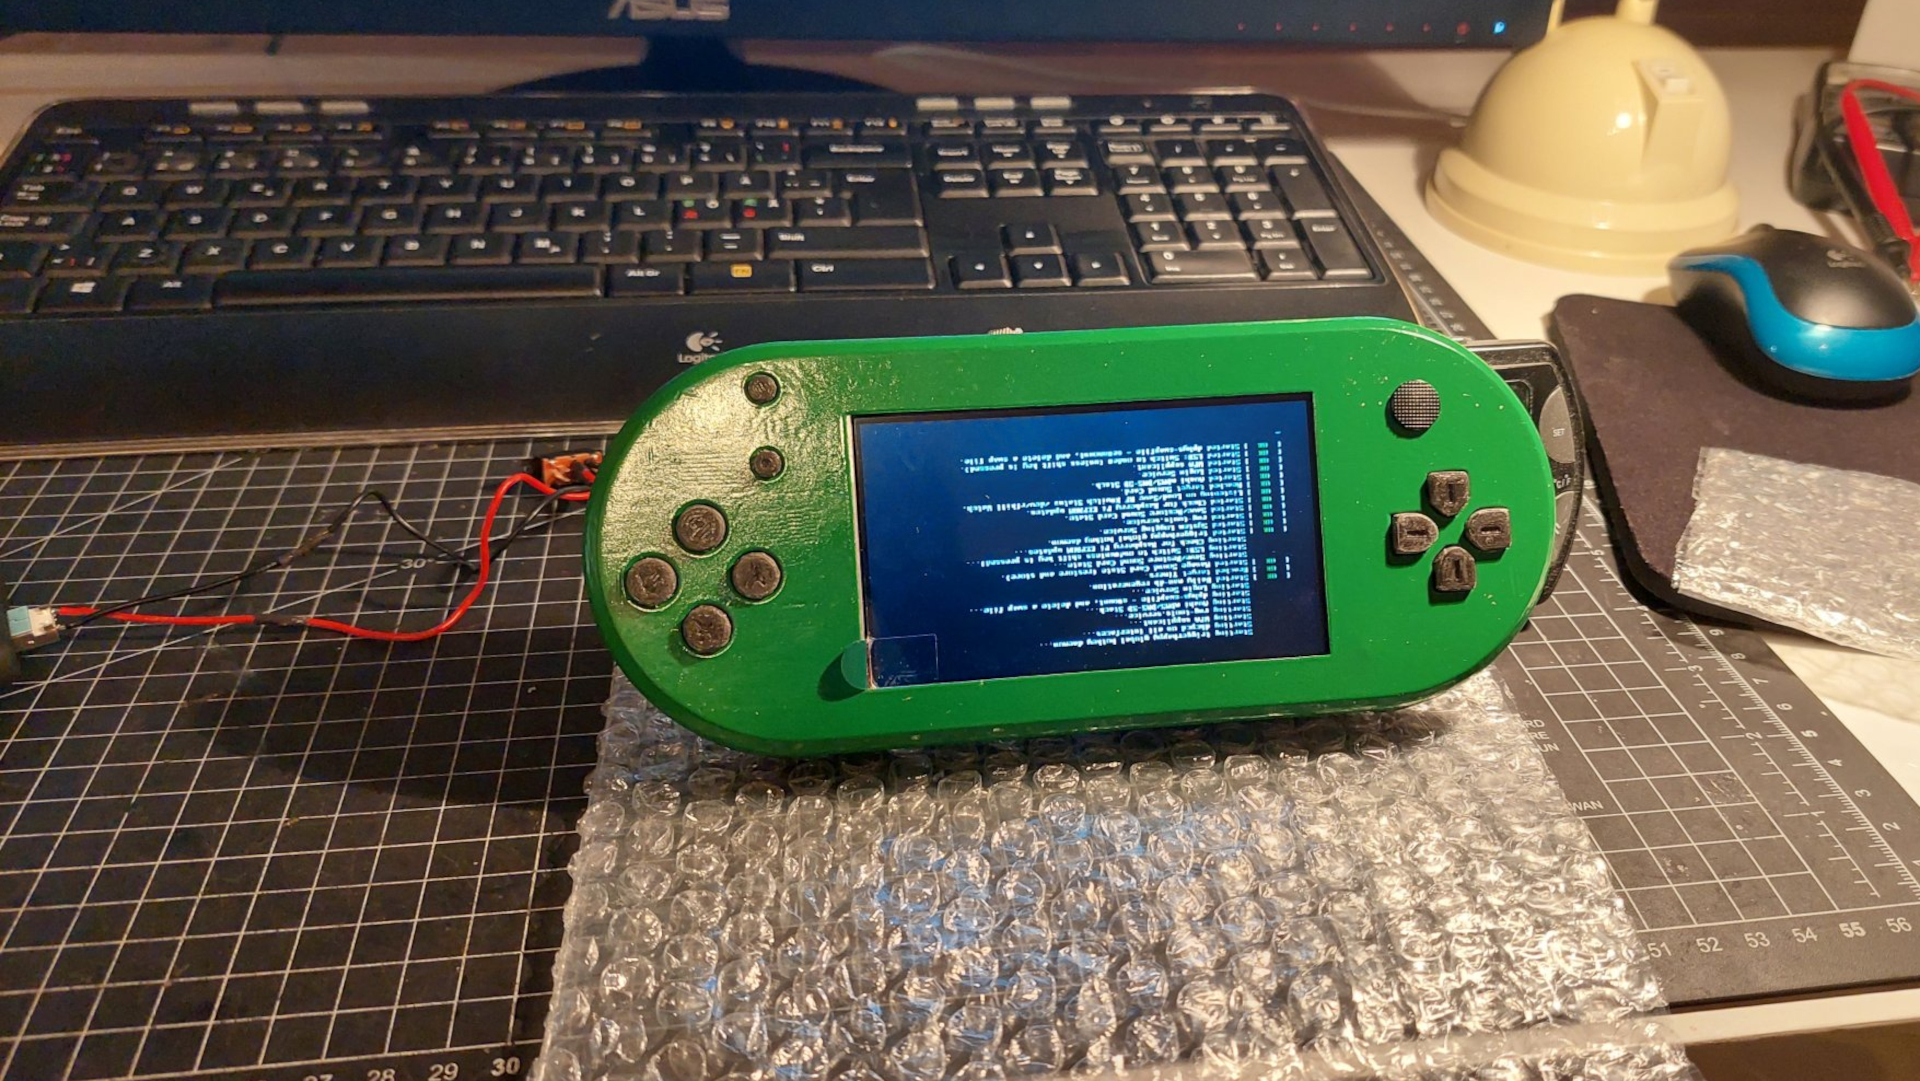
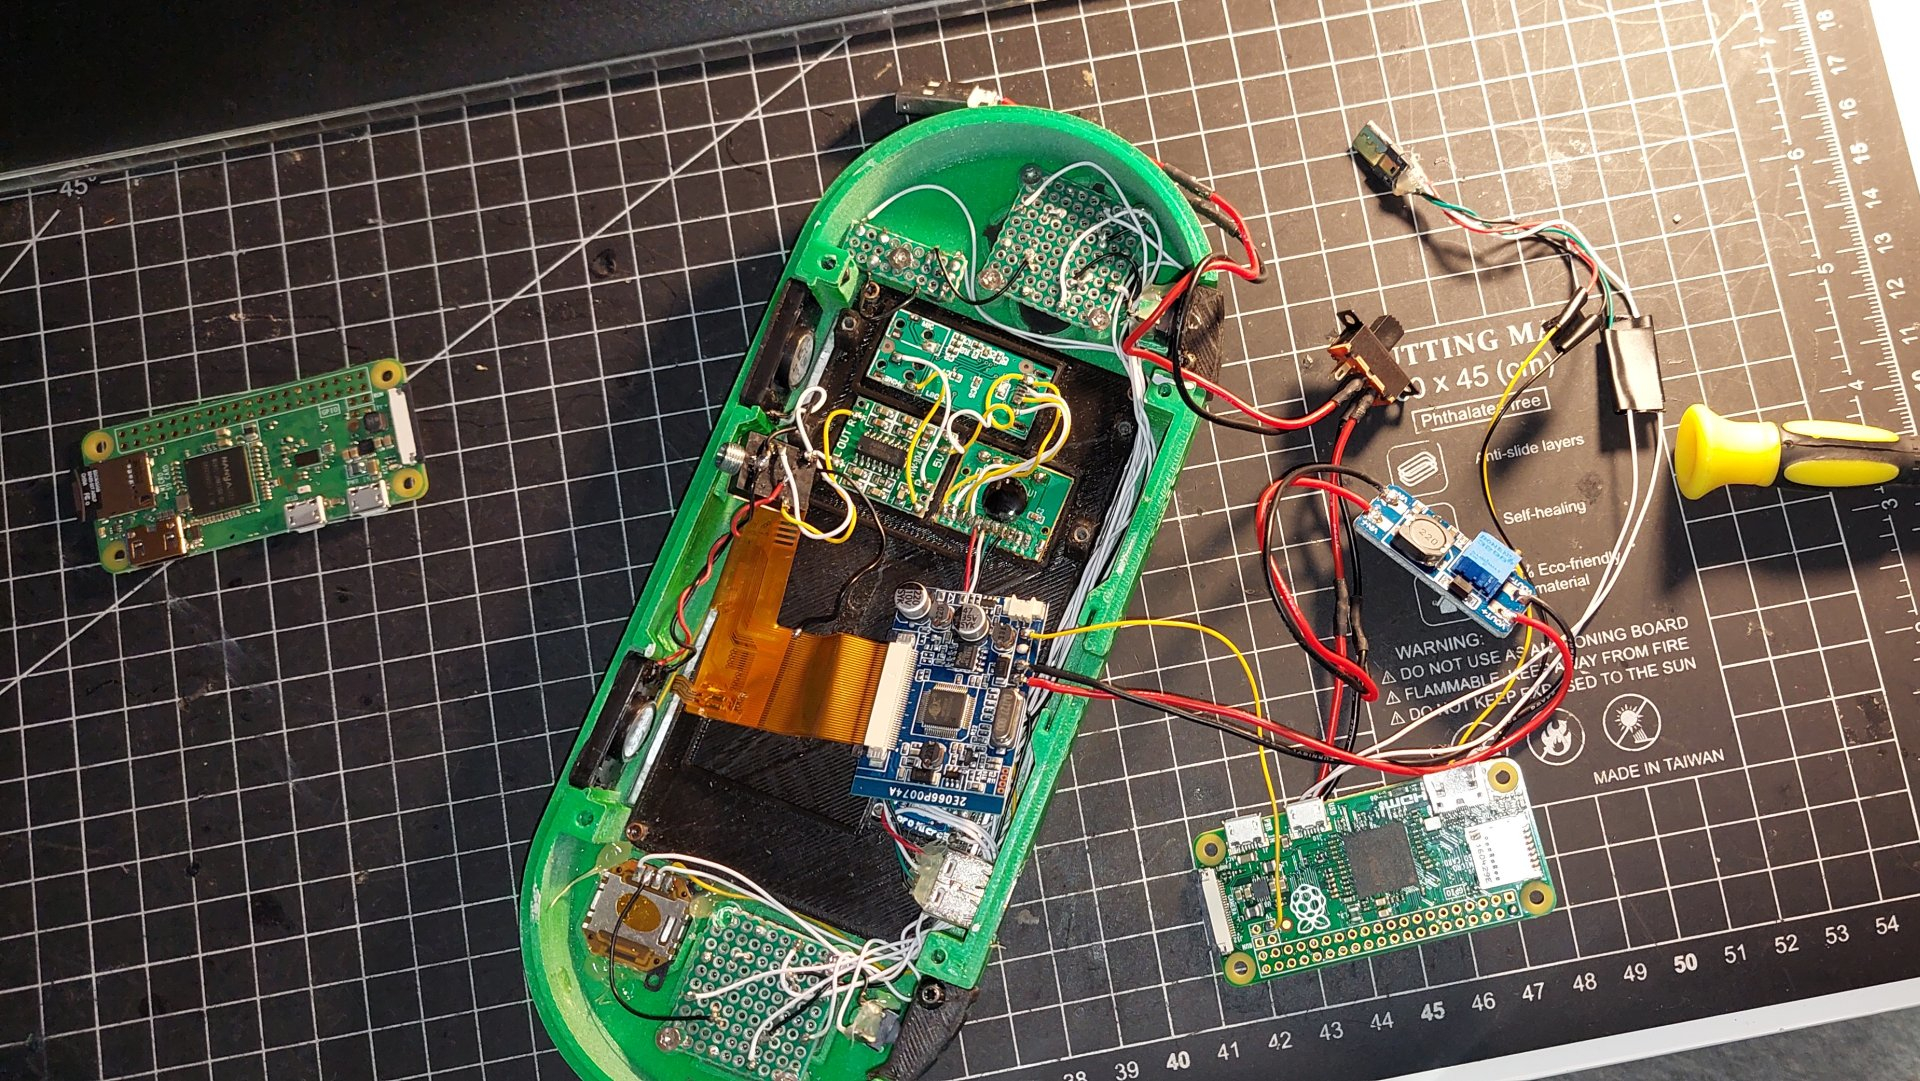
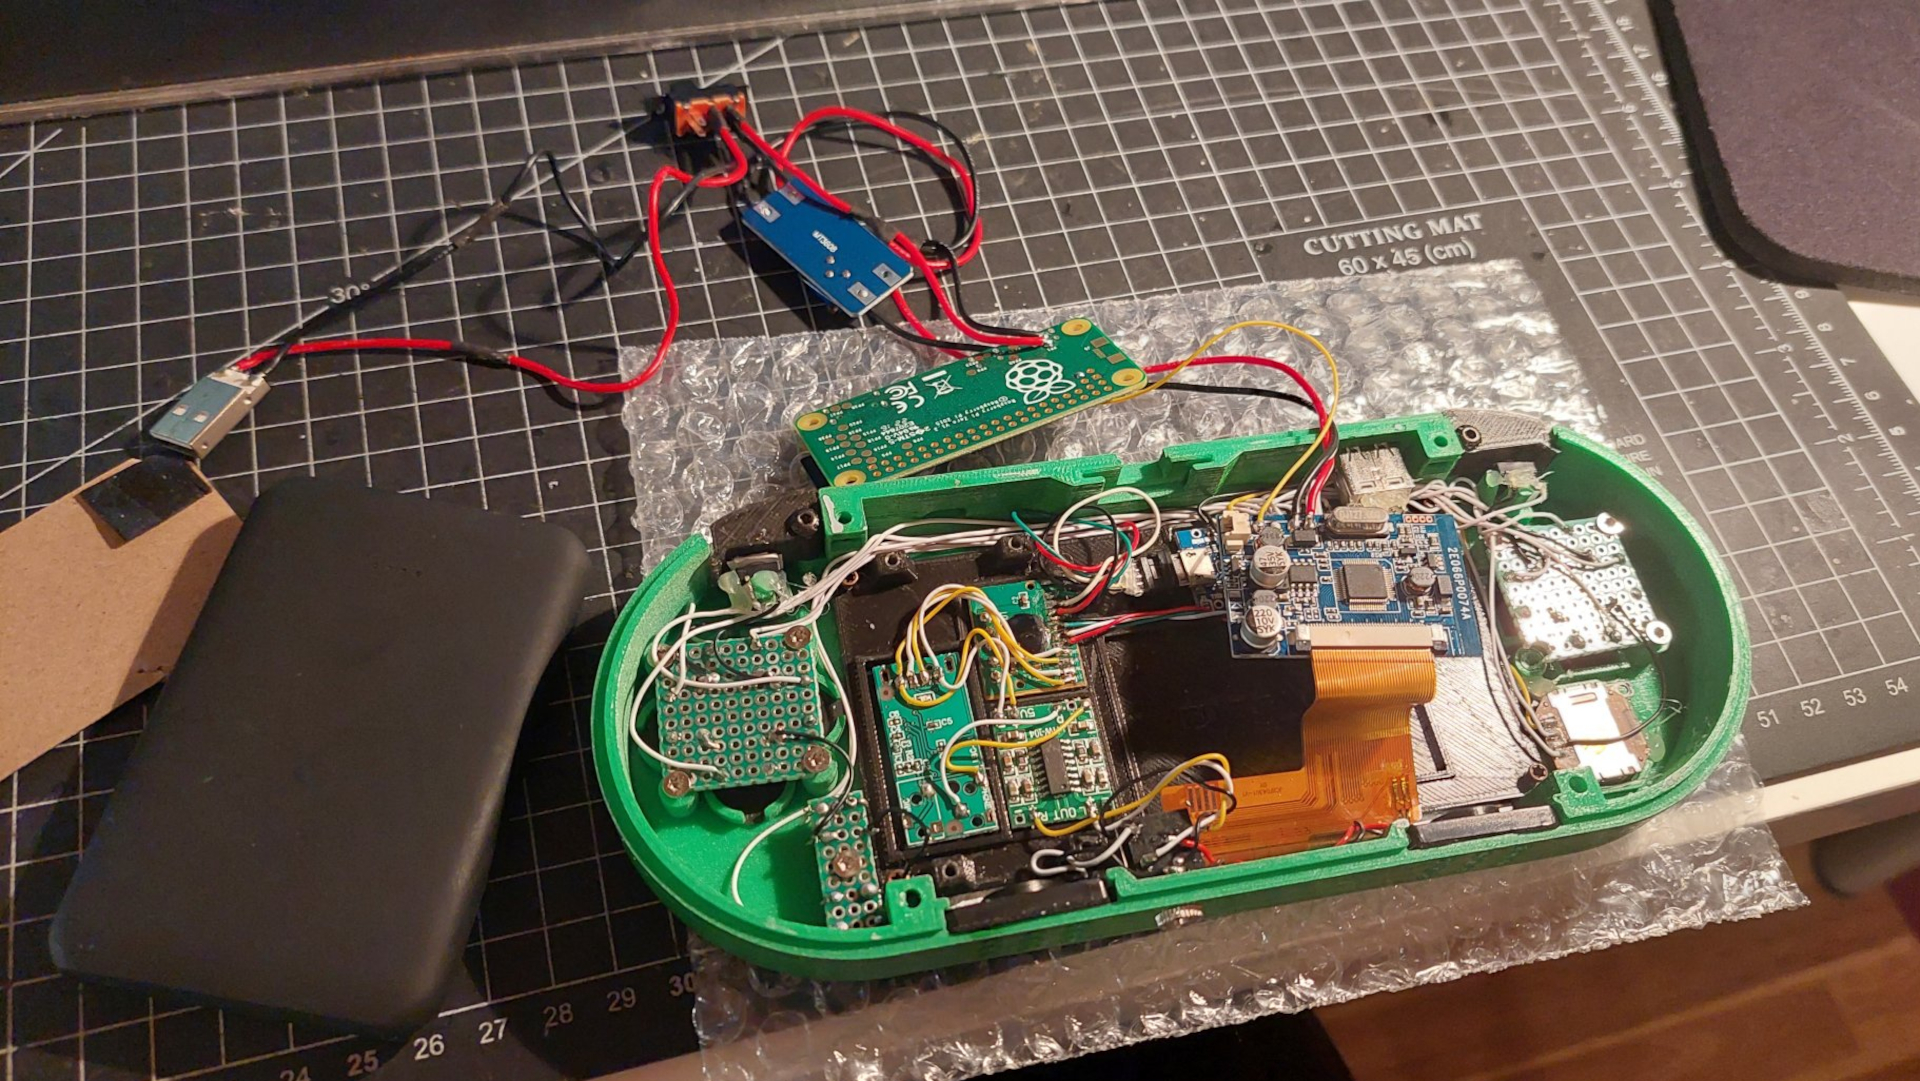
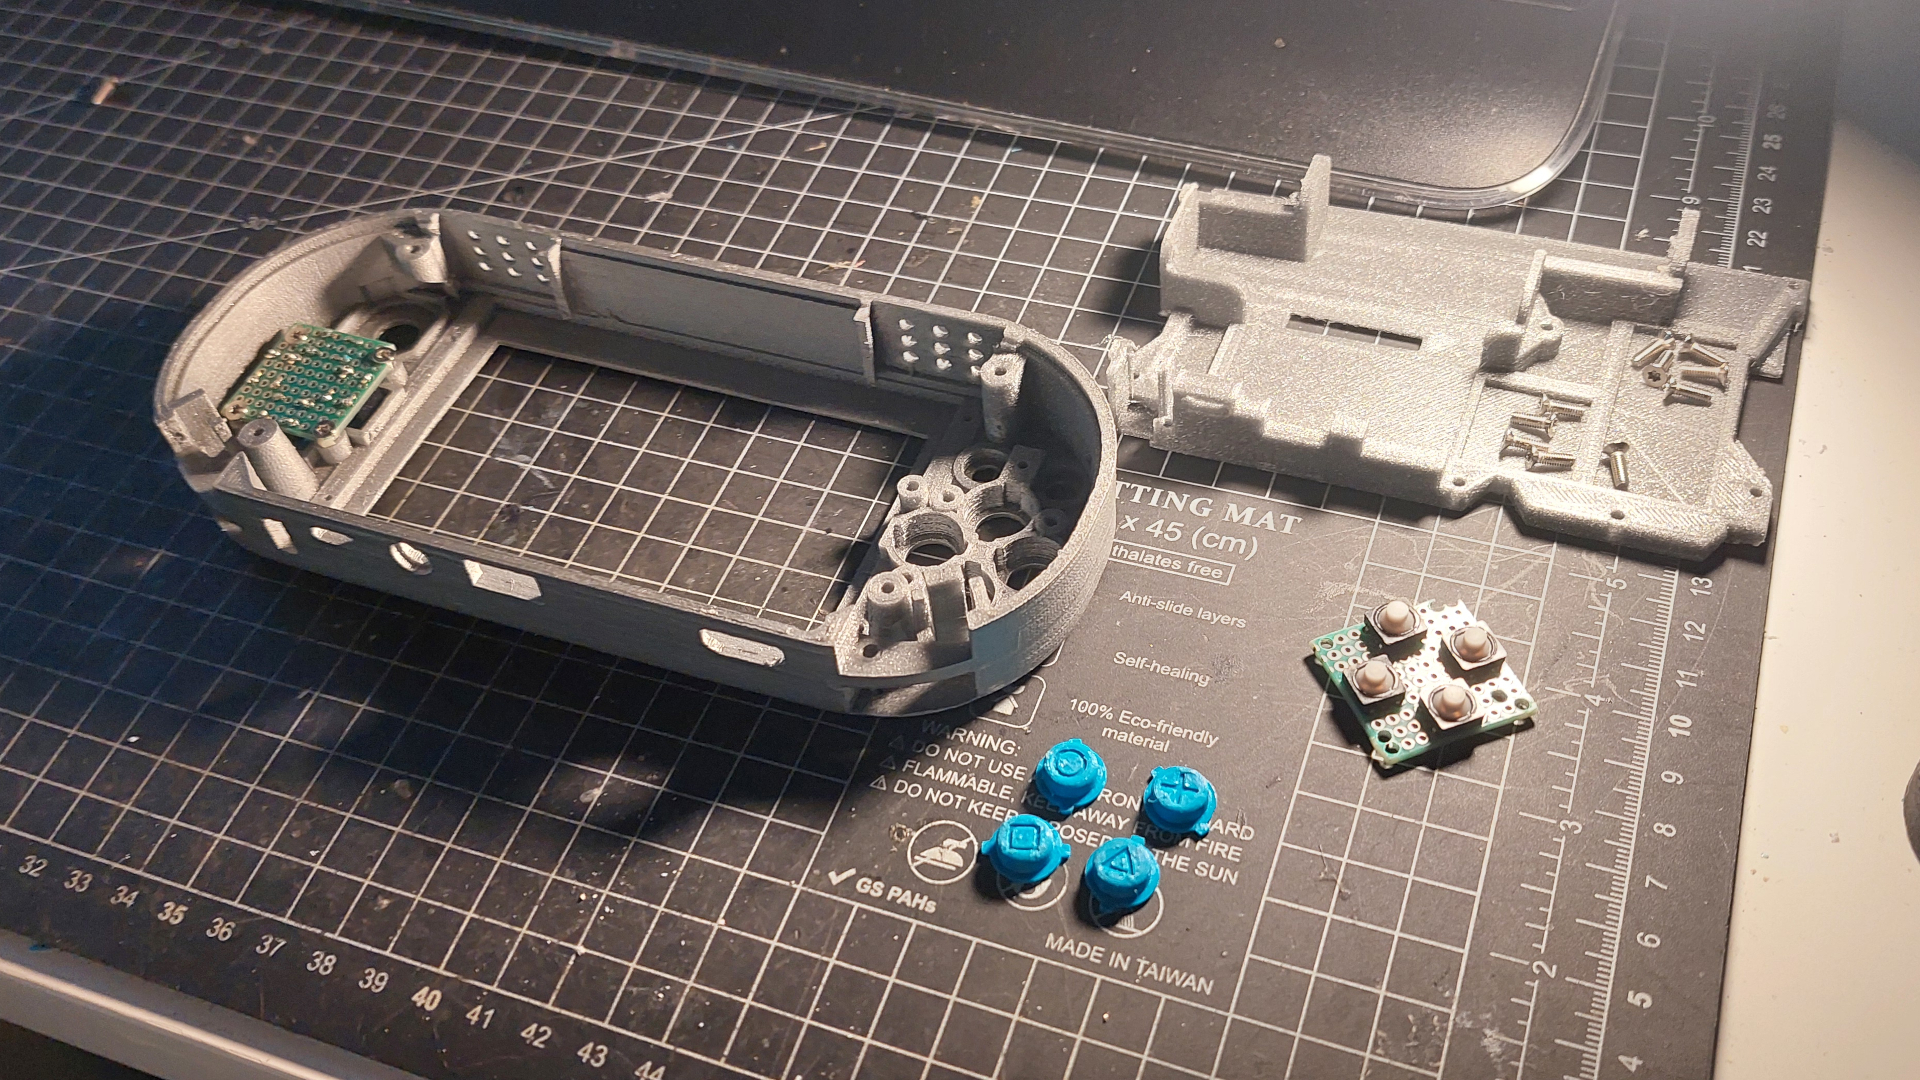
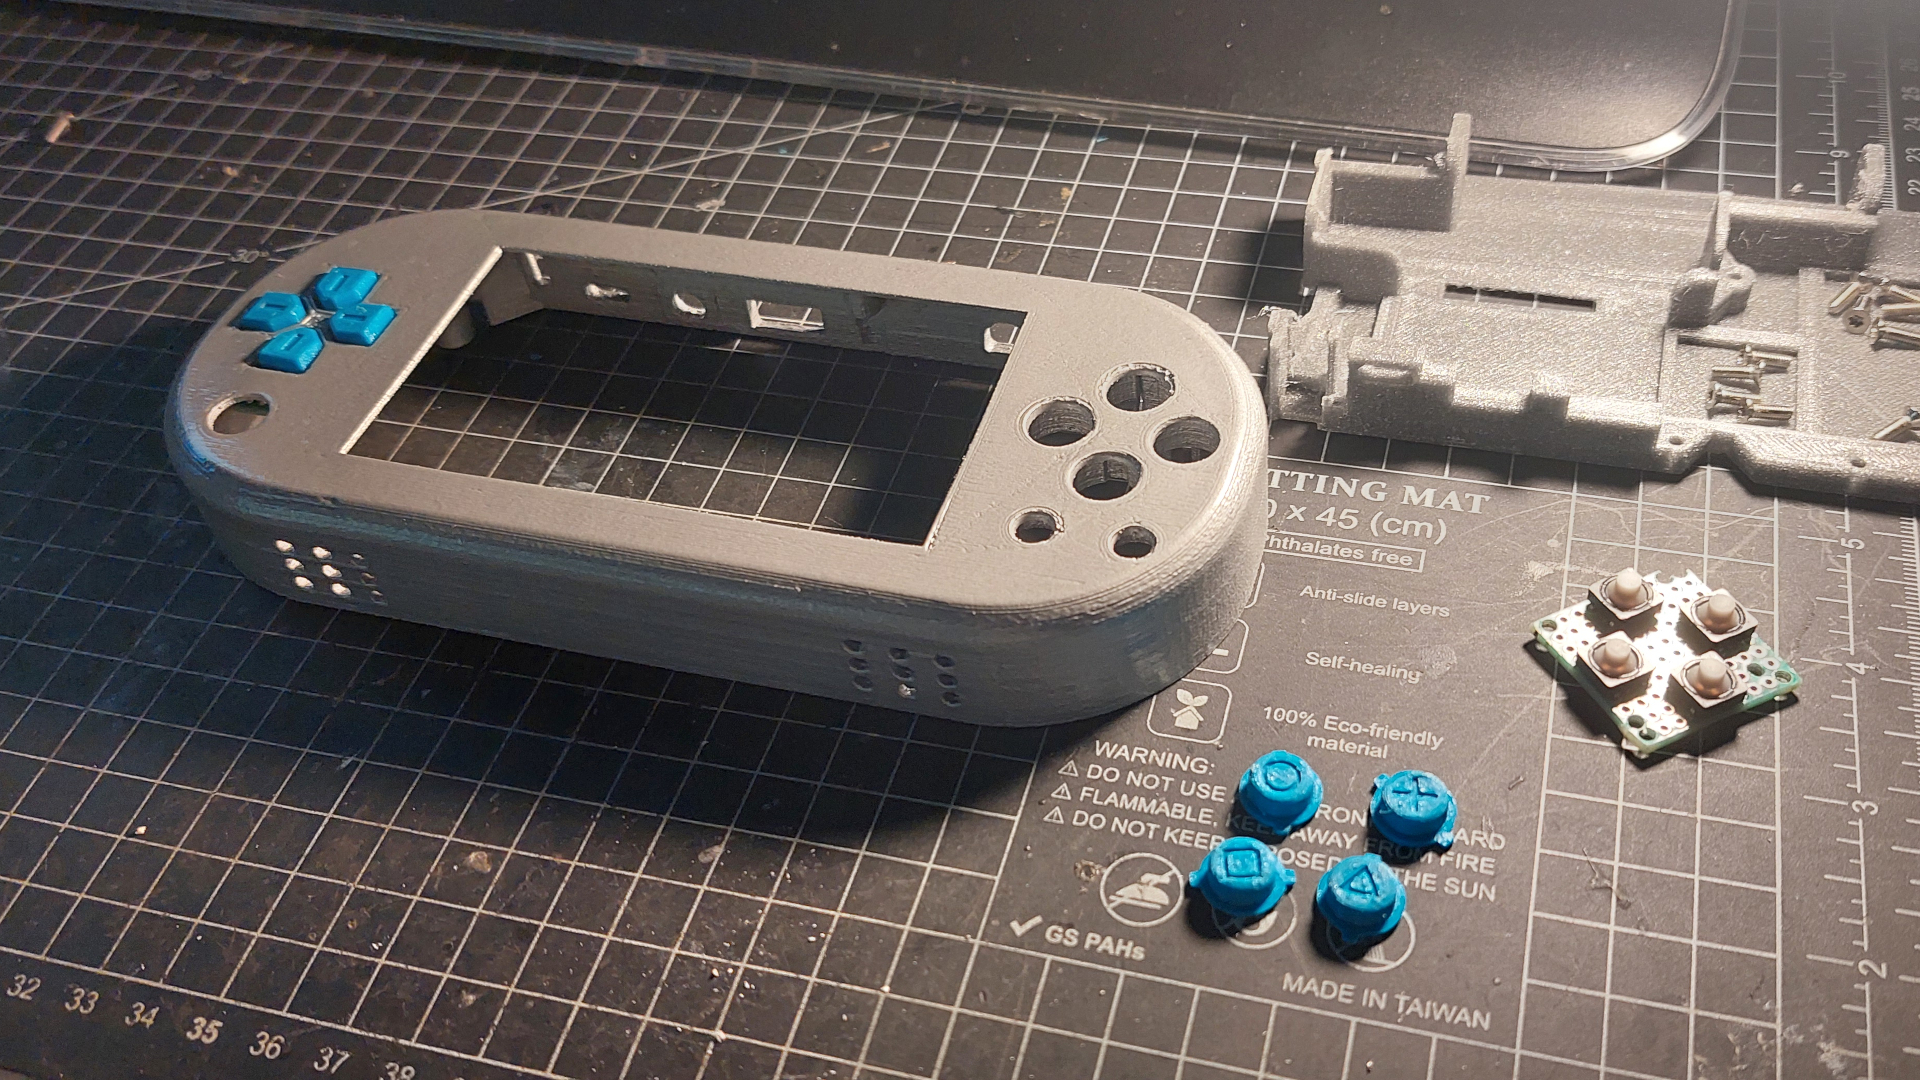
Case & Buttons: 3D Printed with PLA and painted
Electrics & Firmware: Raspberry Pi ZeroW, 4.3" screen, powered by two 18650-cells. The software currently runs on RetroPie, but I also plan to try Knulli (a Batocera fork).
Notes: The STL files for 3D printing were downloaded from Thingiverse, and assembly ideas were gathered by combining different projects found on Instructables.com. The original power source was a battery cell from a power bank, but it didn’t provide enough power, so it was modified to use two larger battery cells instead.


Copyright © 2025 Niko Nmaki